A Place To Bury Strangers Pinball
Credit:
Hardware and Electronics: Mark Kleeb & Steve Litt
Software and Programming: Andy Wallace & Dustin Long
Playfield Artwork: Joe Jurewicz
Marquee Artwork: Preston Spurlock
Sound Design: Travis Johnson
Graphic Design: Chris Hernandez
Original Music and Video: A Place To Bury Strangers

Before

After
Conceptualization
In 2014 I took a trip to the Silverball Pinball Museum in Asbury Park, NJ. It's a great collection of pinball machines, dating back to the 1950's. There are also a lot of rock-and-roll themed pinball machines like Kiss, Metallica, and AC/DC. Around this time, Death By Audio was closing and my roommate Oliver's band, A Place To Bury Strangers, were gearing up to play the final show. In 2009, APTBS was branded "the loudest band in New York" and their shows consisted of a bunch of projectors pointed at the audience, lasers covering the walls, fog machines that obscured most of the stage, and an encore that usually involved Oliver smashing his guitar in front of a gigantic strobe light. All in all, their performances were a sensory overload of sound and light and I thought "this would be the perfect theme for a pinball machine."
Before the project even started, I knew the pinball machine would have strobe lights, lasers, and a fog machine. I also knew it would need a sound system capable of competing with a Marshall half stack. This was all just a pipe dream until September 2016....
Cabinet Inspection
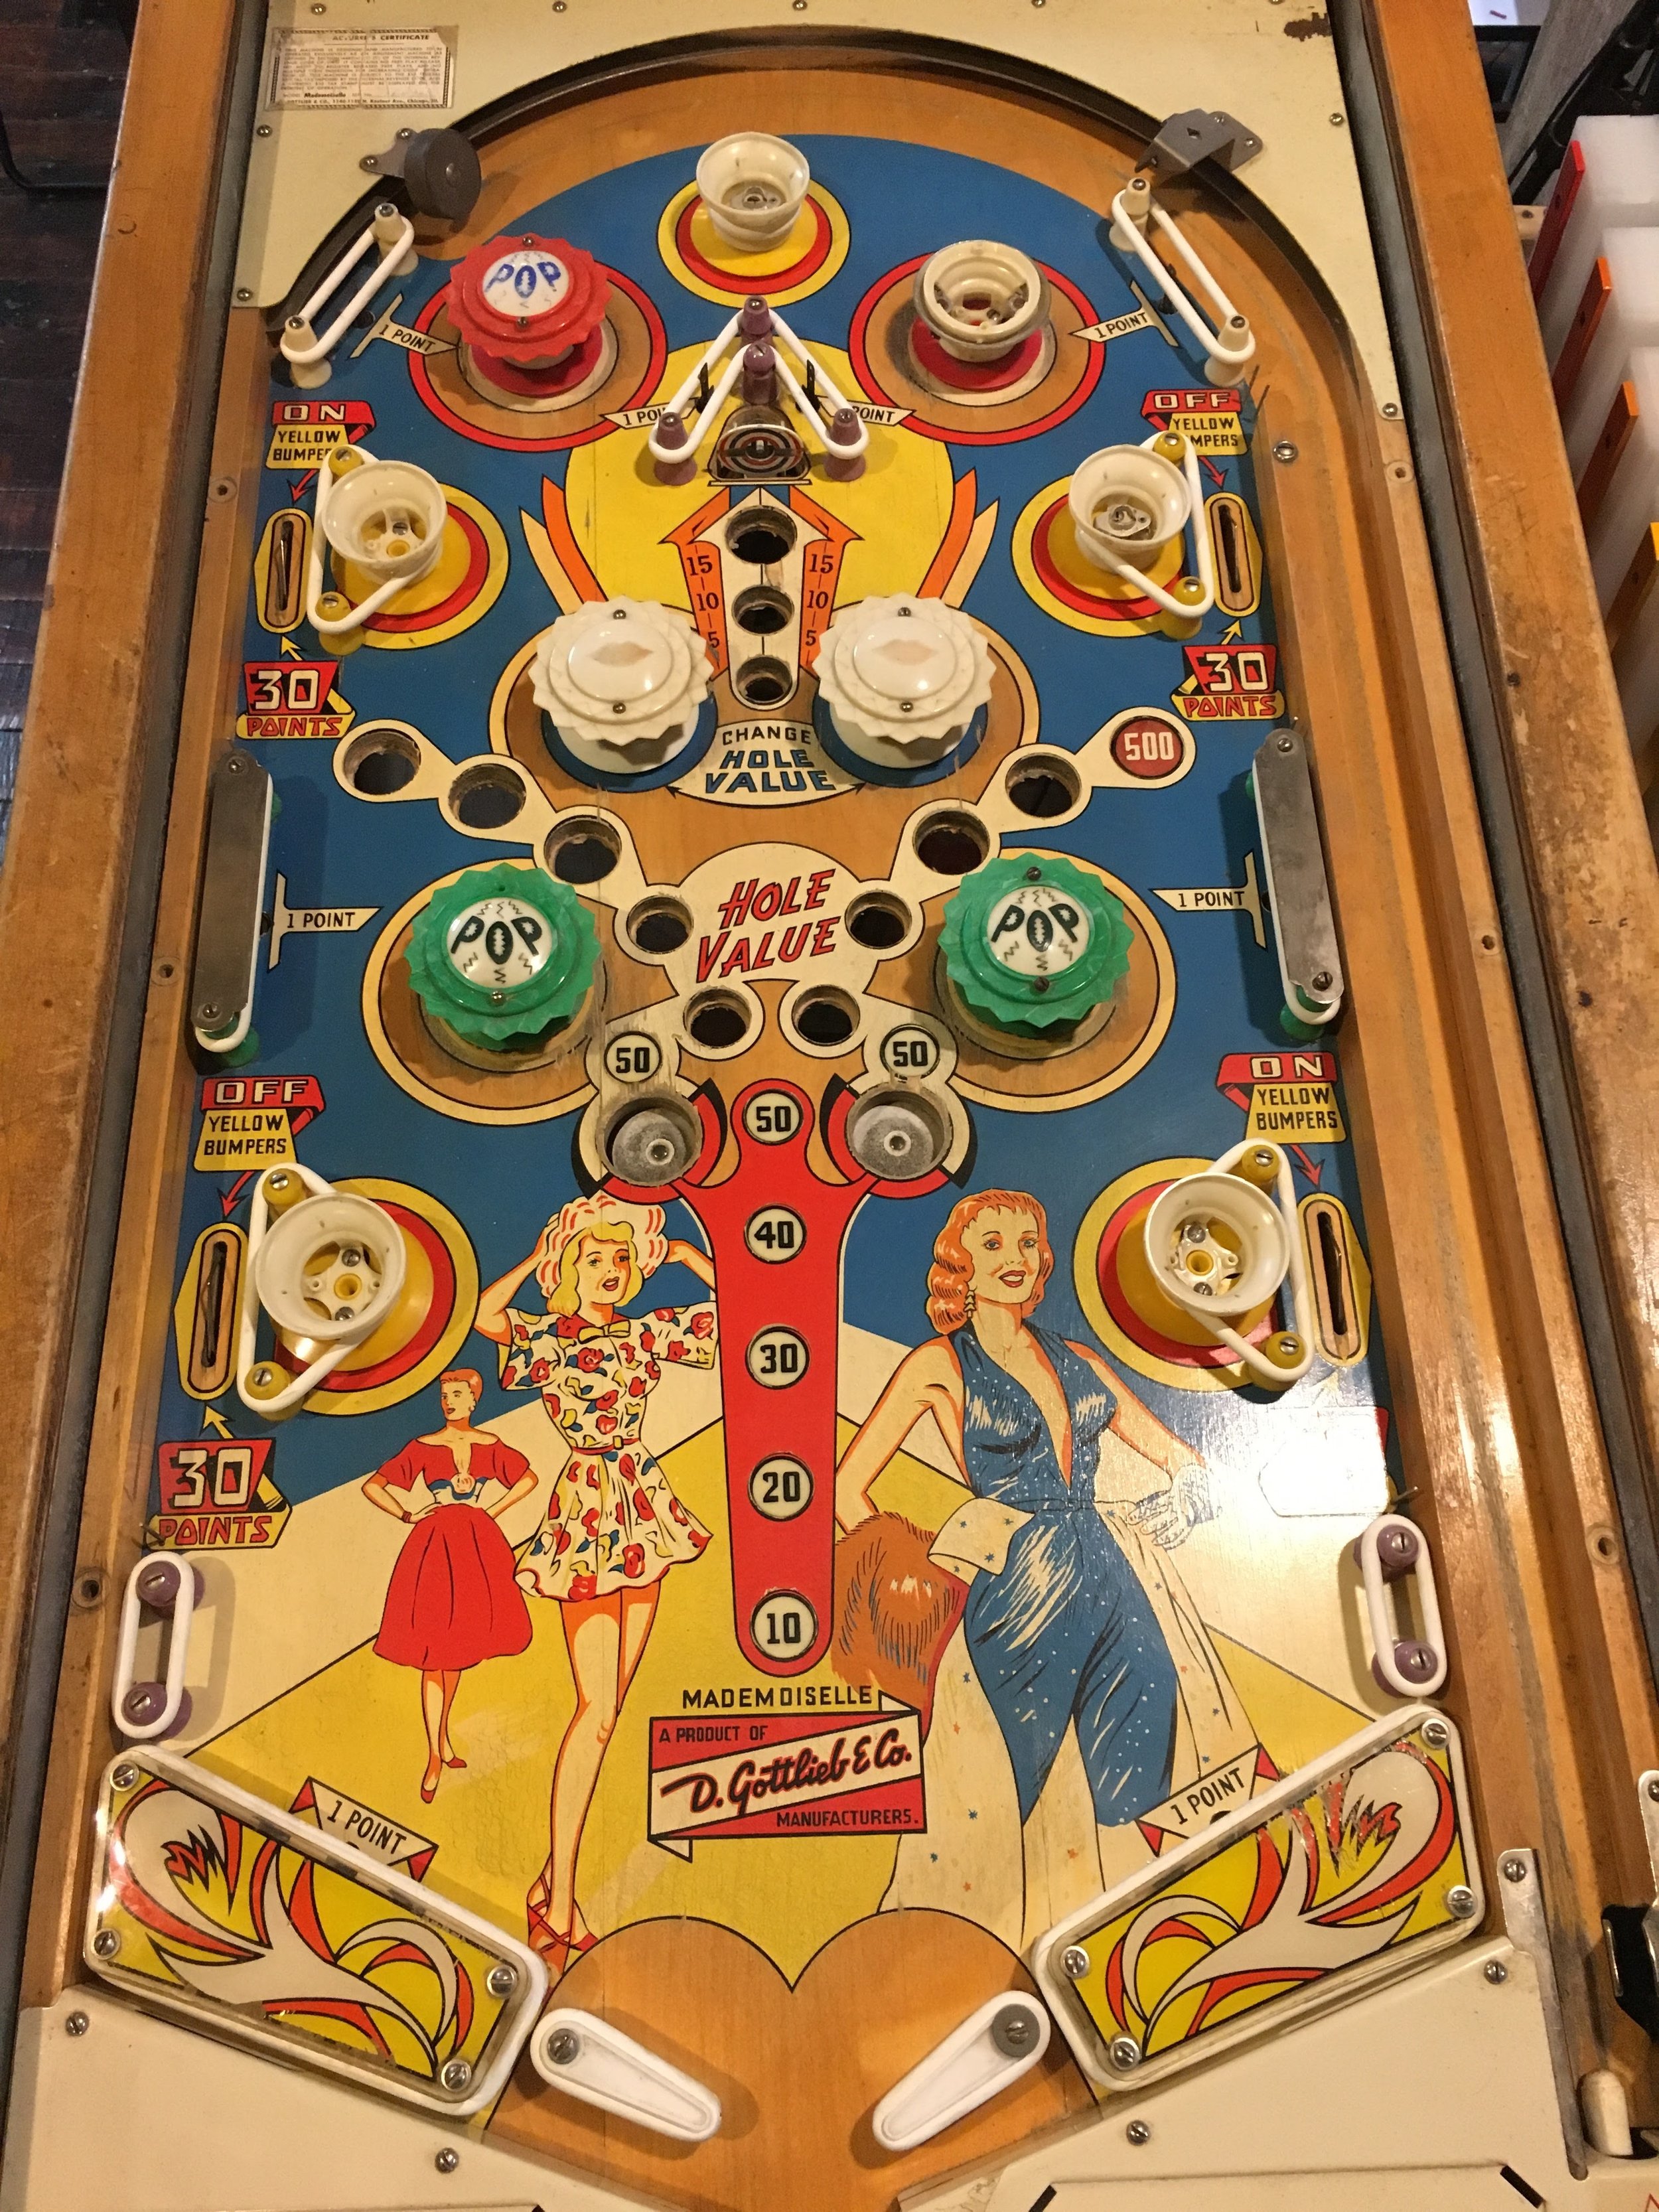


My friend Eric Barry Drasin had acquired an old 1959 Gottlieb Mademoiselle machine and was hacking it so it worked with Max/MSP. I had been interested in hearing about the process, but never got a chance to meet up to see the actual machine. In 2016, he was moving out of his studio and couldn't bring the machine with him, so I offered to buy it from him. It wasn't in great shape - two of the legs were falling off and the headboard glass was cracked. The playfield was chipped and peeling in some parts and the wires had all been cut. For all intents and purposes, it was trash- but it was perfect for what we wanted.
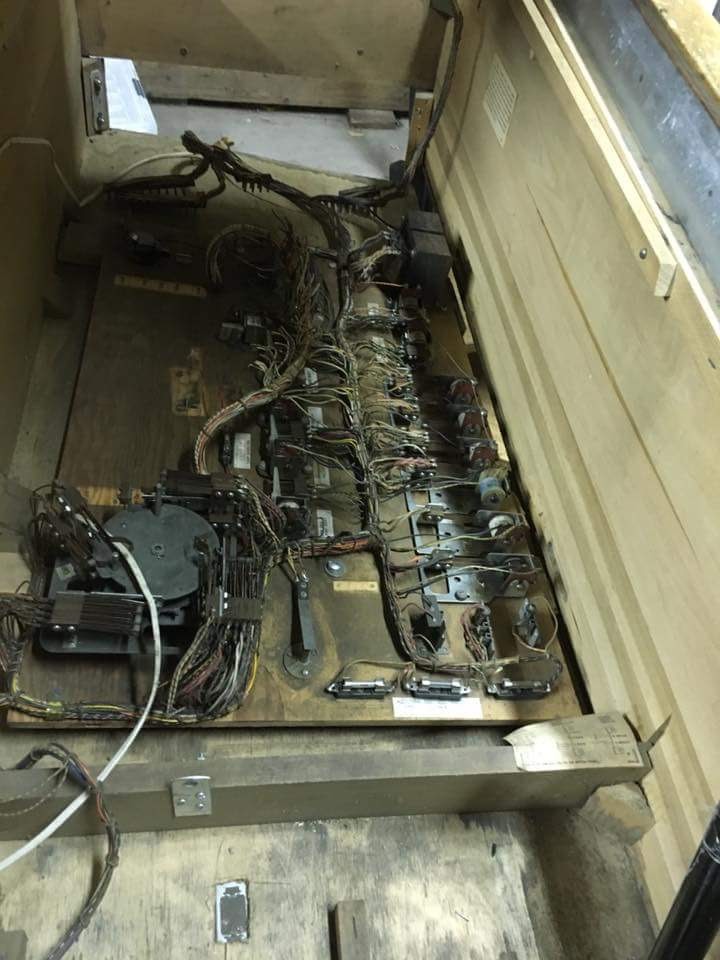
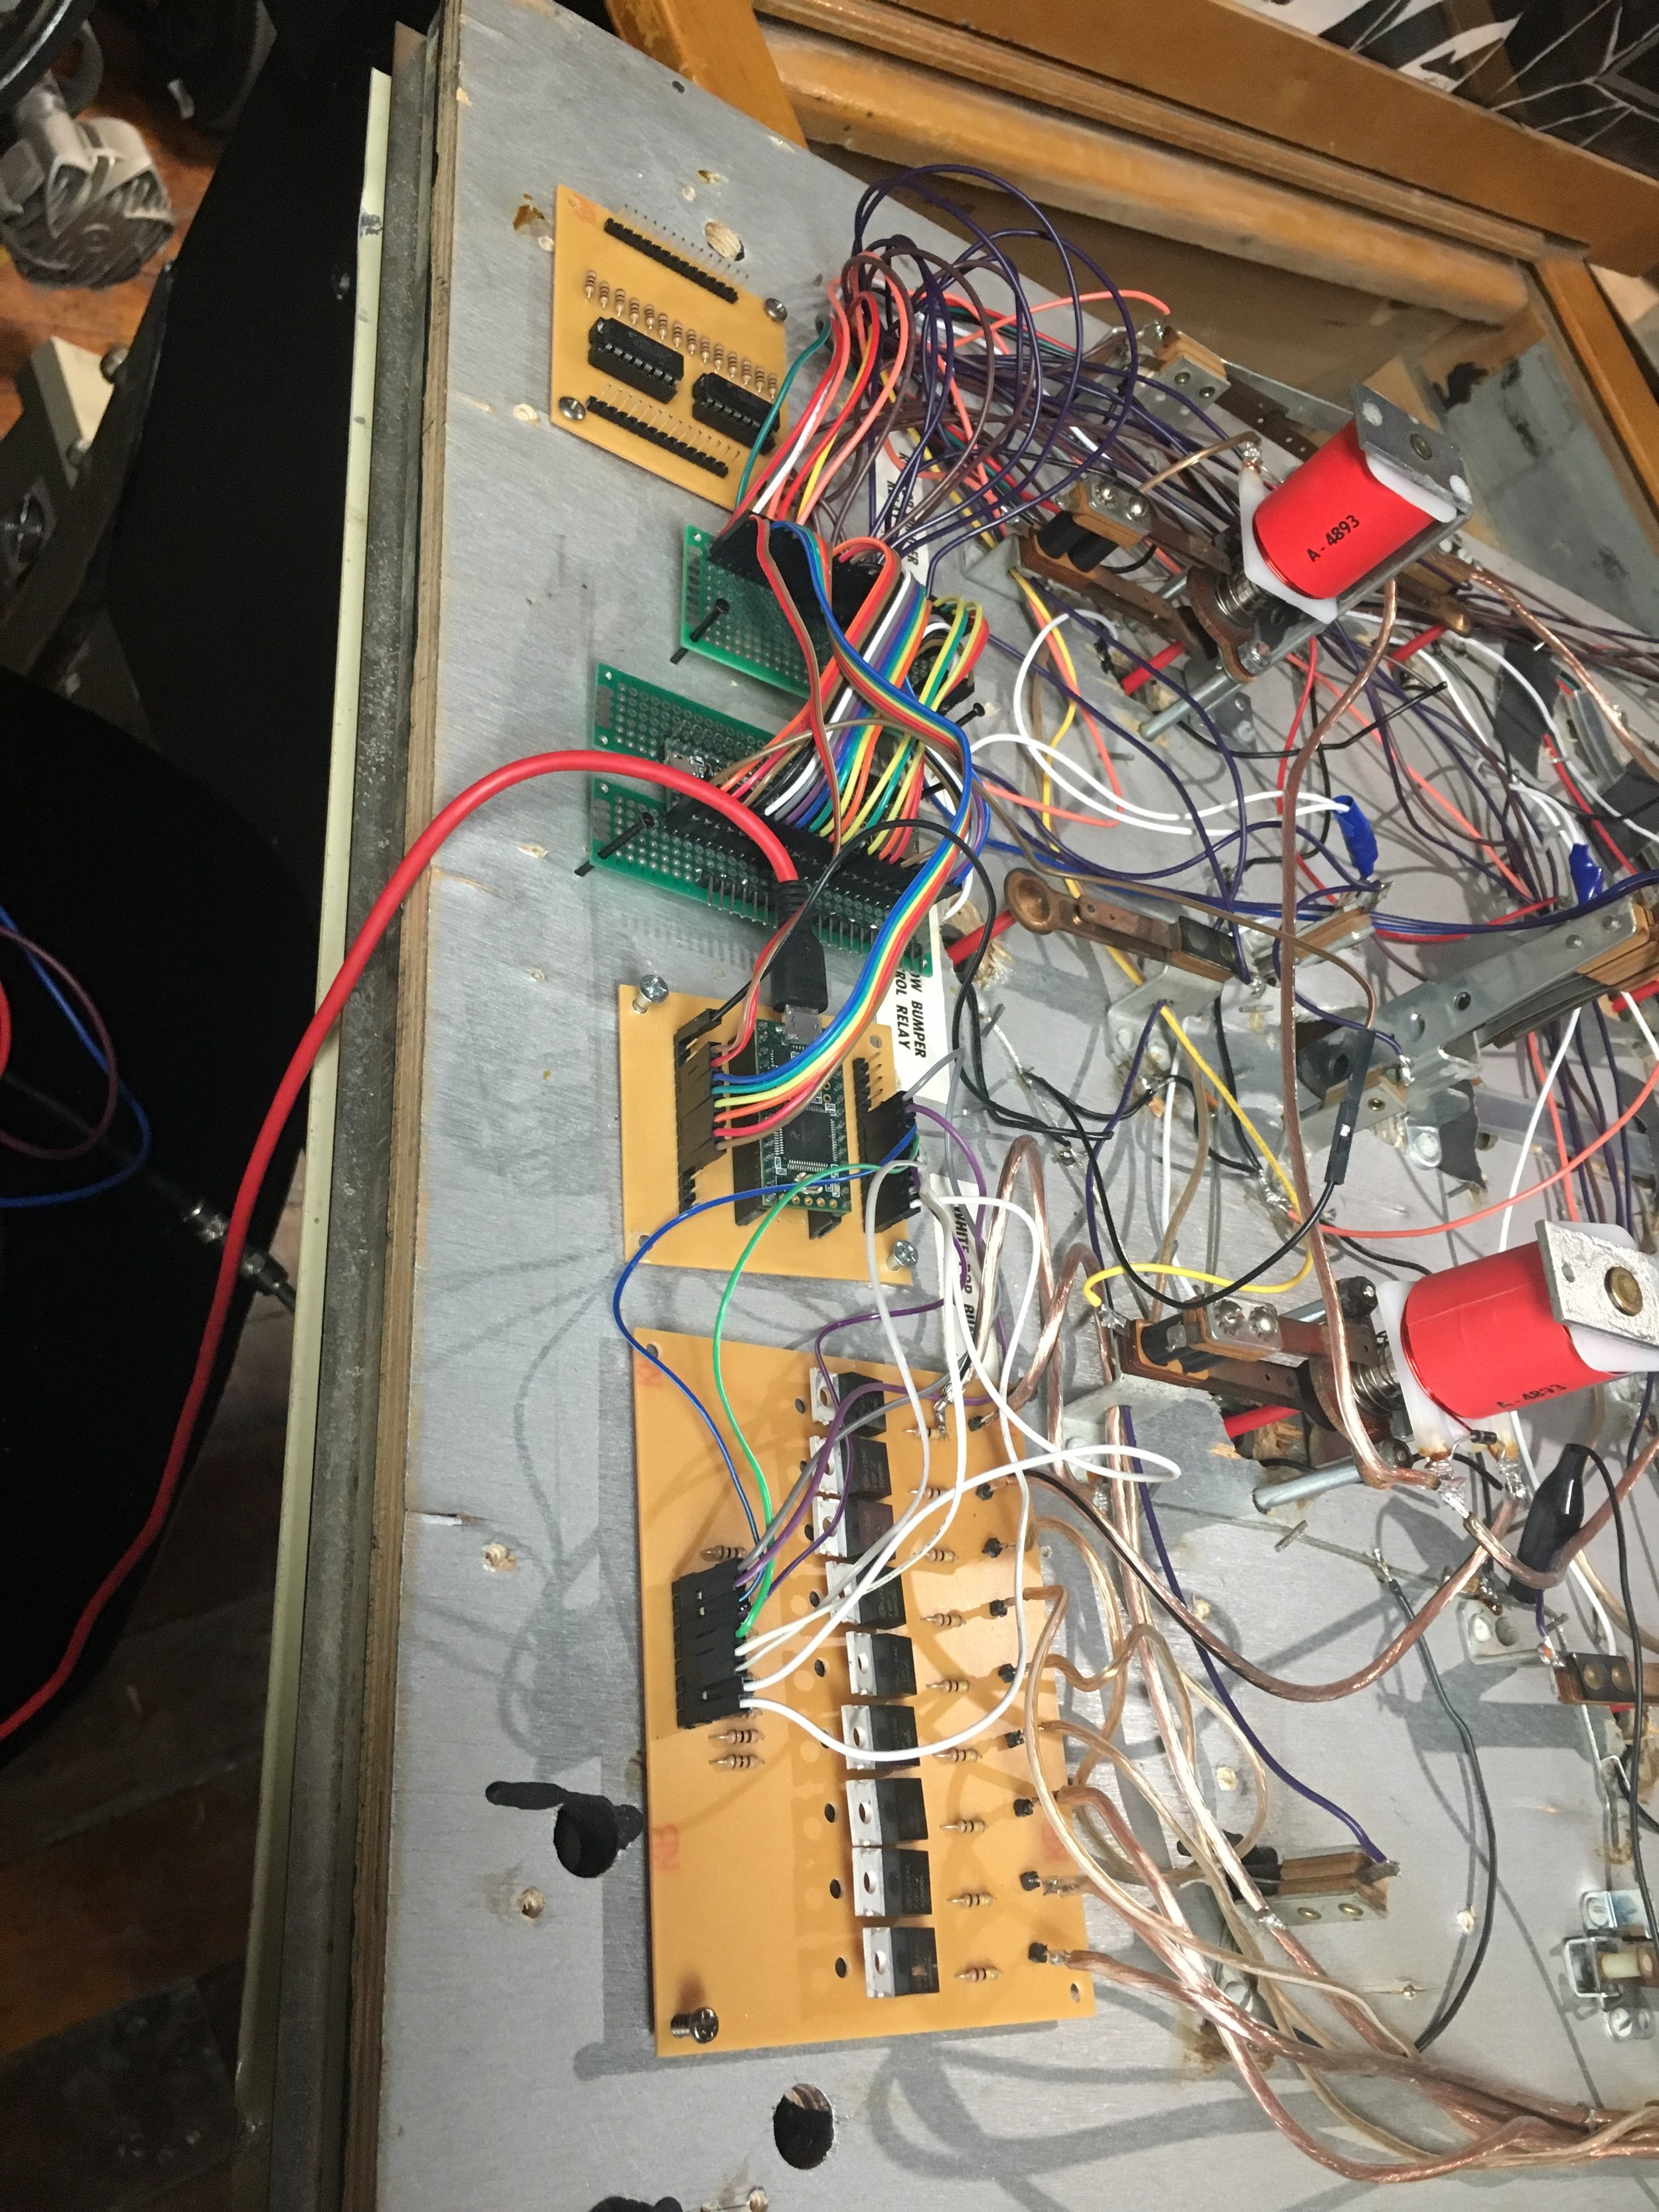
I reached out to my friend Steve Litt, a fellow electrical engineer, NYU professor, and head of Crudlabs, to help inspect the cabinet. In 1959, pinball machines were entirely electro-mechanical. Every time the ball hit a switch, it closed a mechanical relay and caused a solenoid (coil) on the bumper to fire. No ICs, no computers, just magnets and coils and switches.
About 90% of the interior of the machine was made up of these relays. They were rusty, corroded, and most of the wires had already been cut by Eric...so we got rid of them. I wanted to control everything with microcontrollers and newer technology anyway. It was enticing to try to use the old rotary scoreboard, but in the end we decided a complete overhaul would be best. We kept the switches and coils on the playfield, but everything else got trashed.
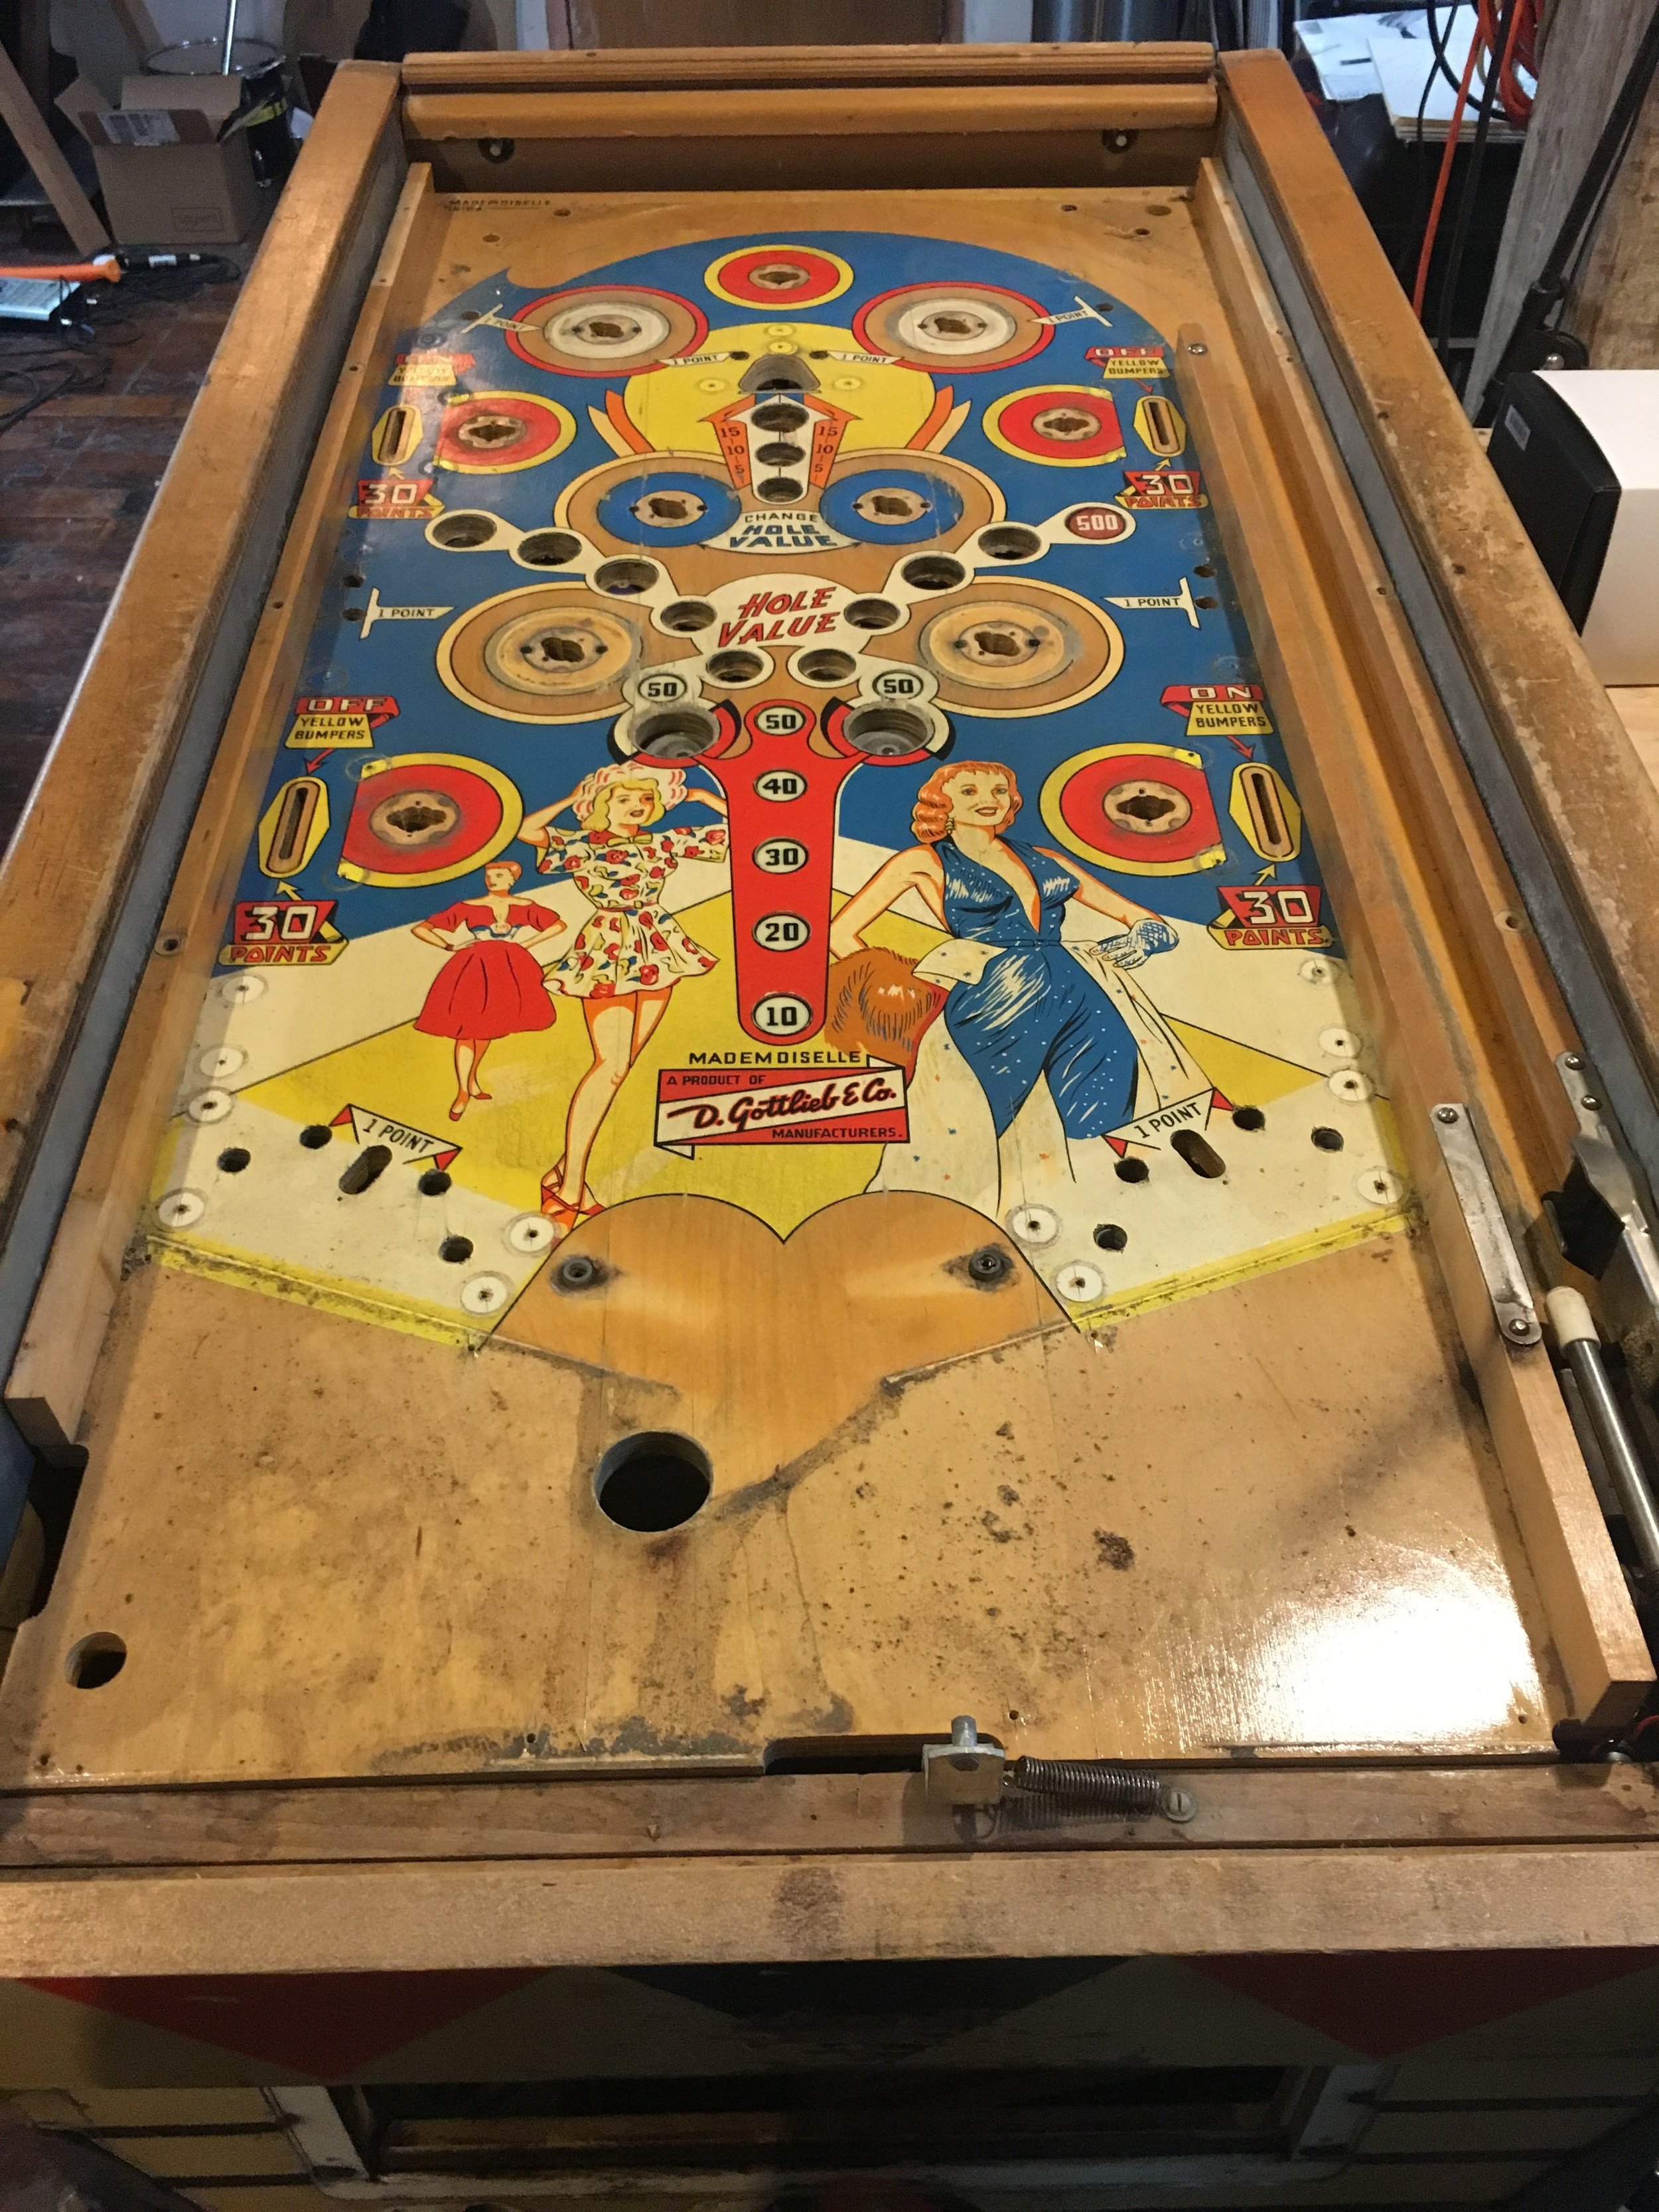
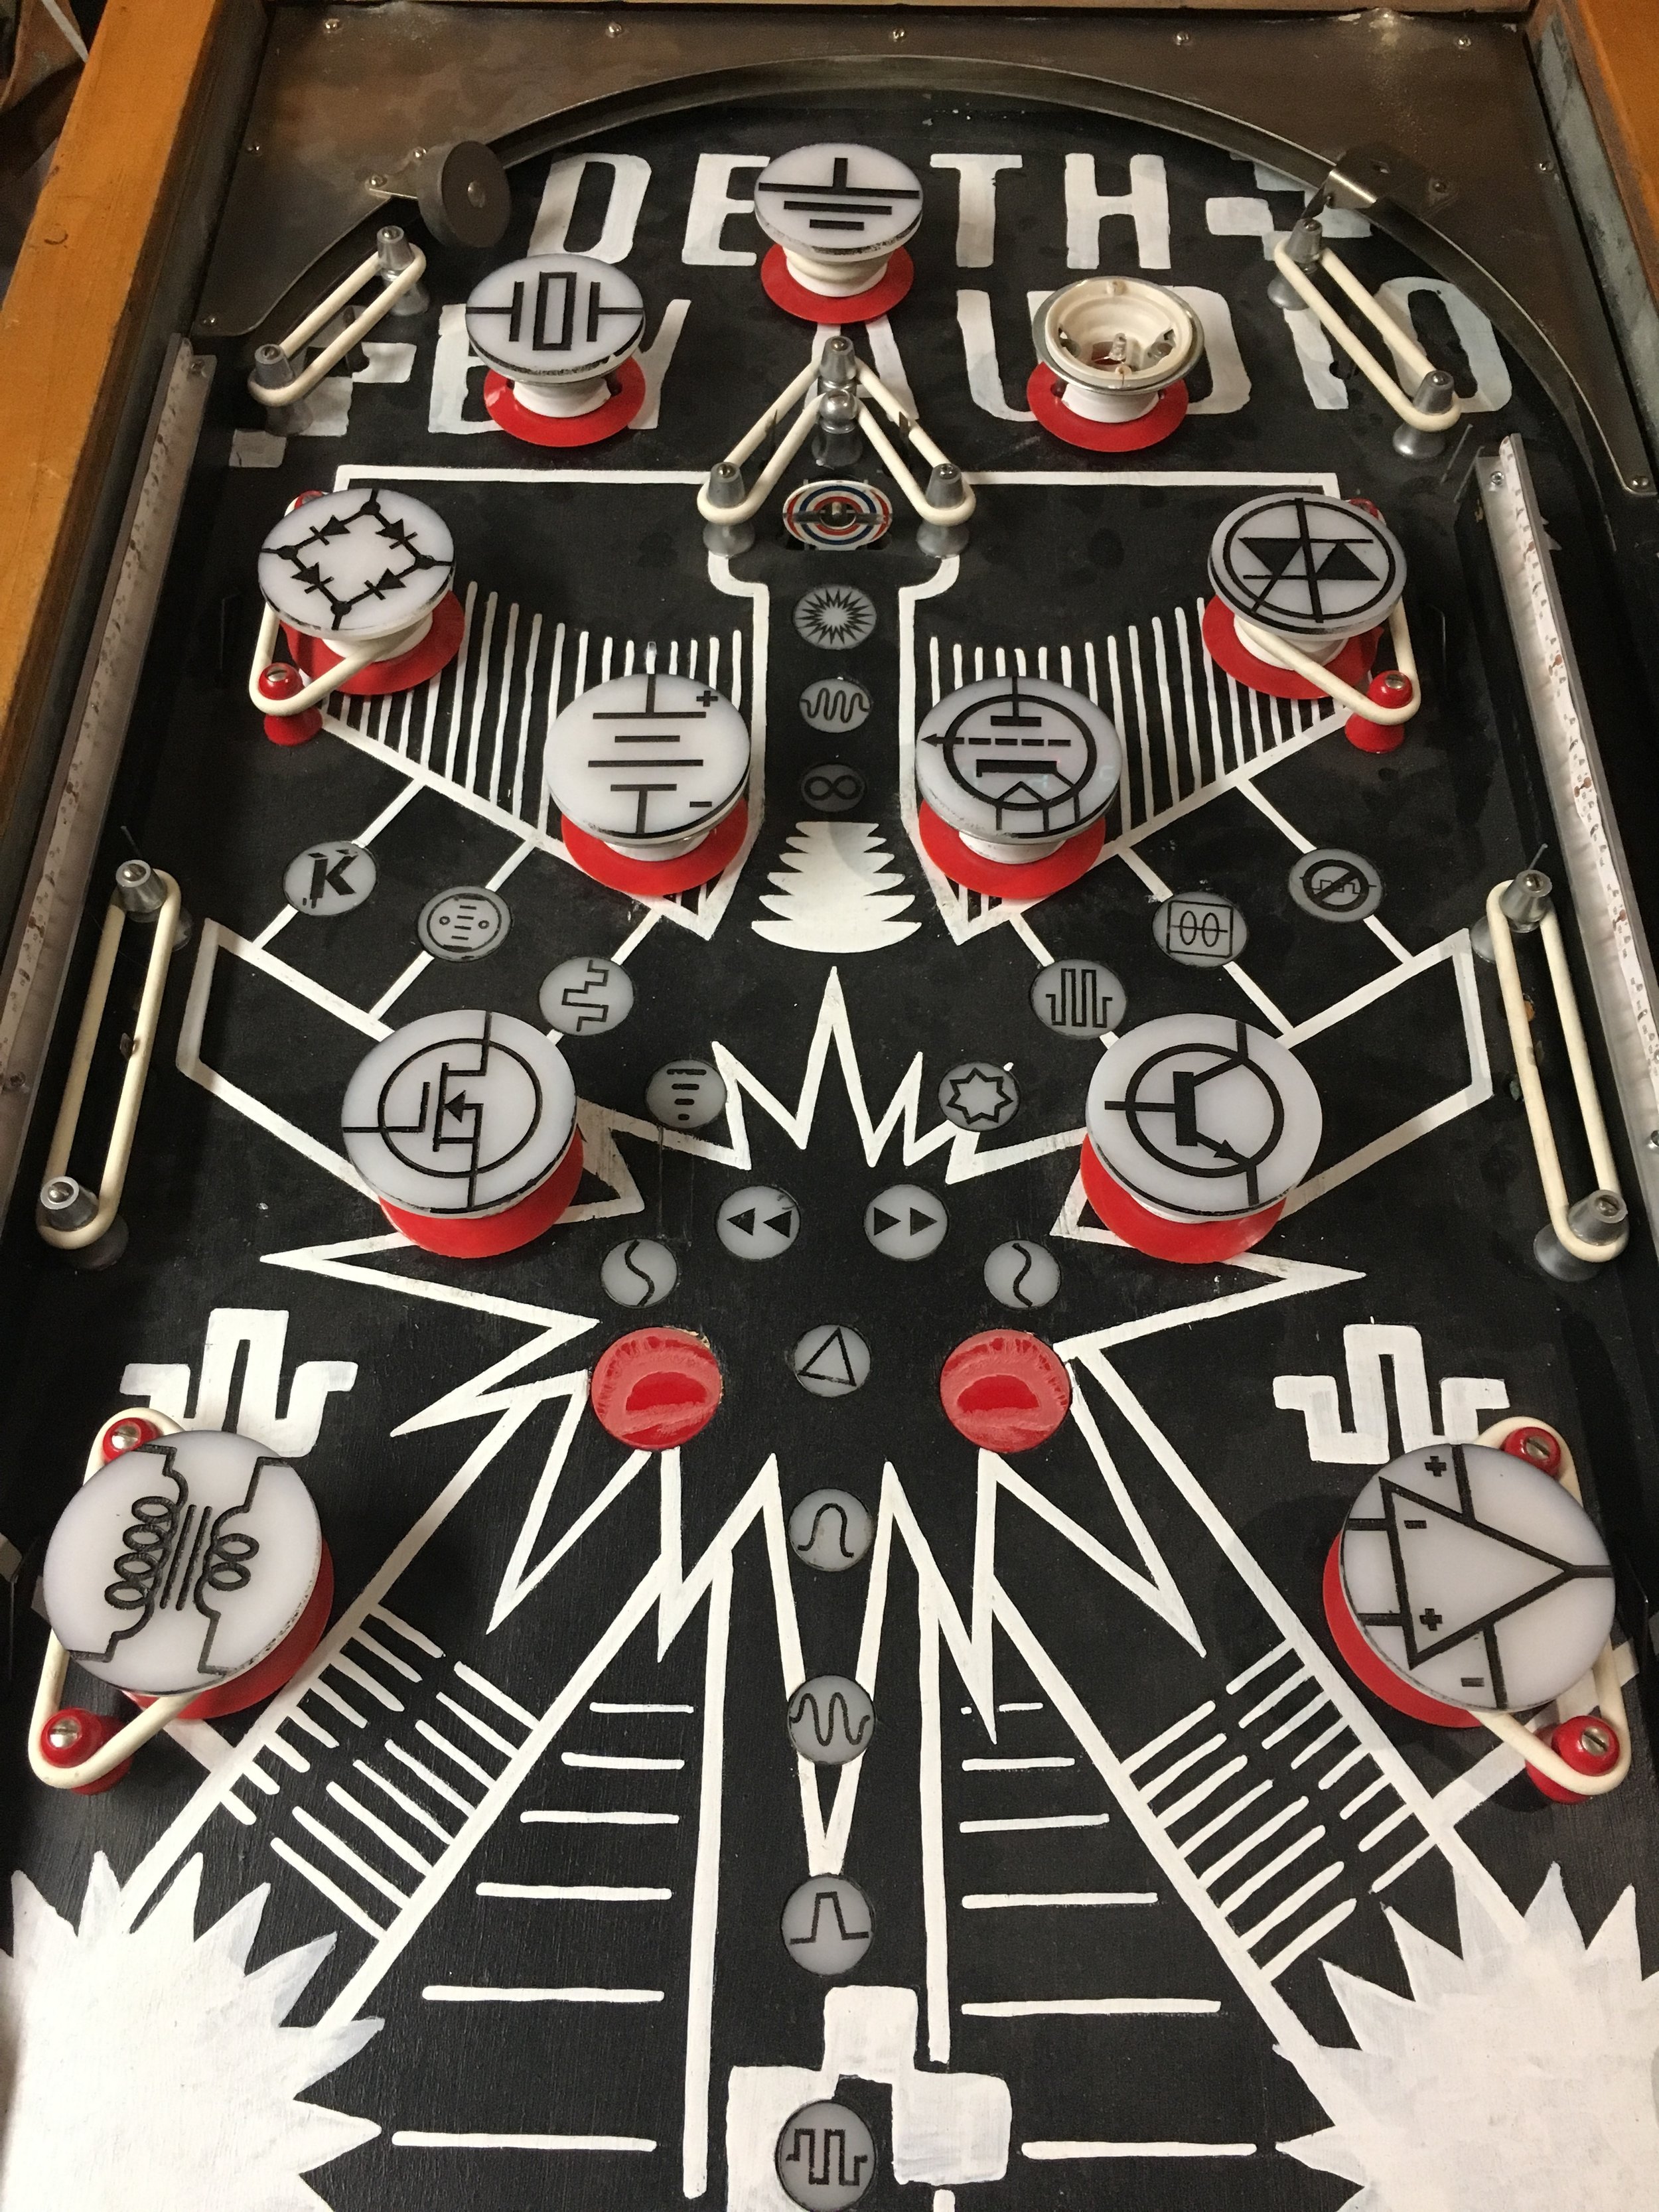
The first thing that we wanted to do was paint the playfield. The art on Mademoiselle was beautiful, but we had our own theme. I contacted Joe Jurewicz, an old friend from Death By Audio who actually helped build the warehouse space with Oliver back in the early '00s. We stripped all of the components from the playfield and Joe painted a Death By Audio theme.

The old playfield also had a lot of plastic inserts that showed score numbers - 10, 20, 30, etc. We had to pop those out for Joe, but decided against putting them back in. Instead, I reached out to Death By Audio guitar pedals for some graphics from their pedals. I laser-etched those graphics into frosted acrylic (with the paper still on), spray painted them black, and peeled back the paper to reveal a clean black image. We planned to light these with WS2812 "NeoPixel" LED strips, because they're individually addressable and would allow us to make cool running patterns in different colors.

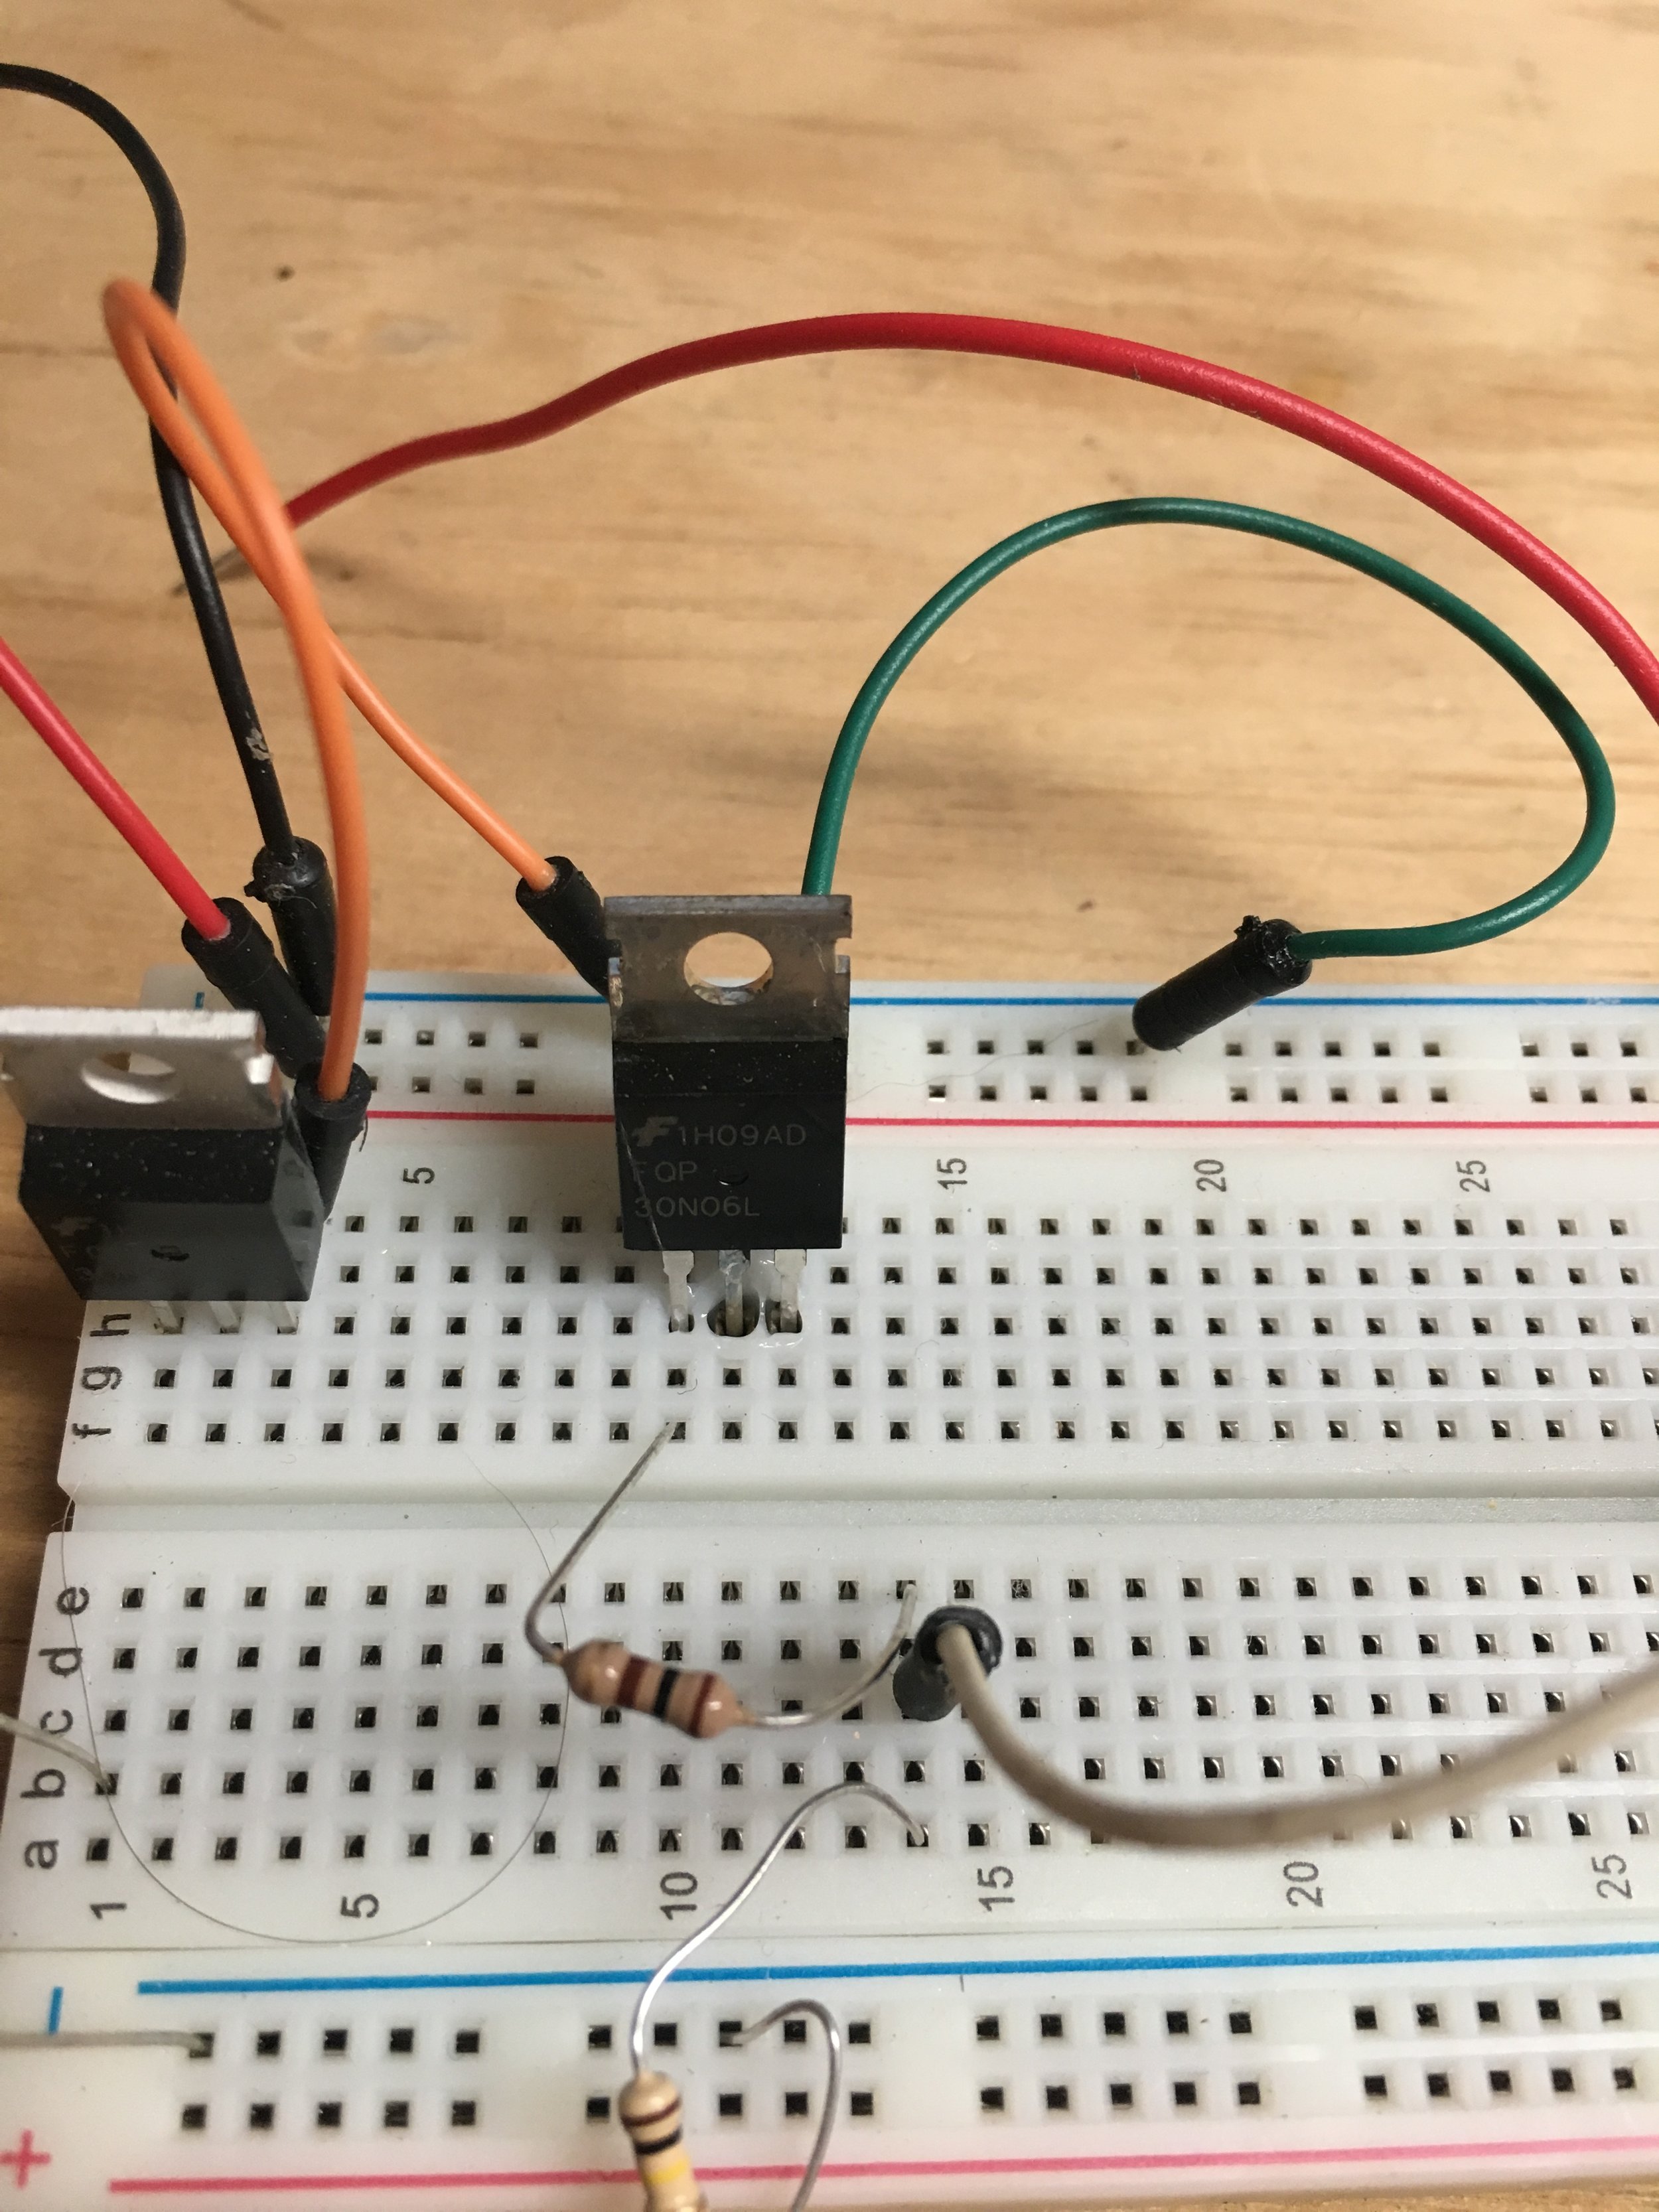
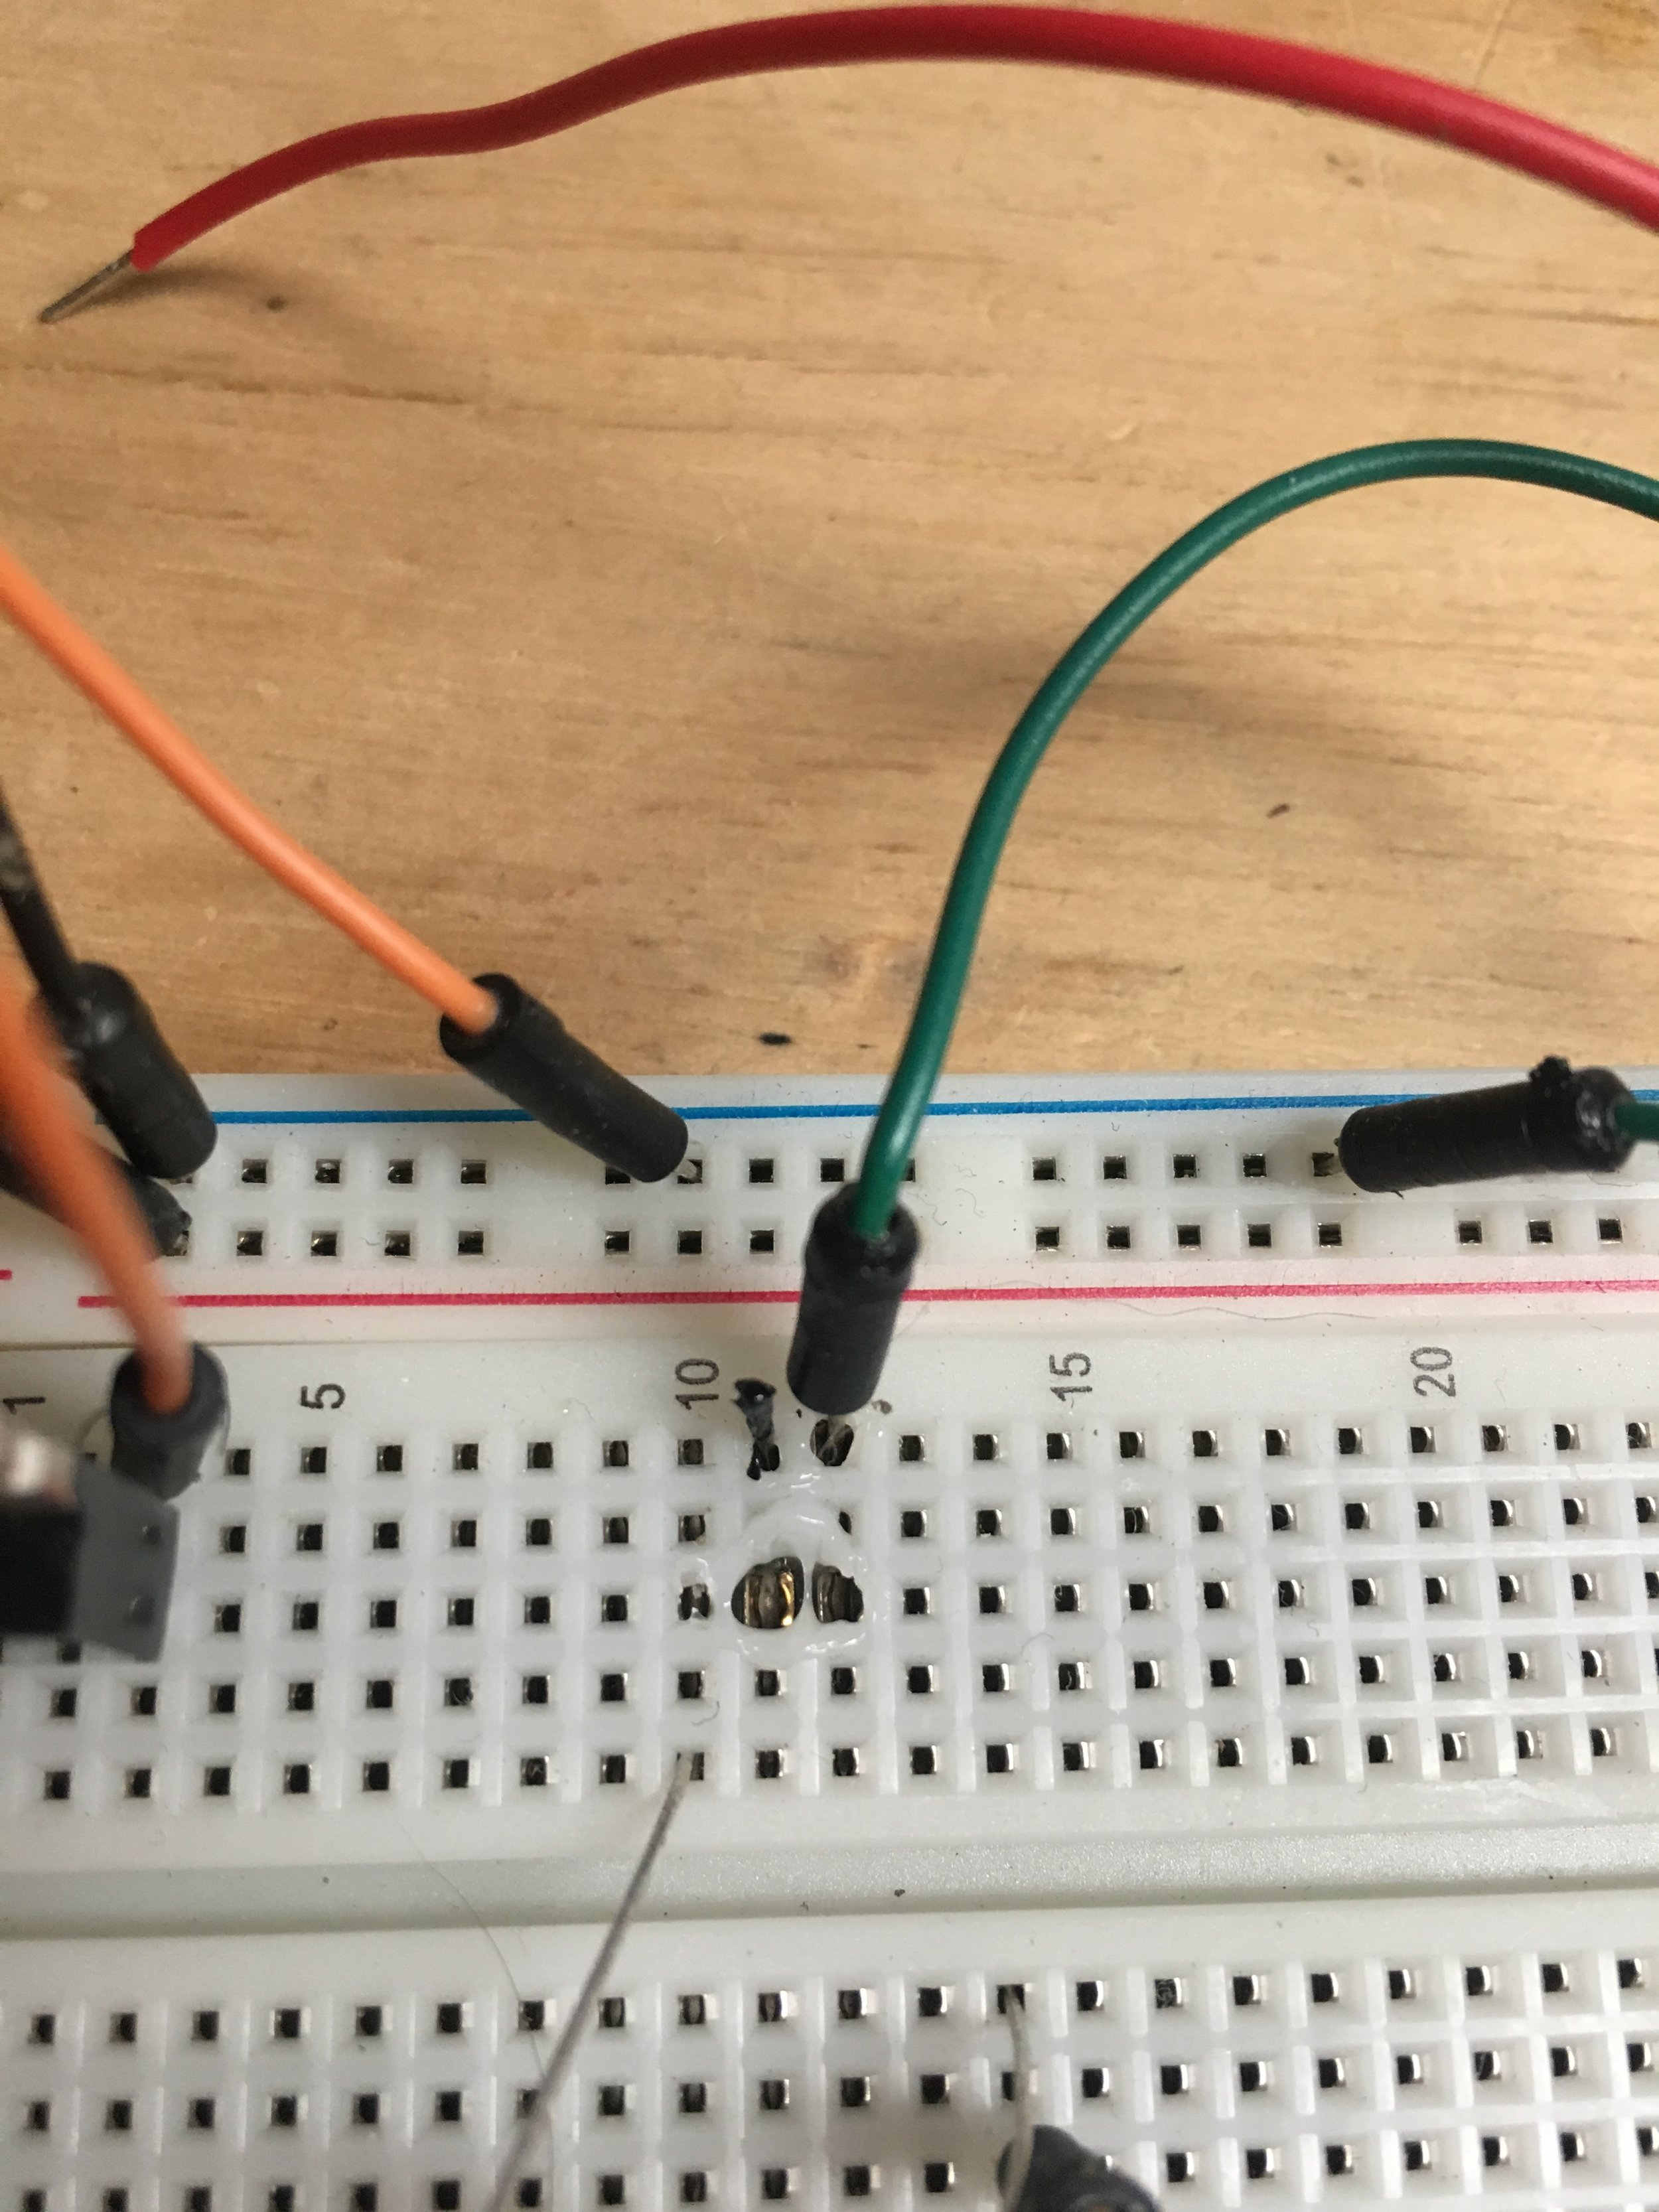
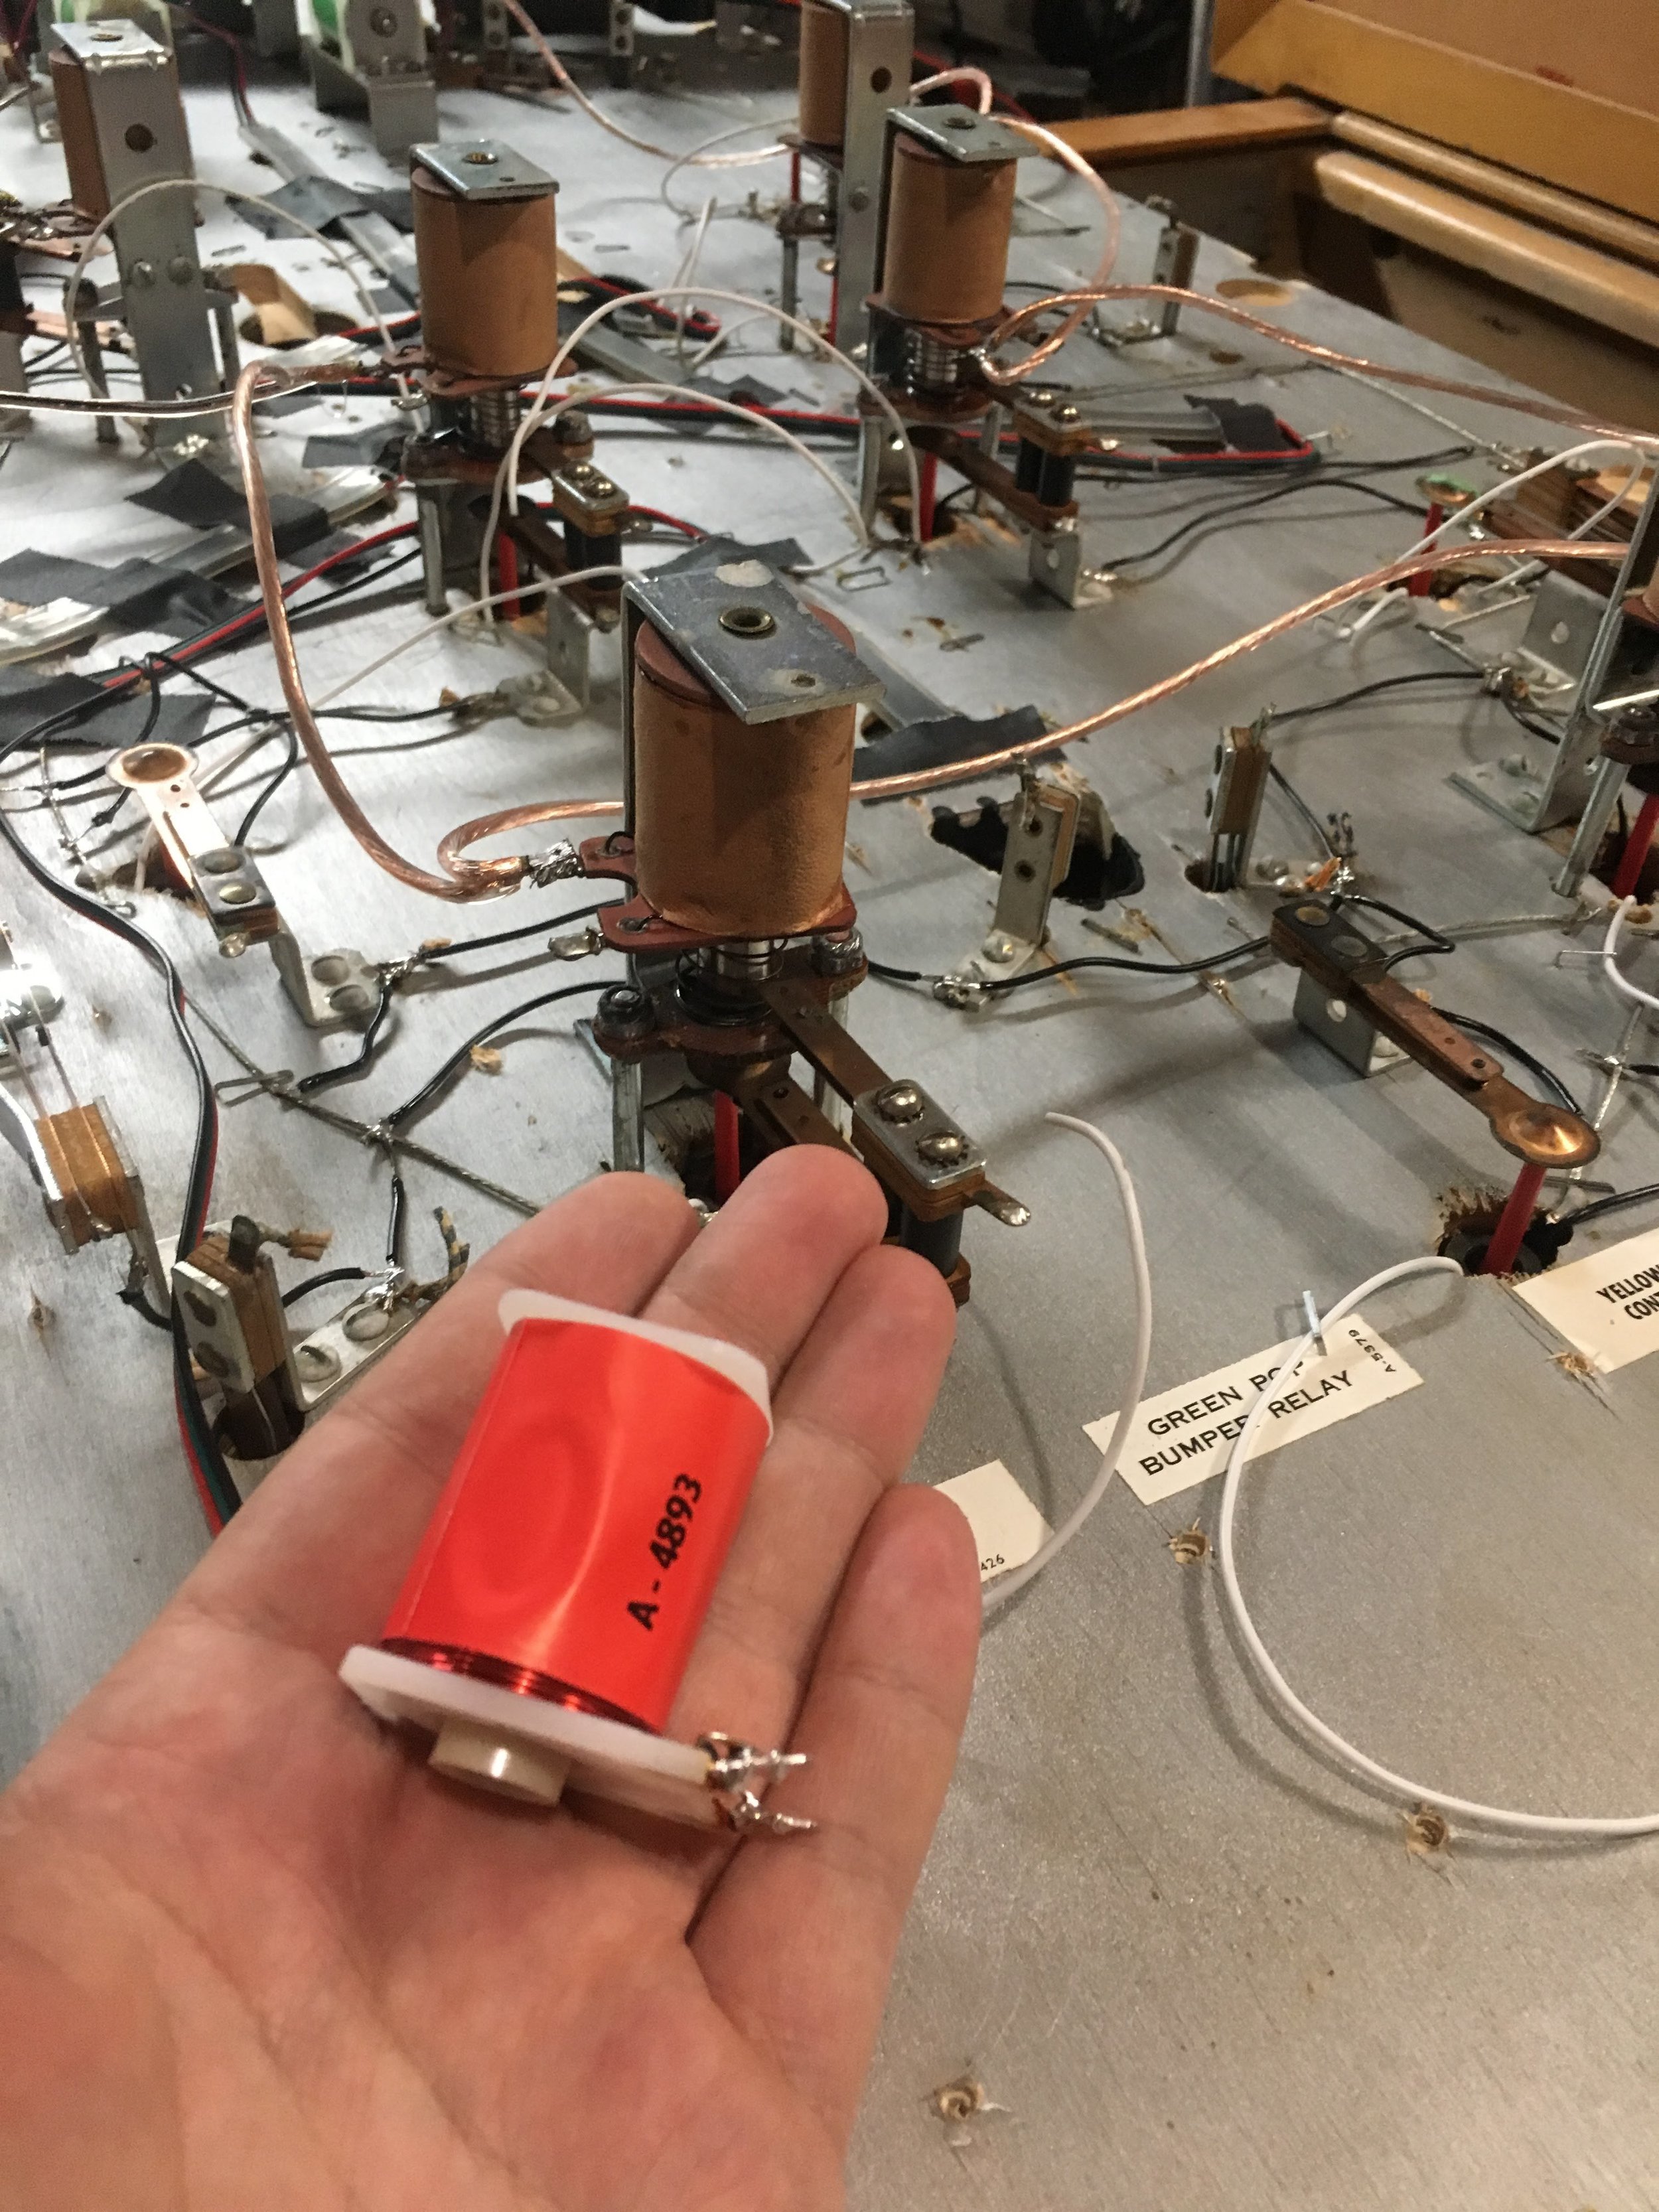
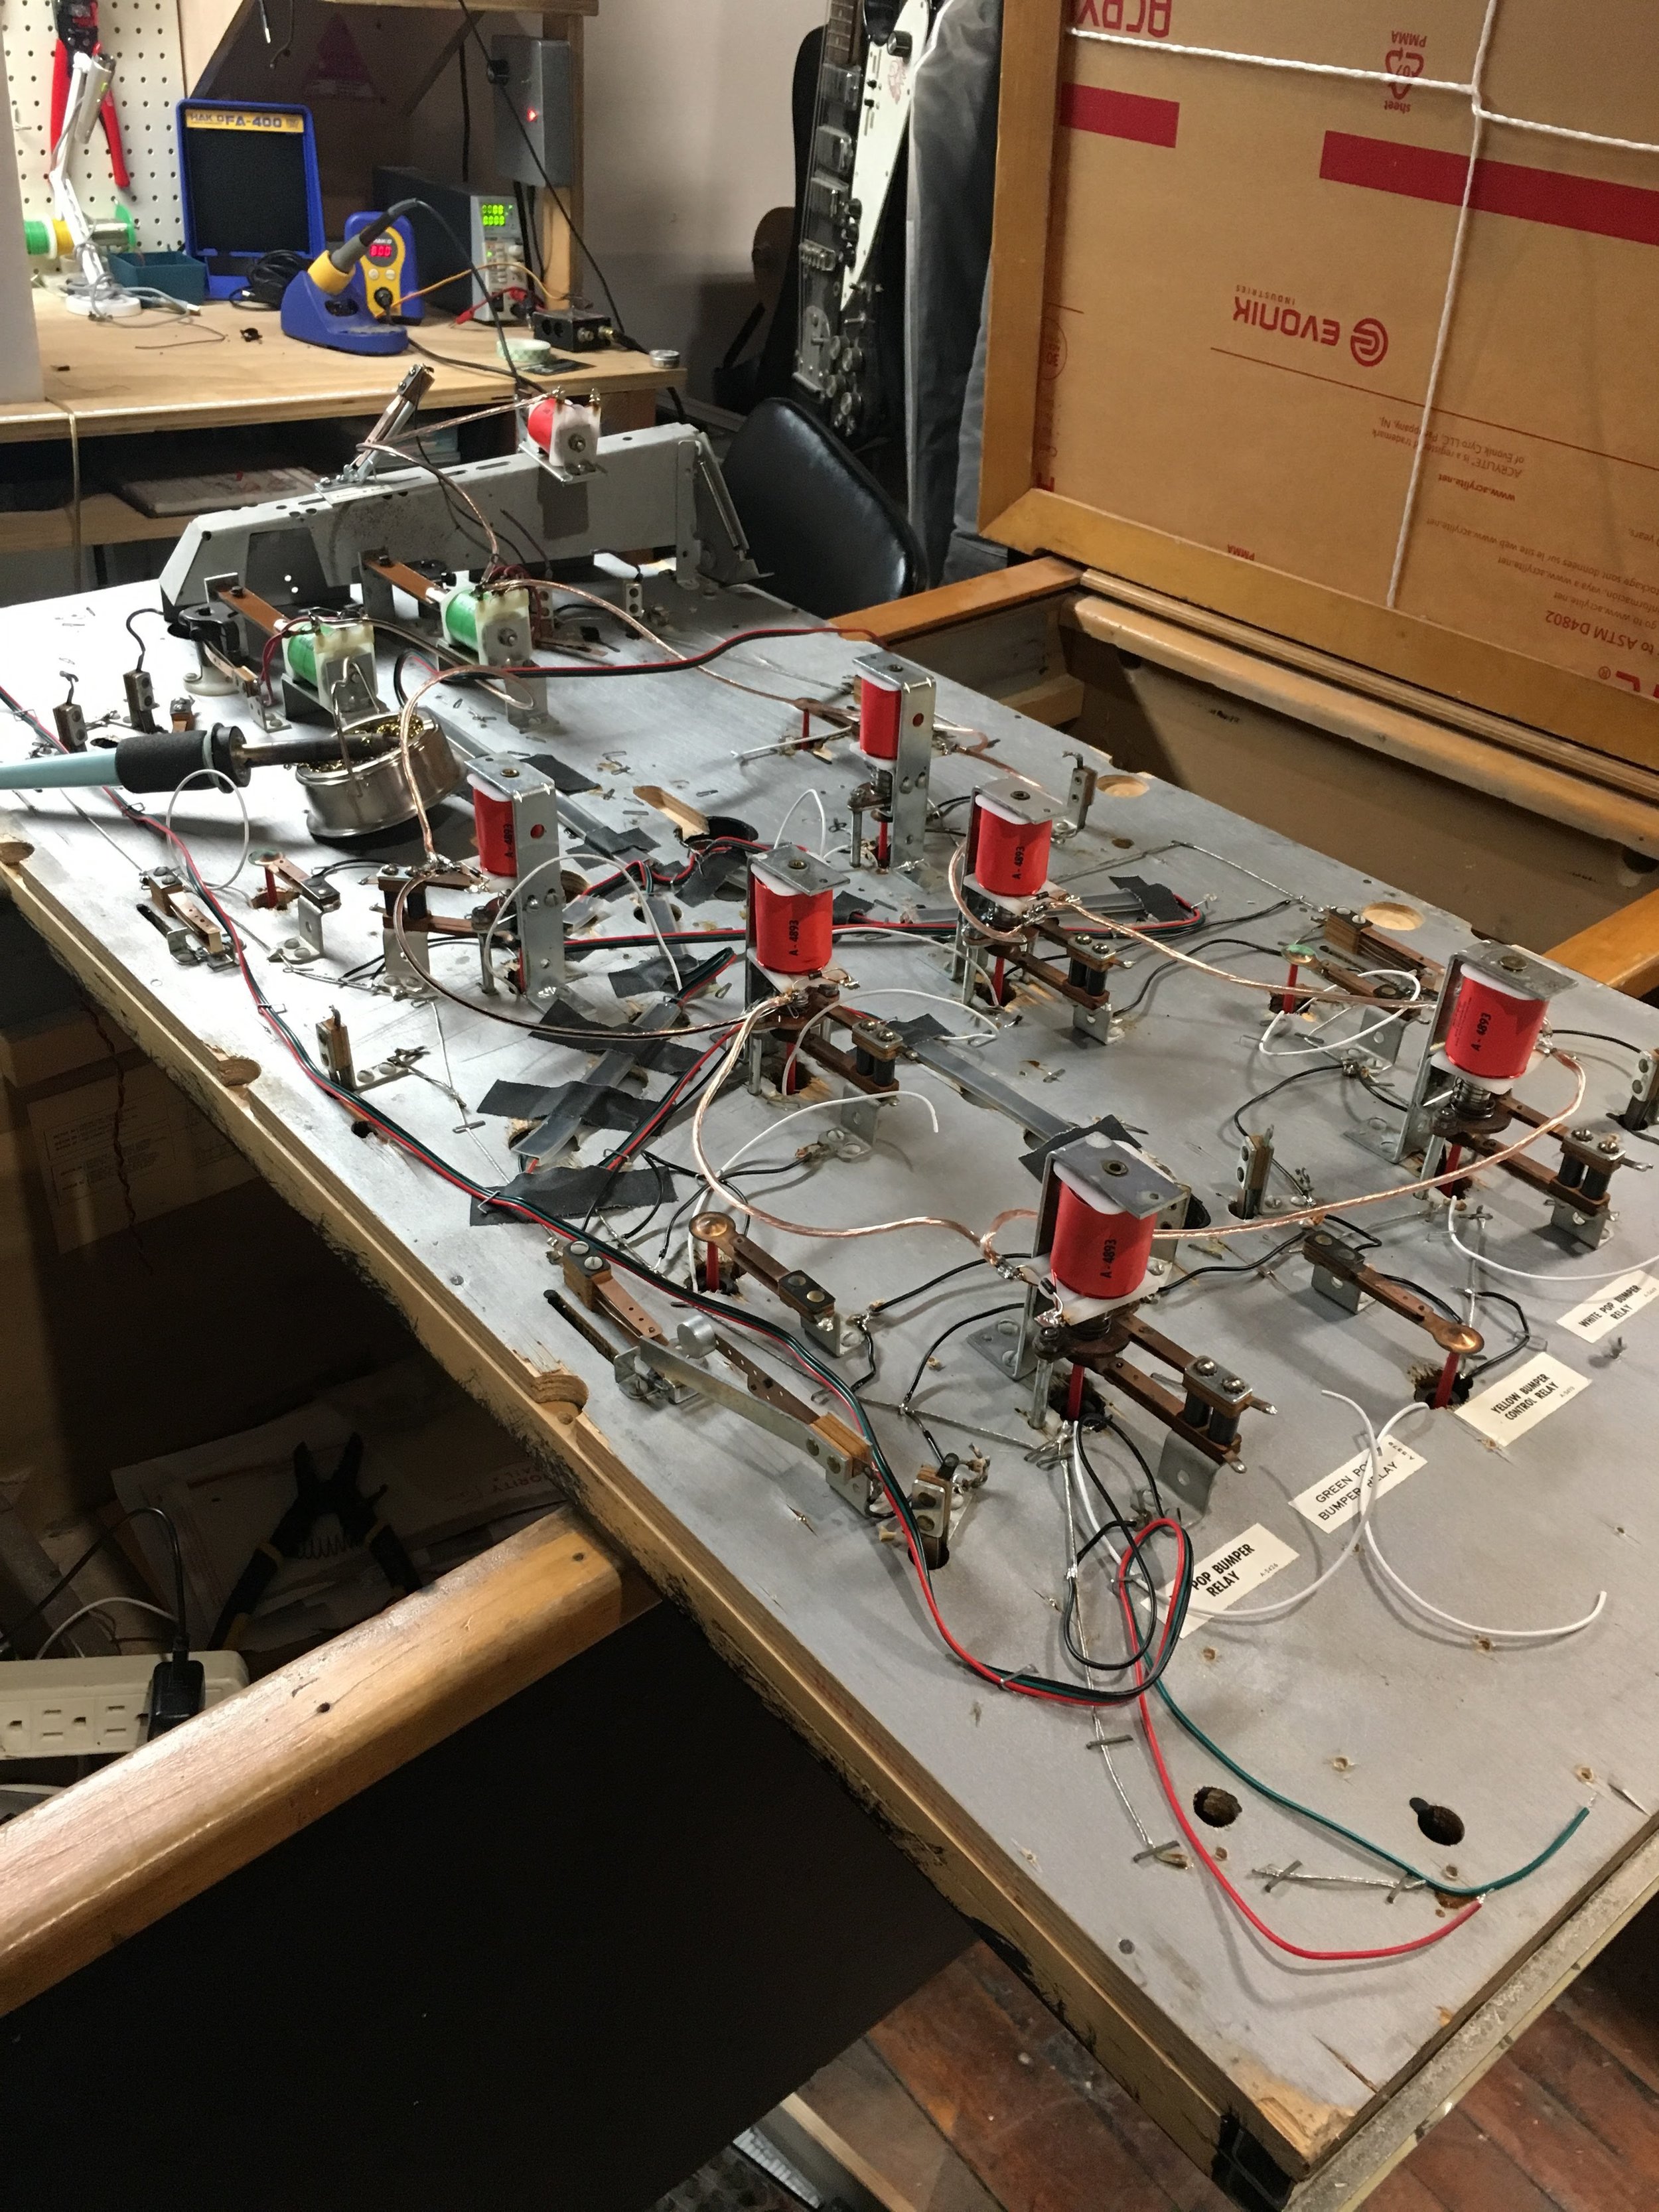
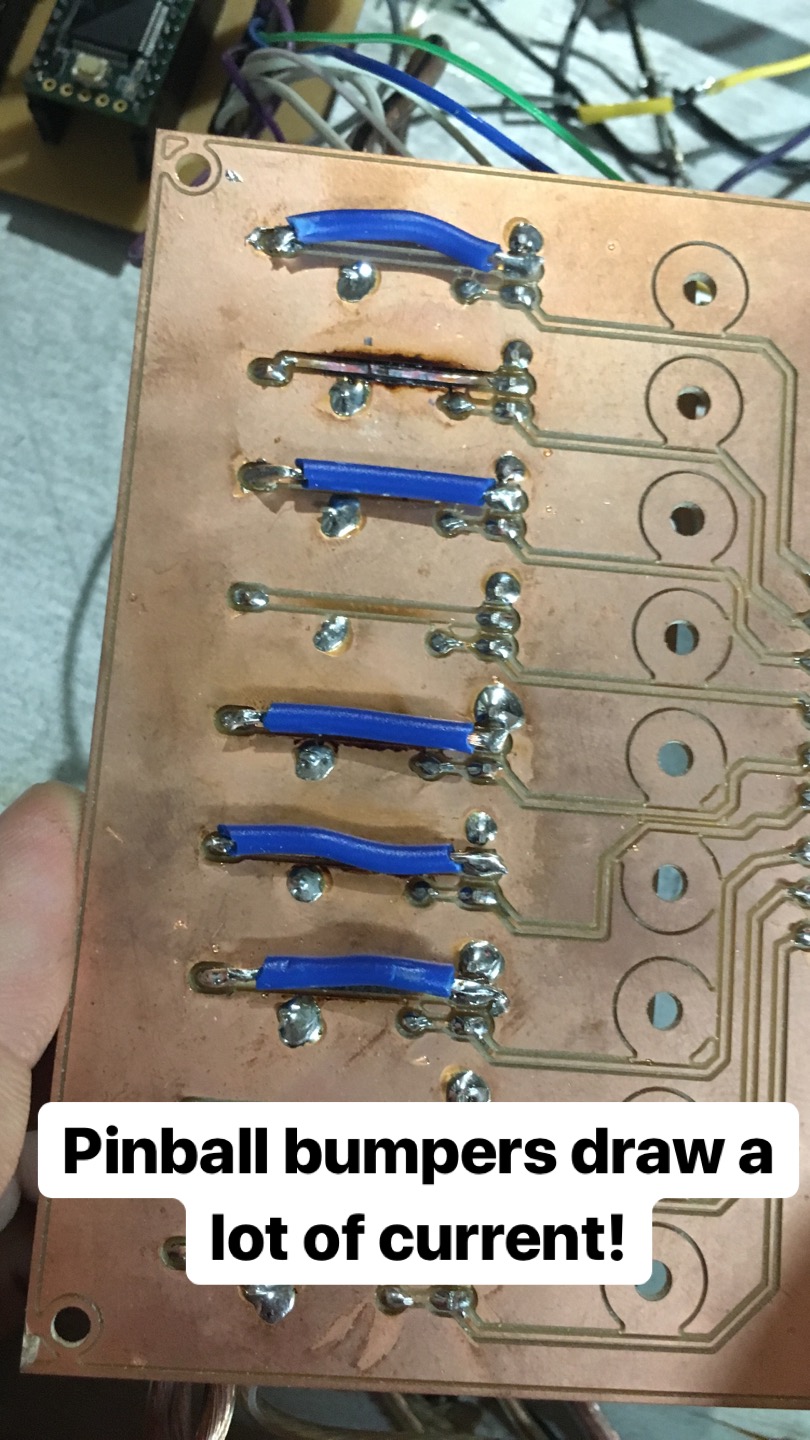
The next and biggest parts to tackle were the bumpers. We tested the old bumpers and they worked fine, but once we hooked up a power supply, they started sticking and drawing enough current to melt the breadboard. I went to the Pinside Forum and decided to seek help on the best practices for wiring up DC voltage coils.
Using this diagram, I made a MOSFET board for the old coils and tried to get them to work with a 24VDC power supply, but they kept sticking too frequently, and so I decided to order a whole new set of coils.
Luckily, Marco Specialities sells OEM parts for lots of old machines, and I was able to get a set of replacement coils for a generic Gottlieb machine, as well as some upgraded DC voltage flipper coils (plus they already had Diodes soldered on!). We also ordered red flippers and red bumpers, so that we had a uniform color scheme rather than the carnival rainbow theme of the original machine.

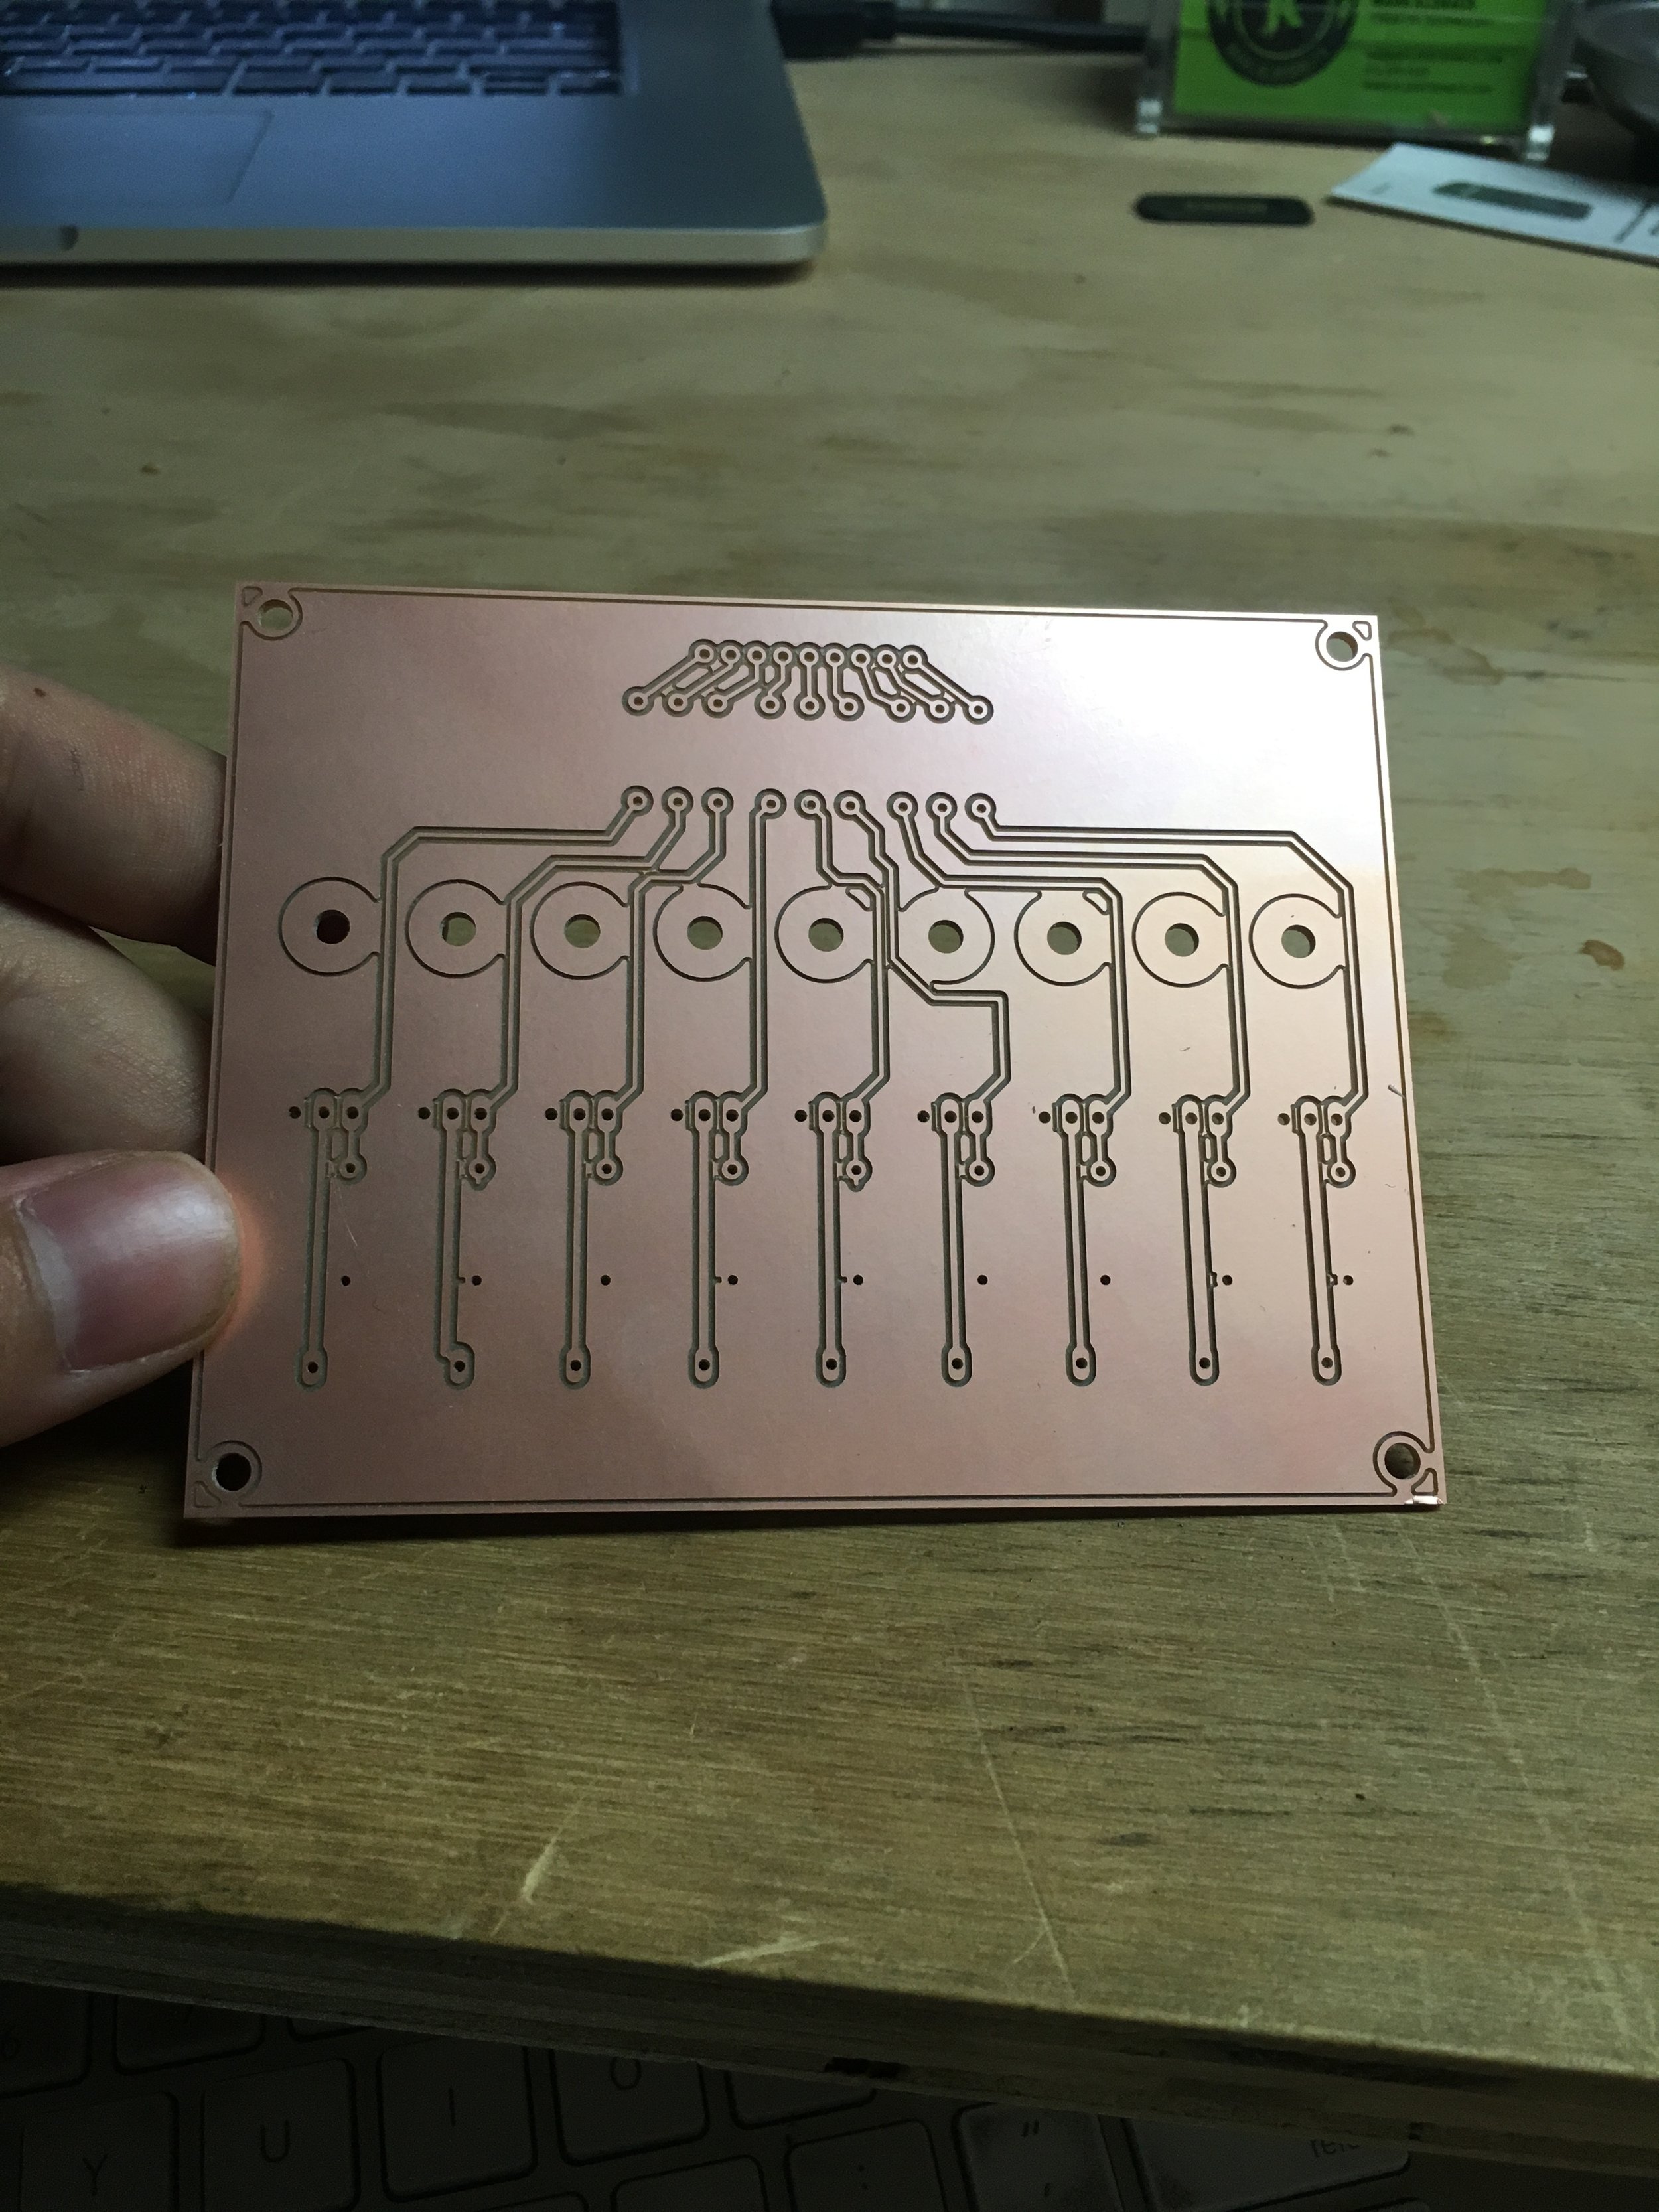
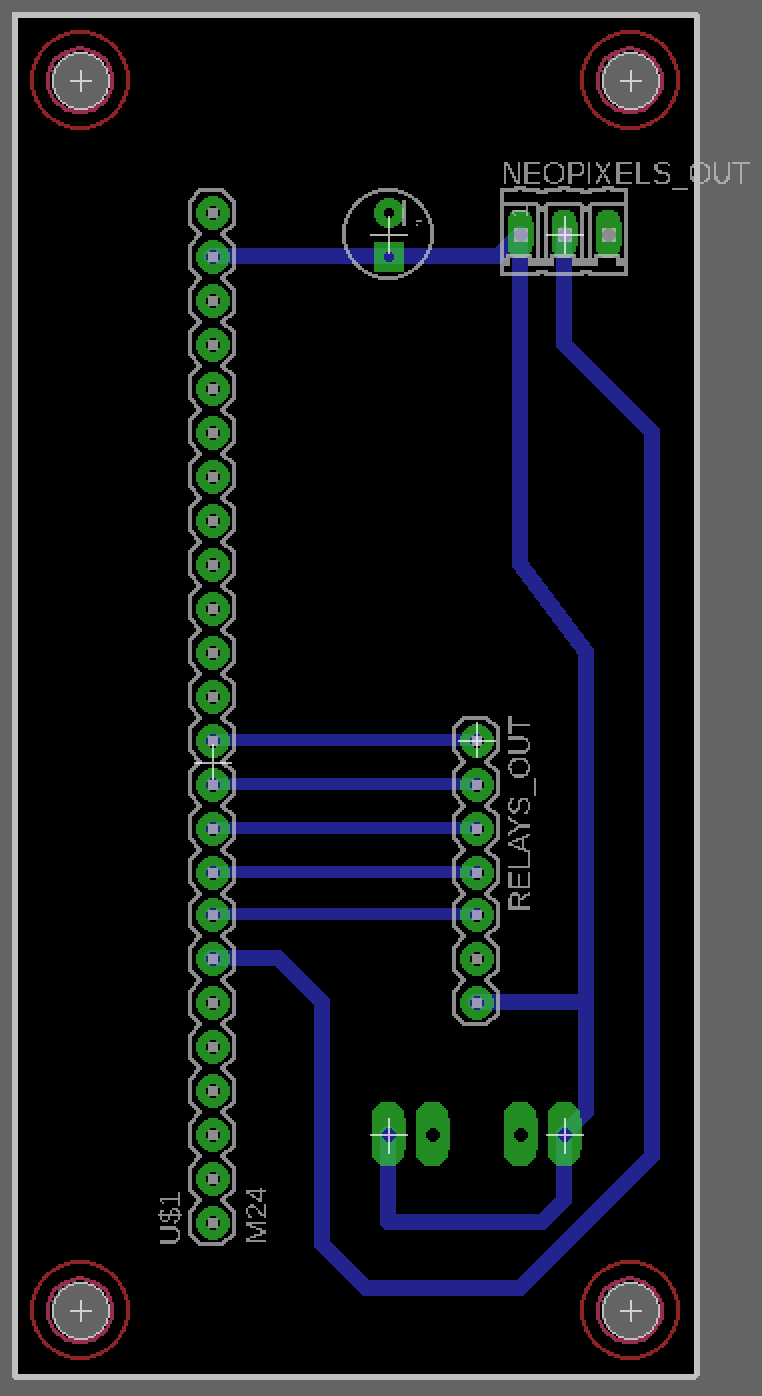
Custom Circuit Boards
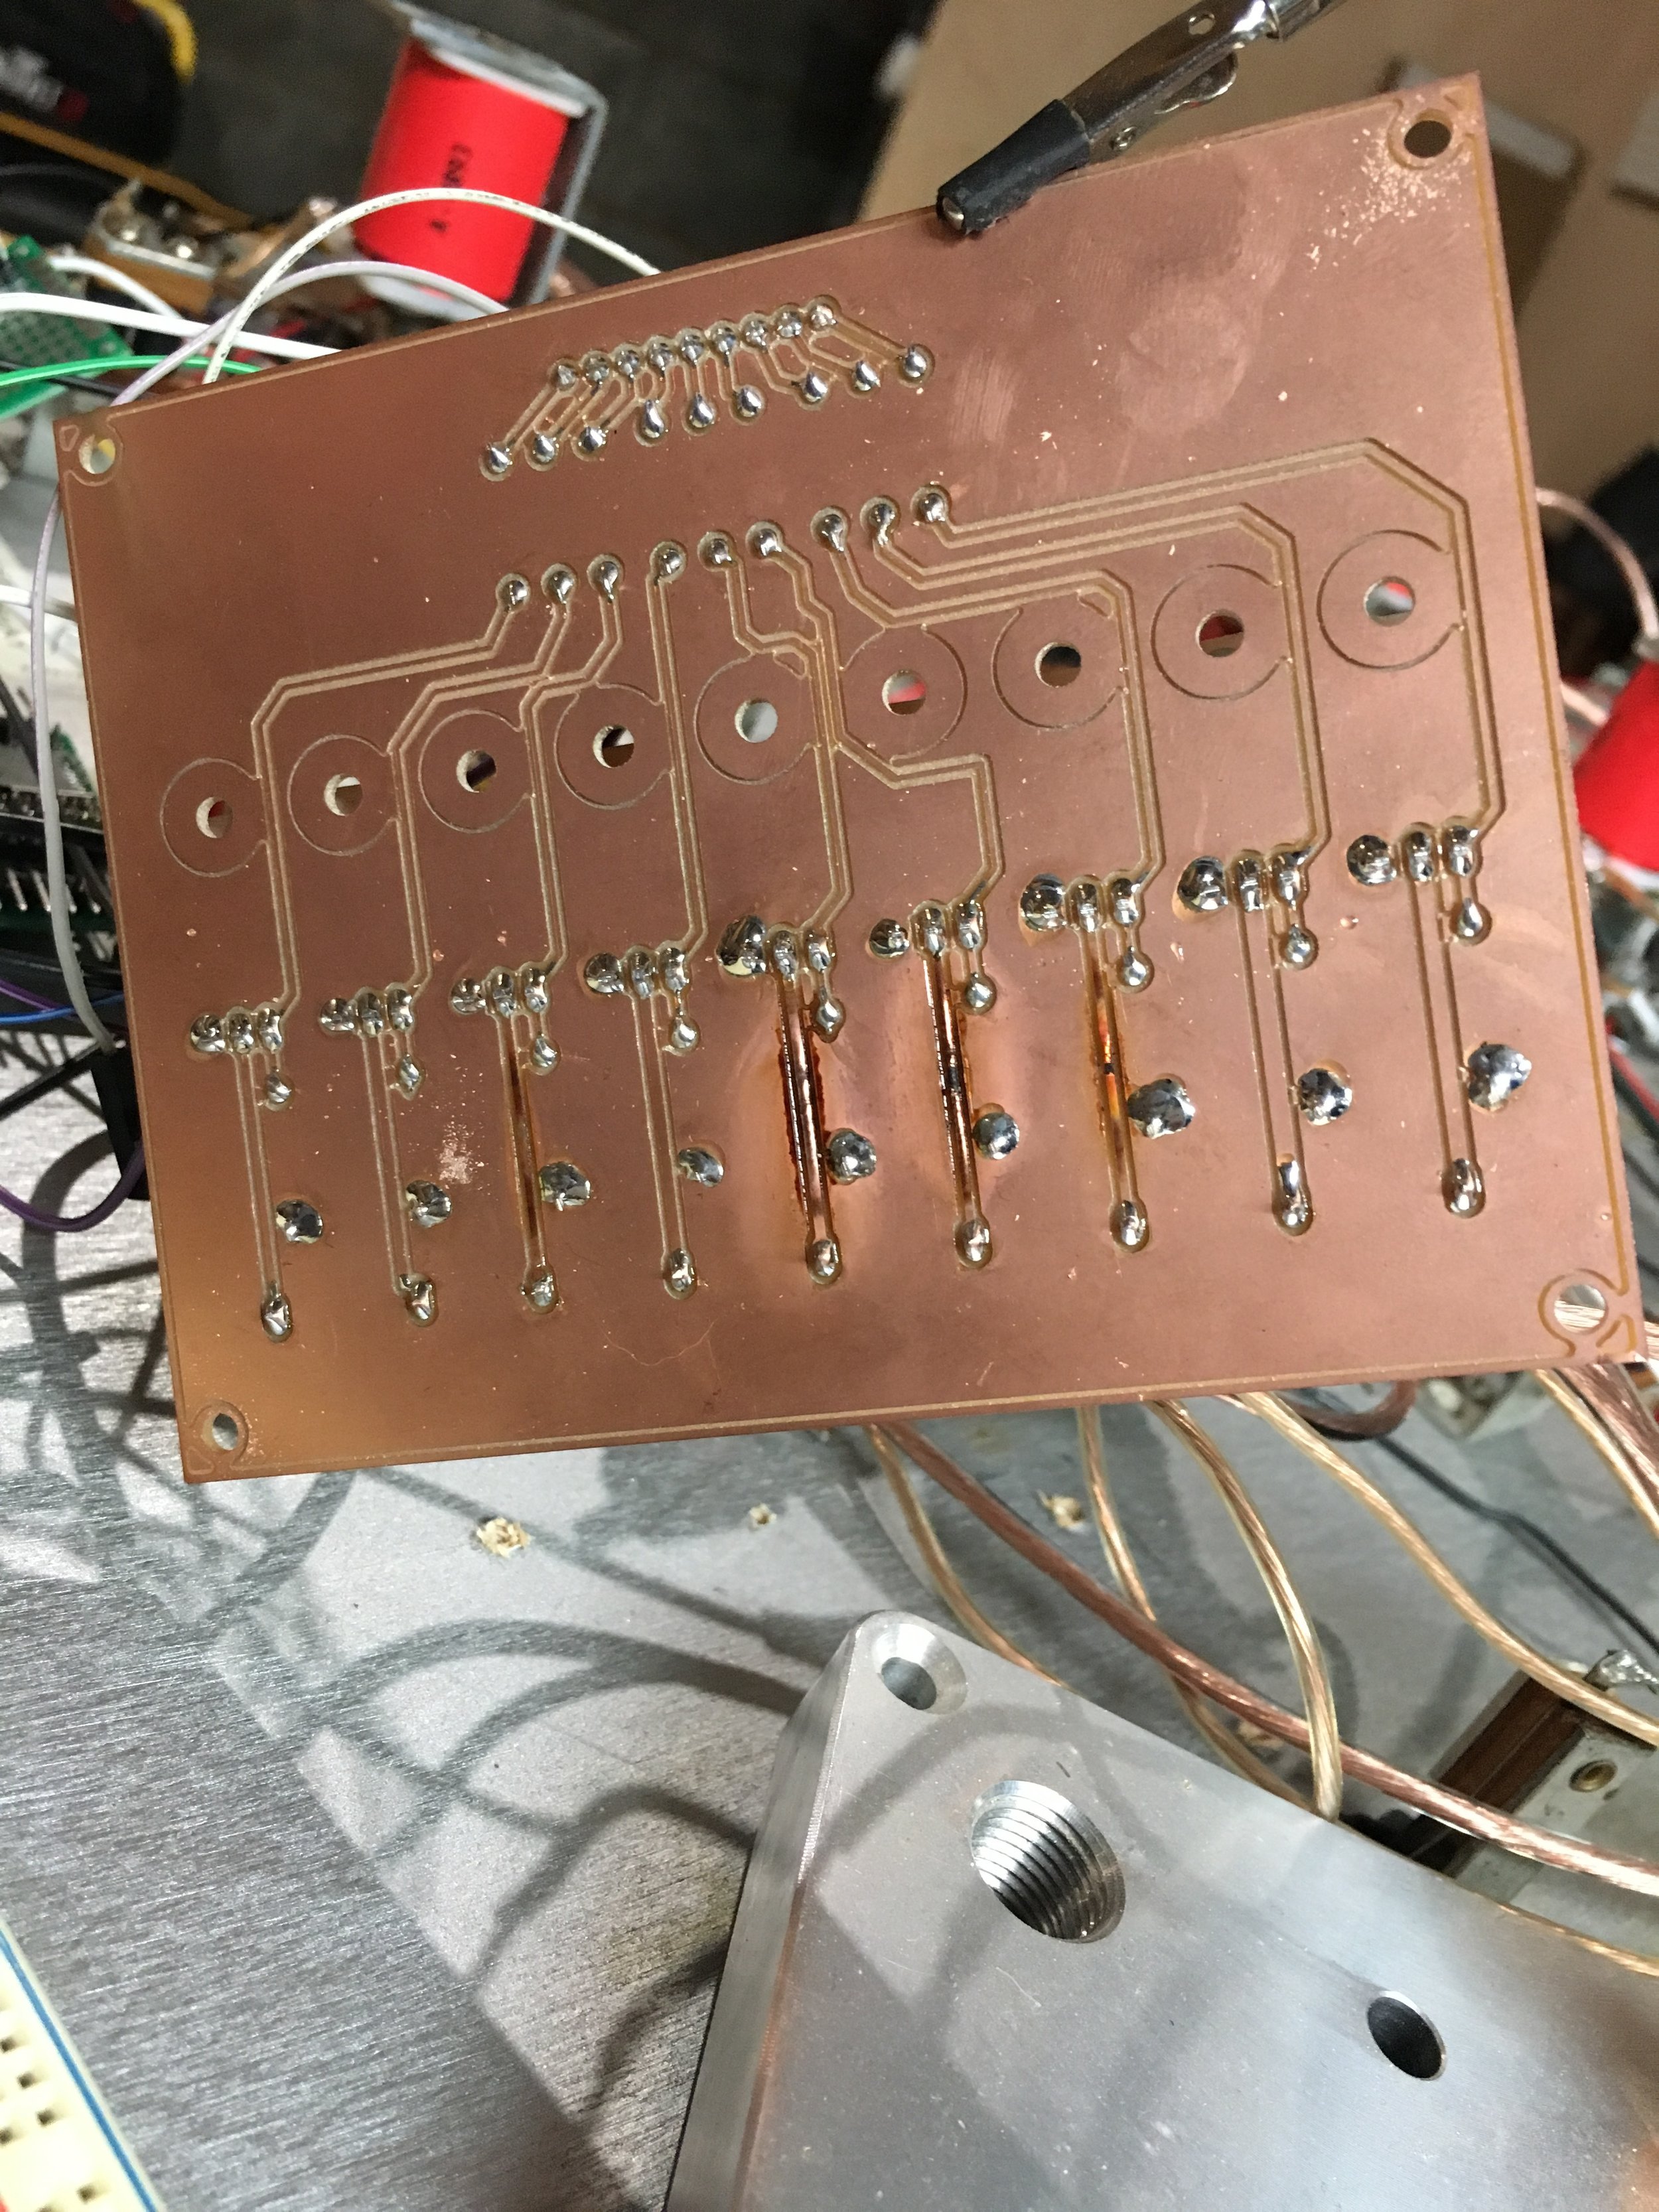
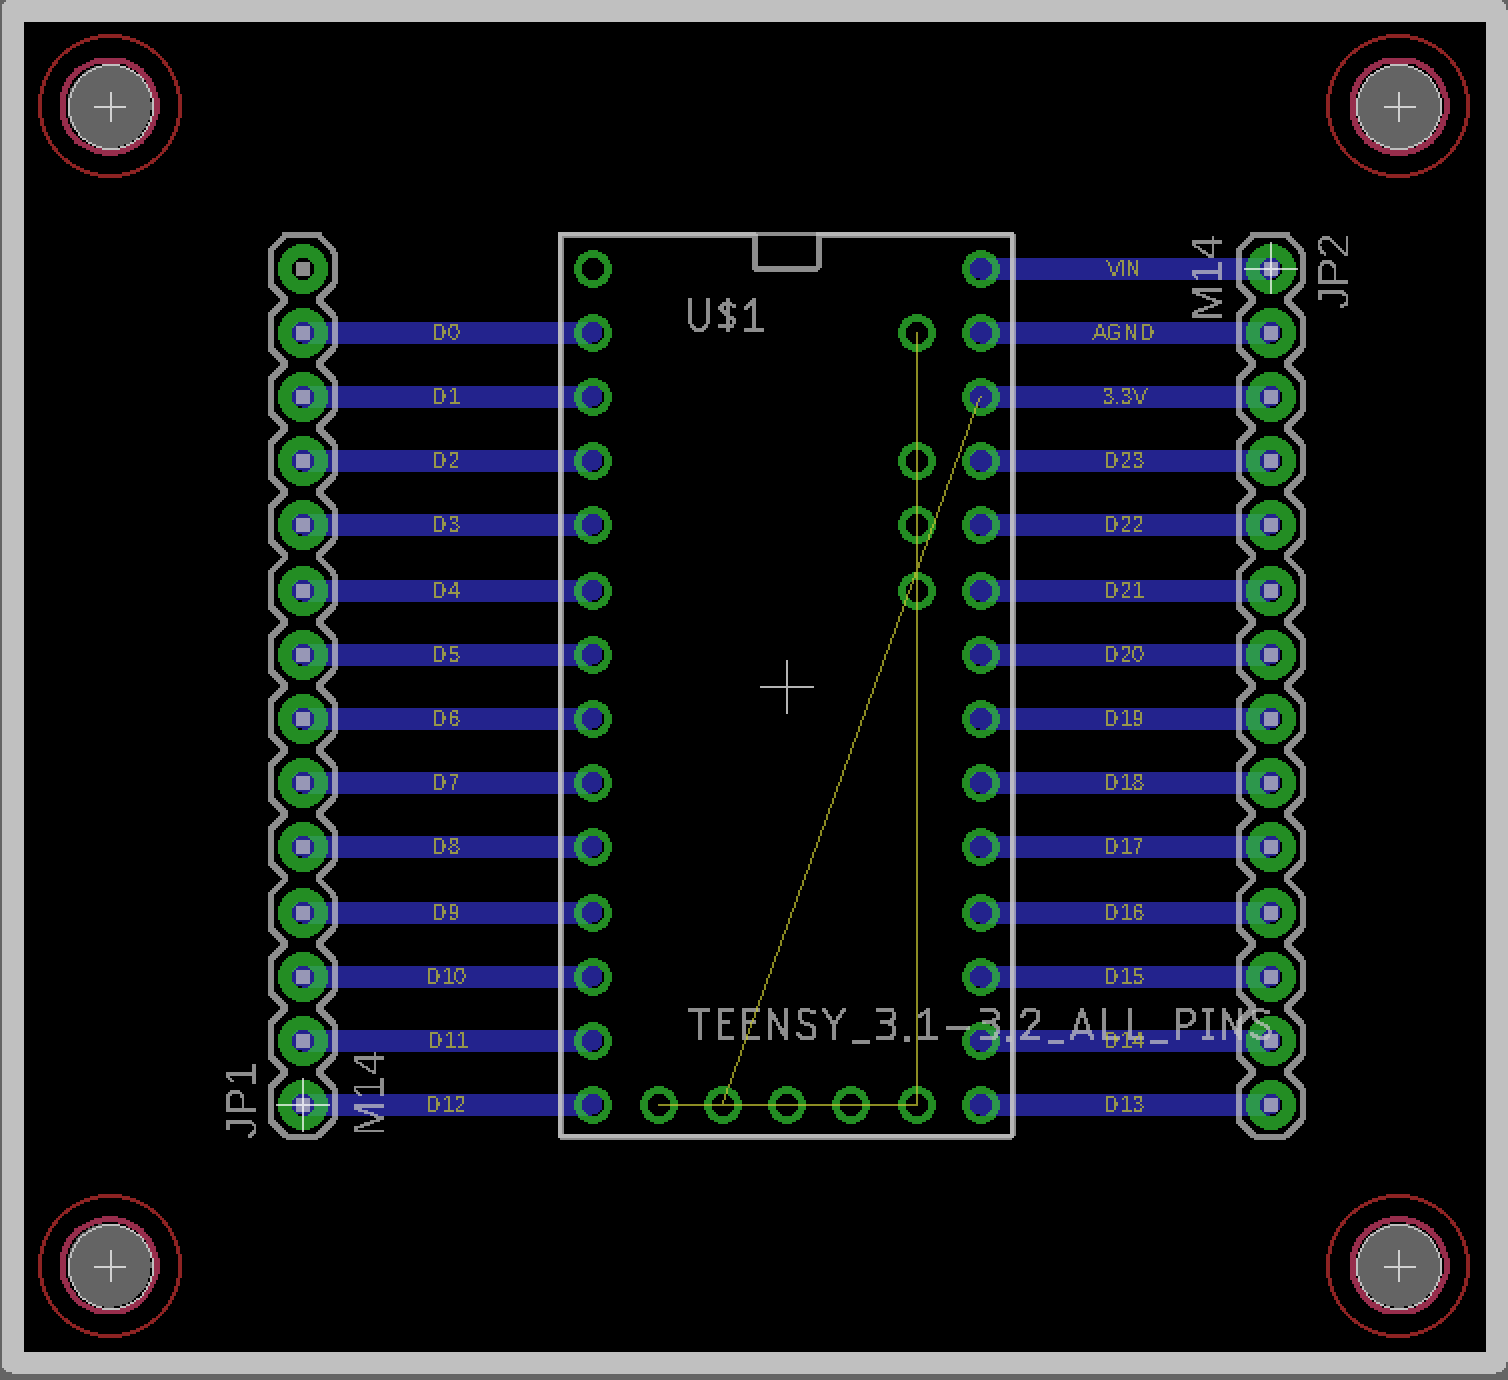
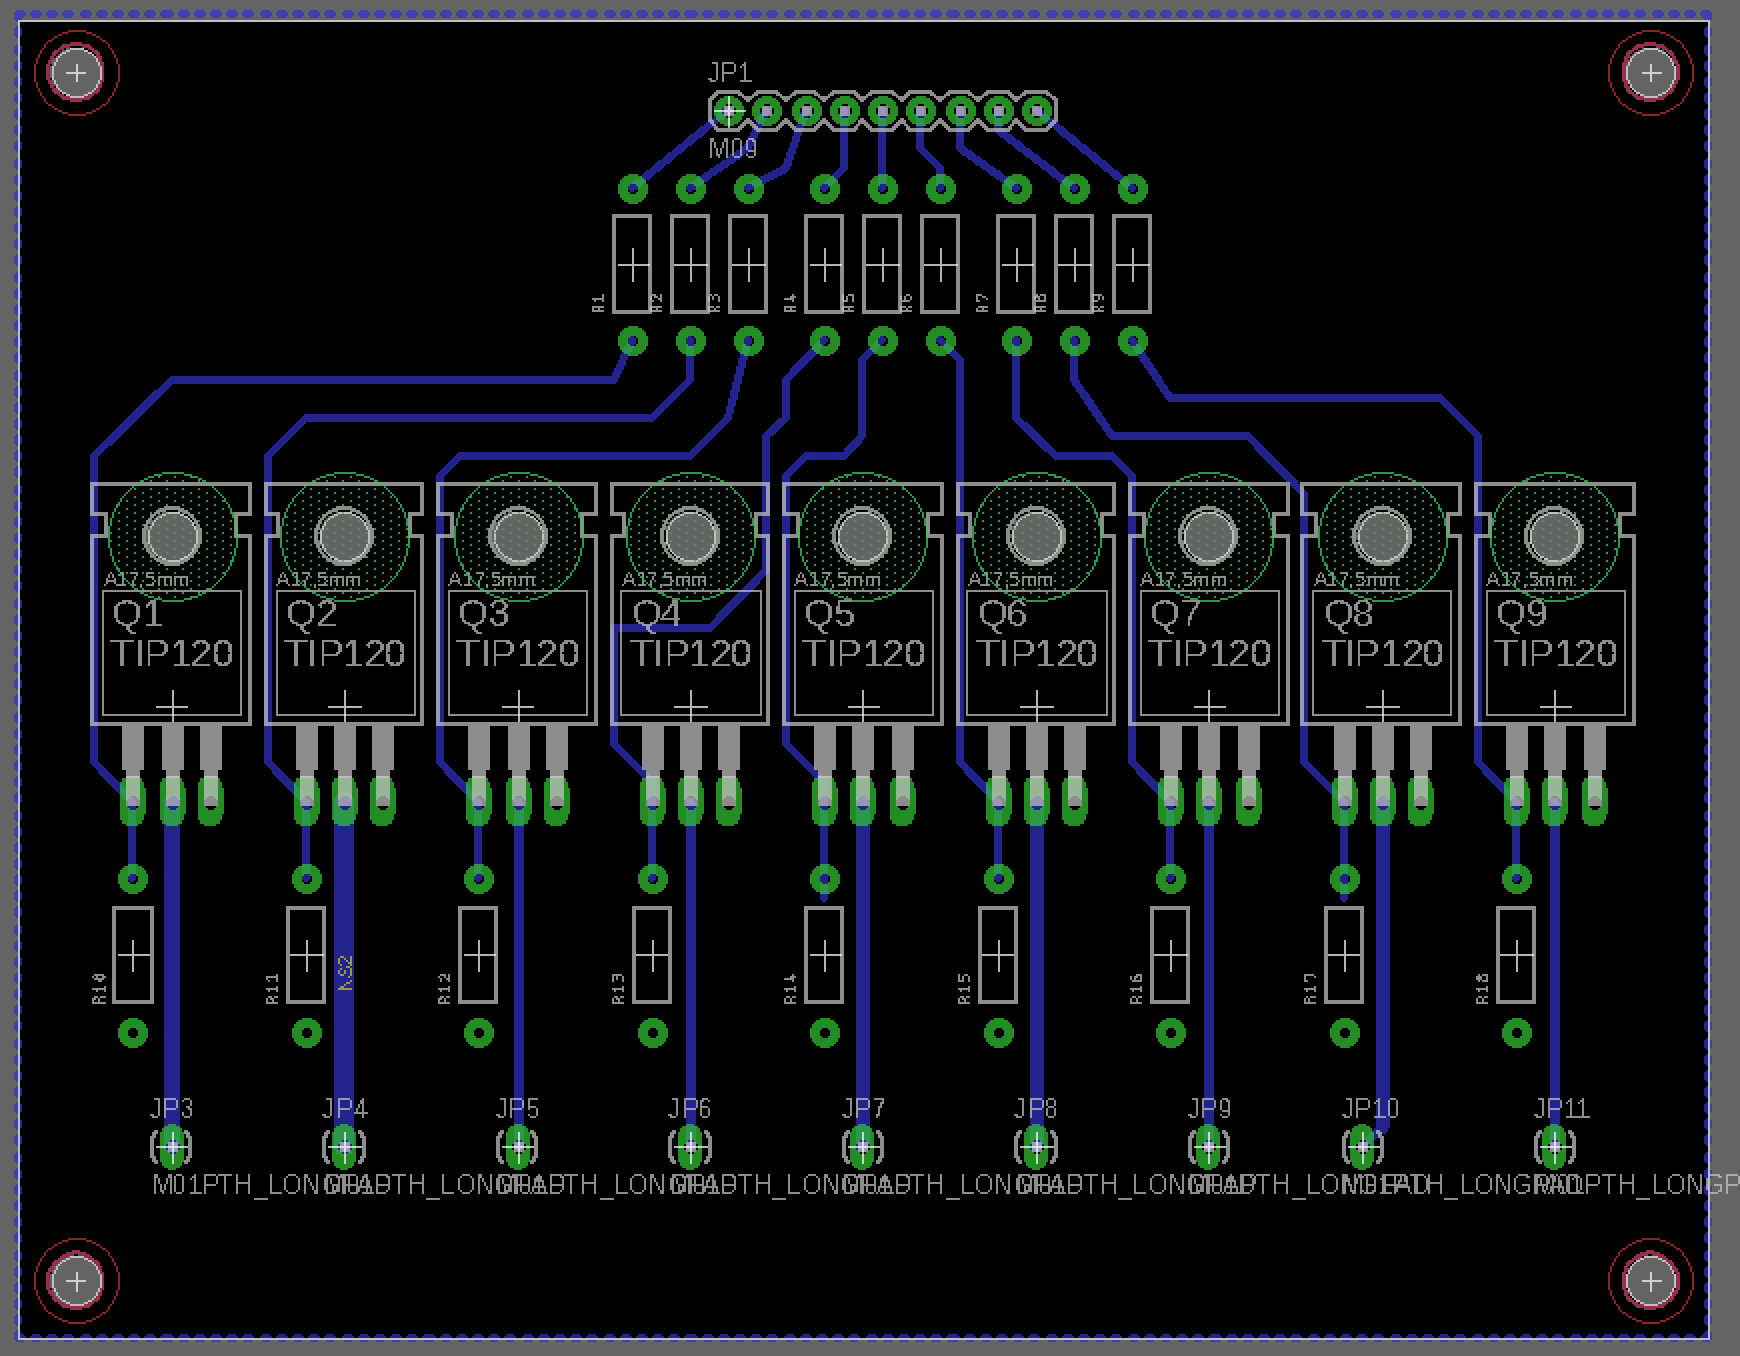
It was clear that I'd need to make some custom circuitry for all of the different components on the machine. I started with a MOSFET board for the coils. I used an Othermill machine to etch a copper board for the MOSFETs and another board for the Teensy microcontroller. I decided to use one Teensy 3.2 to control the bumpers, and another Teensy 3.6 to control all of the other switches on the playfield, as well as the white LEDs inside of the bumpers and lamps. This helped to isolate the voltage for the bumpers and minimize false positives. I would later learn that the copper traces on the coils were much too thin, and the copper started burning apart. I had to reinforce all of those connections later with thicker gauge wire.
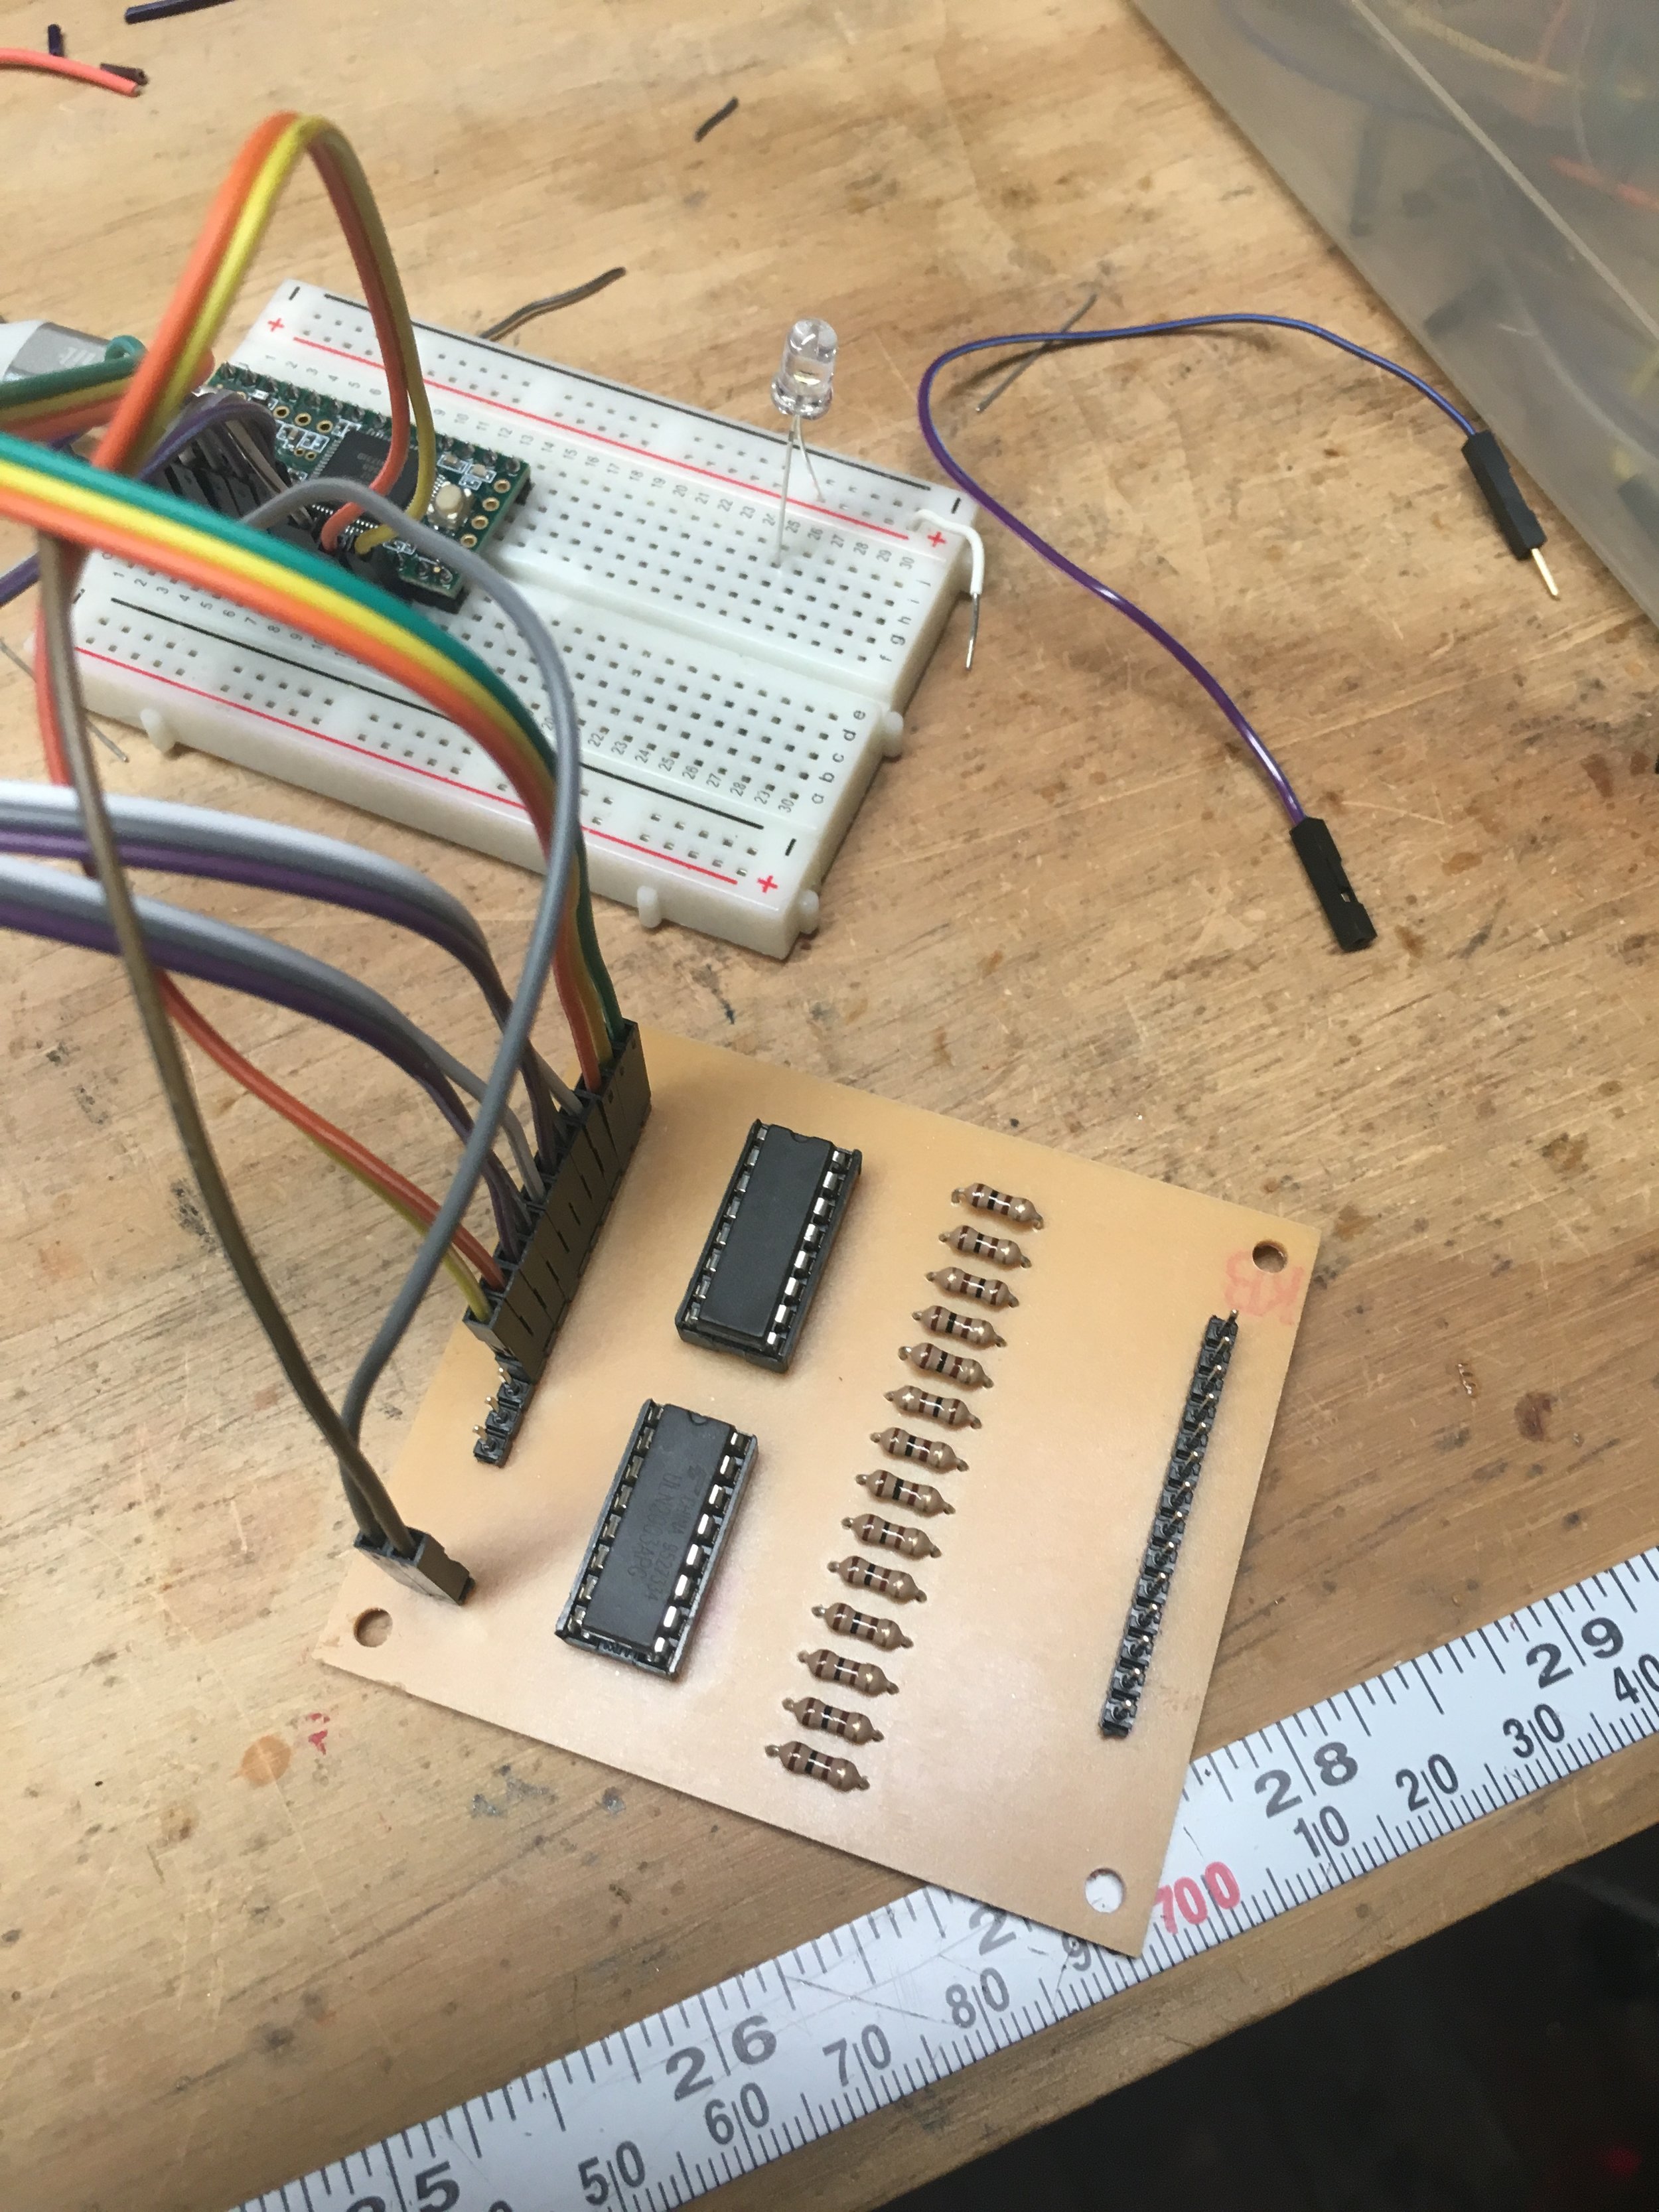
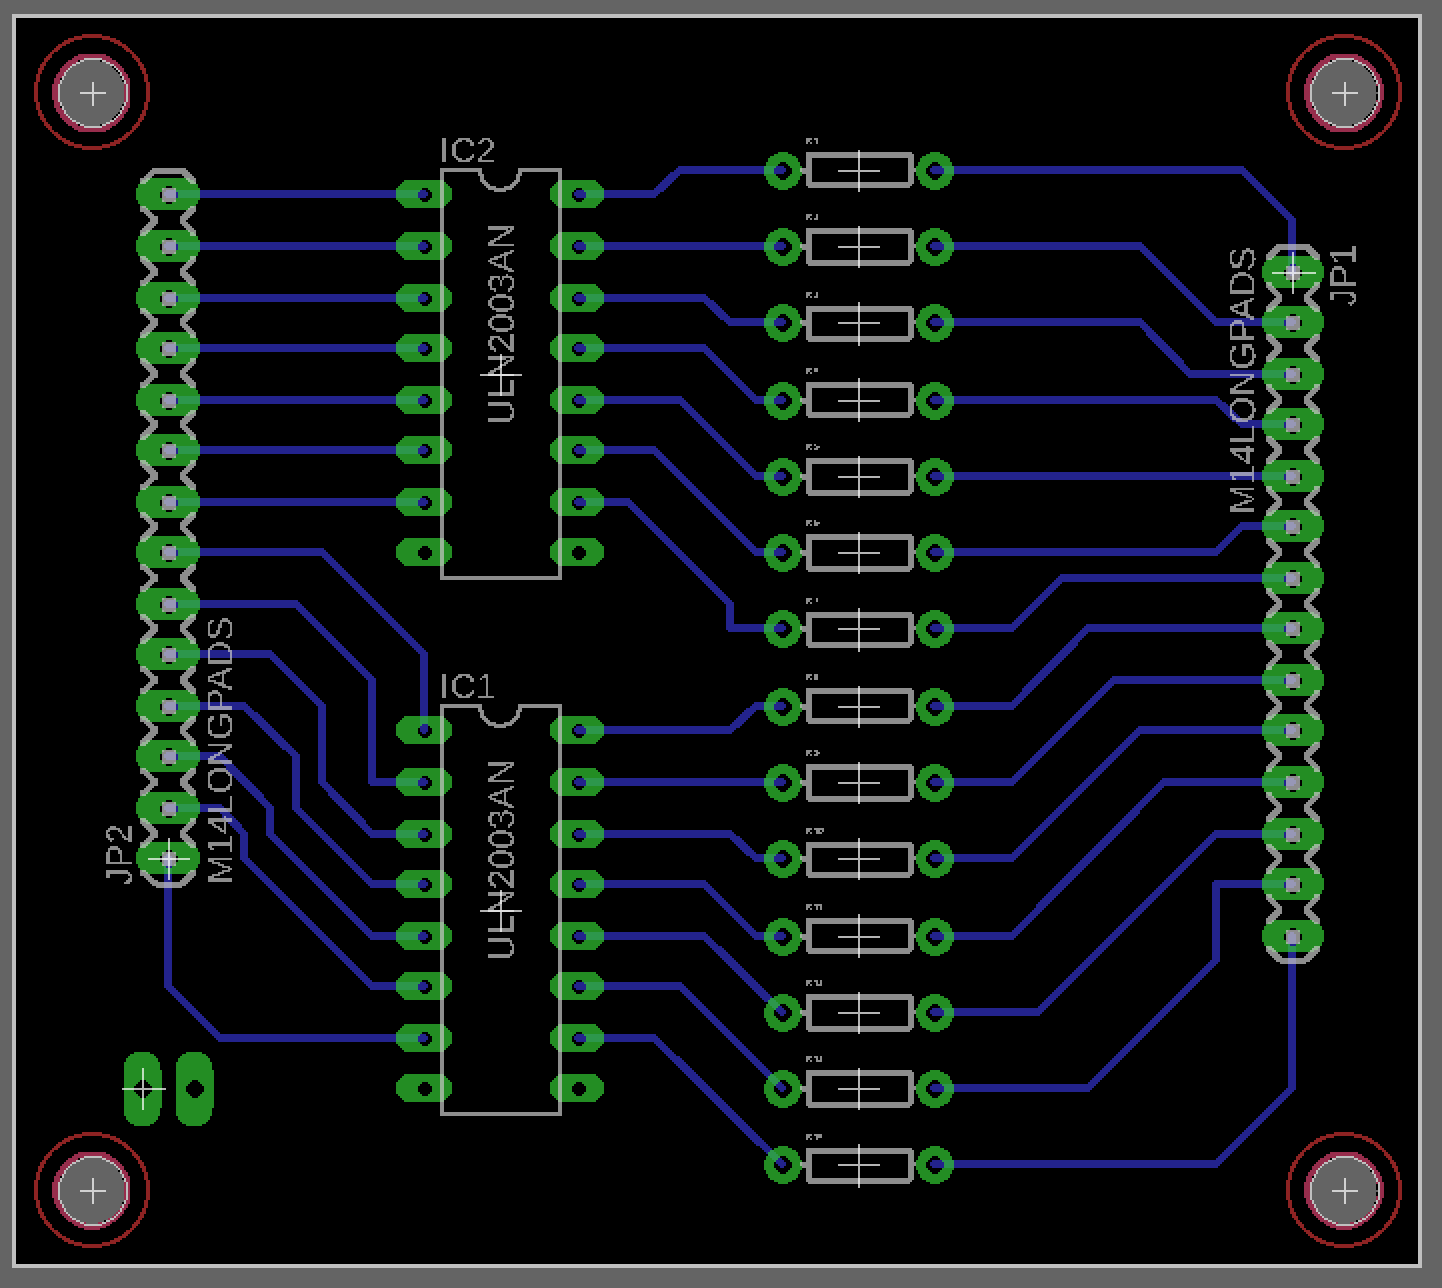
The white LEDs couldn't be driven directly by the Teensy, so I had to build another network of transistors to drive them. At the suggestion of Maximo Balestrini (VIDEOGAMO), I used two Darlington Arrays (ULN2003) and built another board to drive the LEDs. There was also a custom Arduino controller driving the NeoPixels and so I decided to keep things clean and let it just run color patterns and not worry about anything else (I'd later add the relay functionality to this that I'll talk about shortly).
There was also a breakout board for the 32 switches on the playfield, just because I wanted to connect everything with female-female jumper wires just in case we needed to change things. All in all, there were six custom circuit boards in the pinball machine.
Power
The original Gottlieb machine ran on 20 volts AC and there was no chance we were sticking with that (plus I threw out all the old circuitry remember?) So I had to try and make this work with DC voltage.
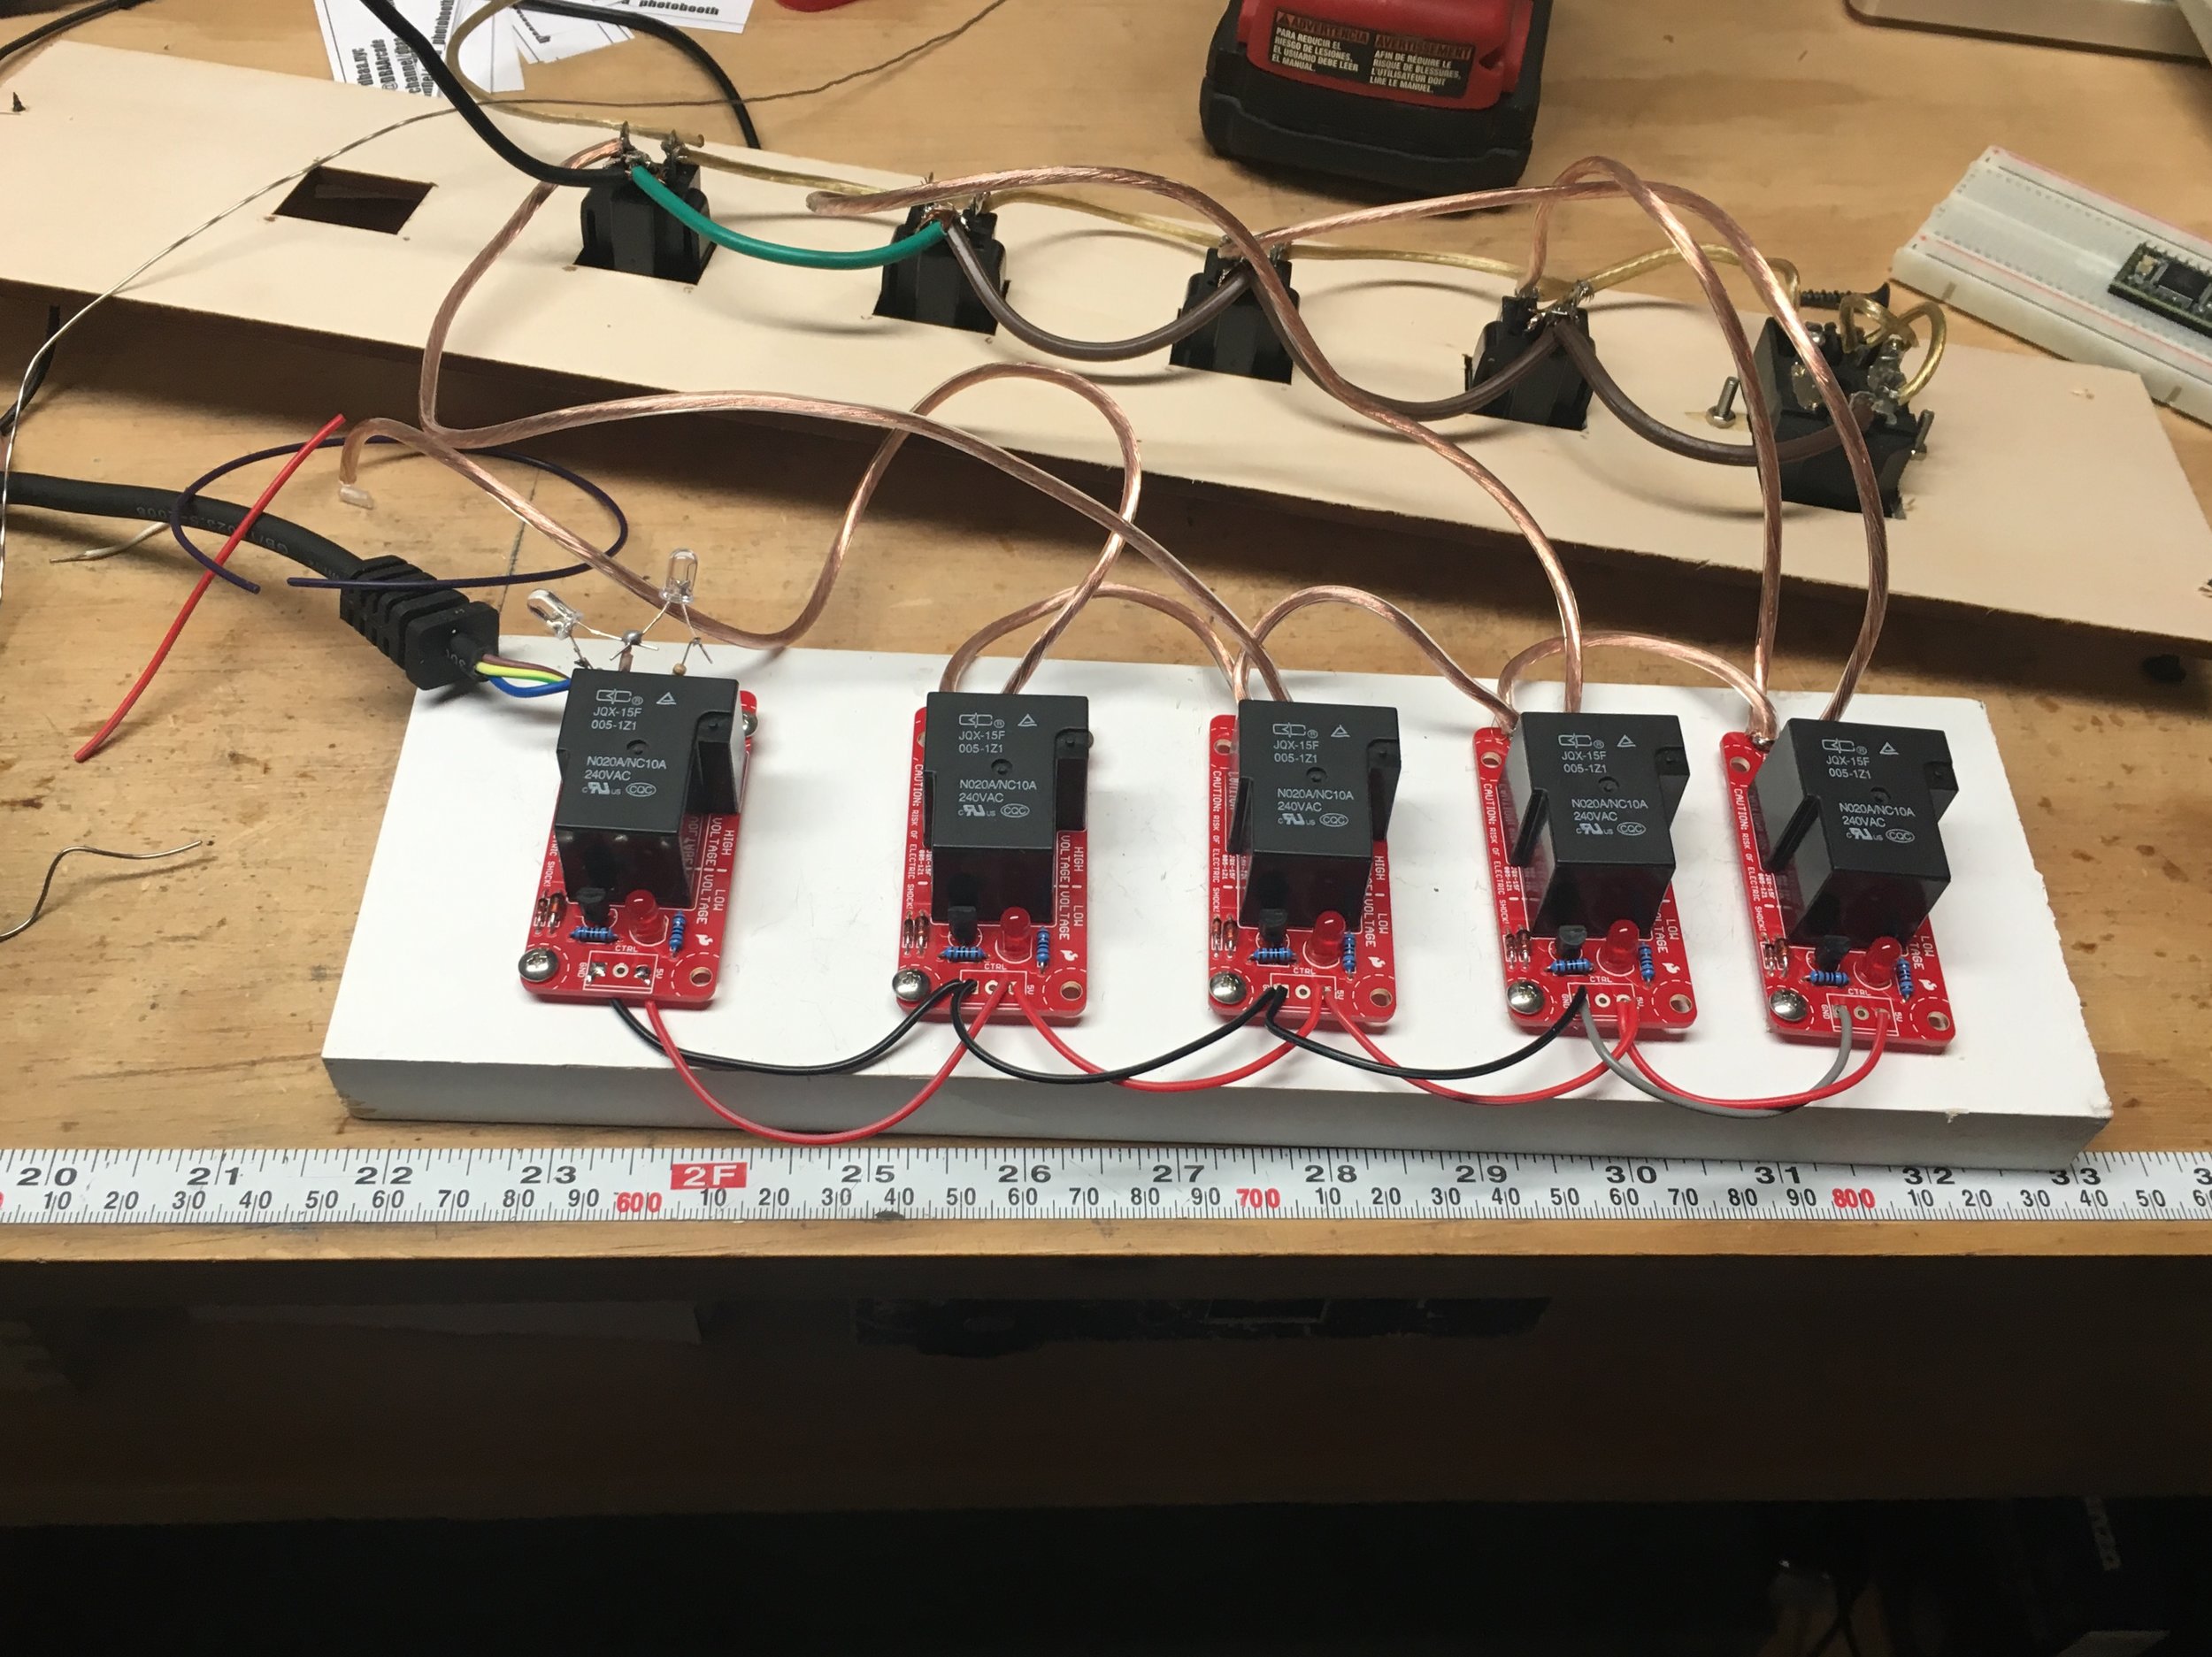
We got a 24V 15A power supply to run the solenoids. This was the largest power source and it needed the most current. I decided to buy an AC port with a fuse, just in case something happened to the power. I also needed 5 volts to run the microcontrollers, NeoPixels, and LEDs, so I used an ATX supply with a Sparkfun breakout.
I also knew I wanted to control some 120-volt AC devices like strobes, lasers, and a fog machine. The easiest way would be to have high-voltage relays that could receive commands from one of the microcontrollers. I used Sparkfun's beefcake relay board and wired them up to four AC outlets. This way, I could turn on or off any common outlet I wanted!
The fog machine was a bit tricky, because it needs to warm up before it can be used. However, it comes with a wired "controller" button, which is a simple momentary on/off switch. I cracked that open and wired the button terminals to my fifth beefcake relay, and viola! As long as the machine has sufficiently warmed up, I can press the button remotely using the relay.
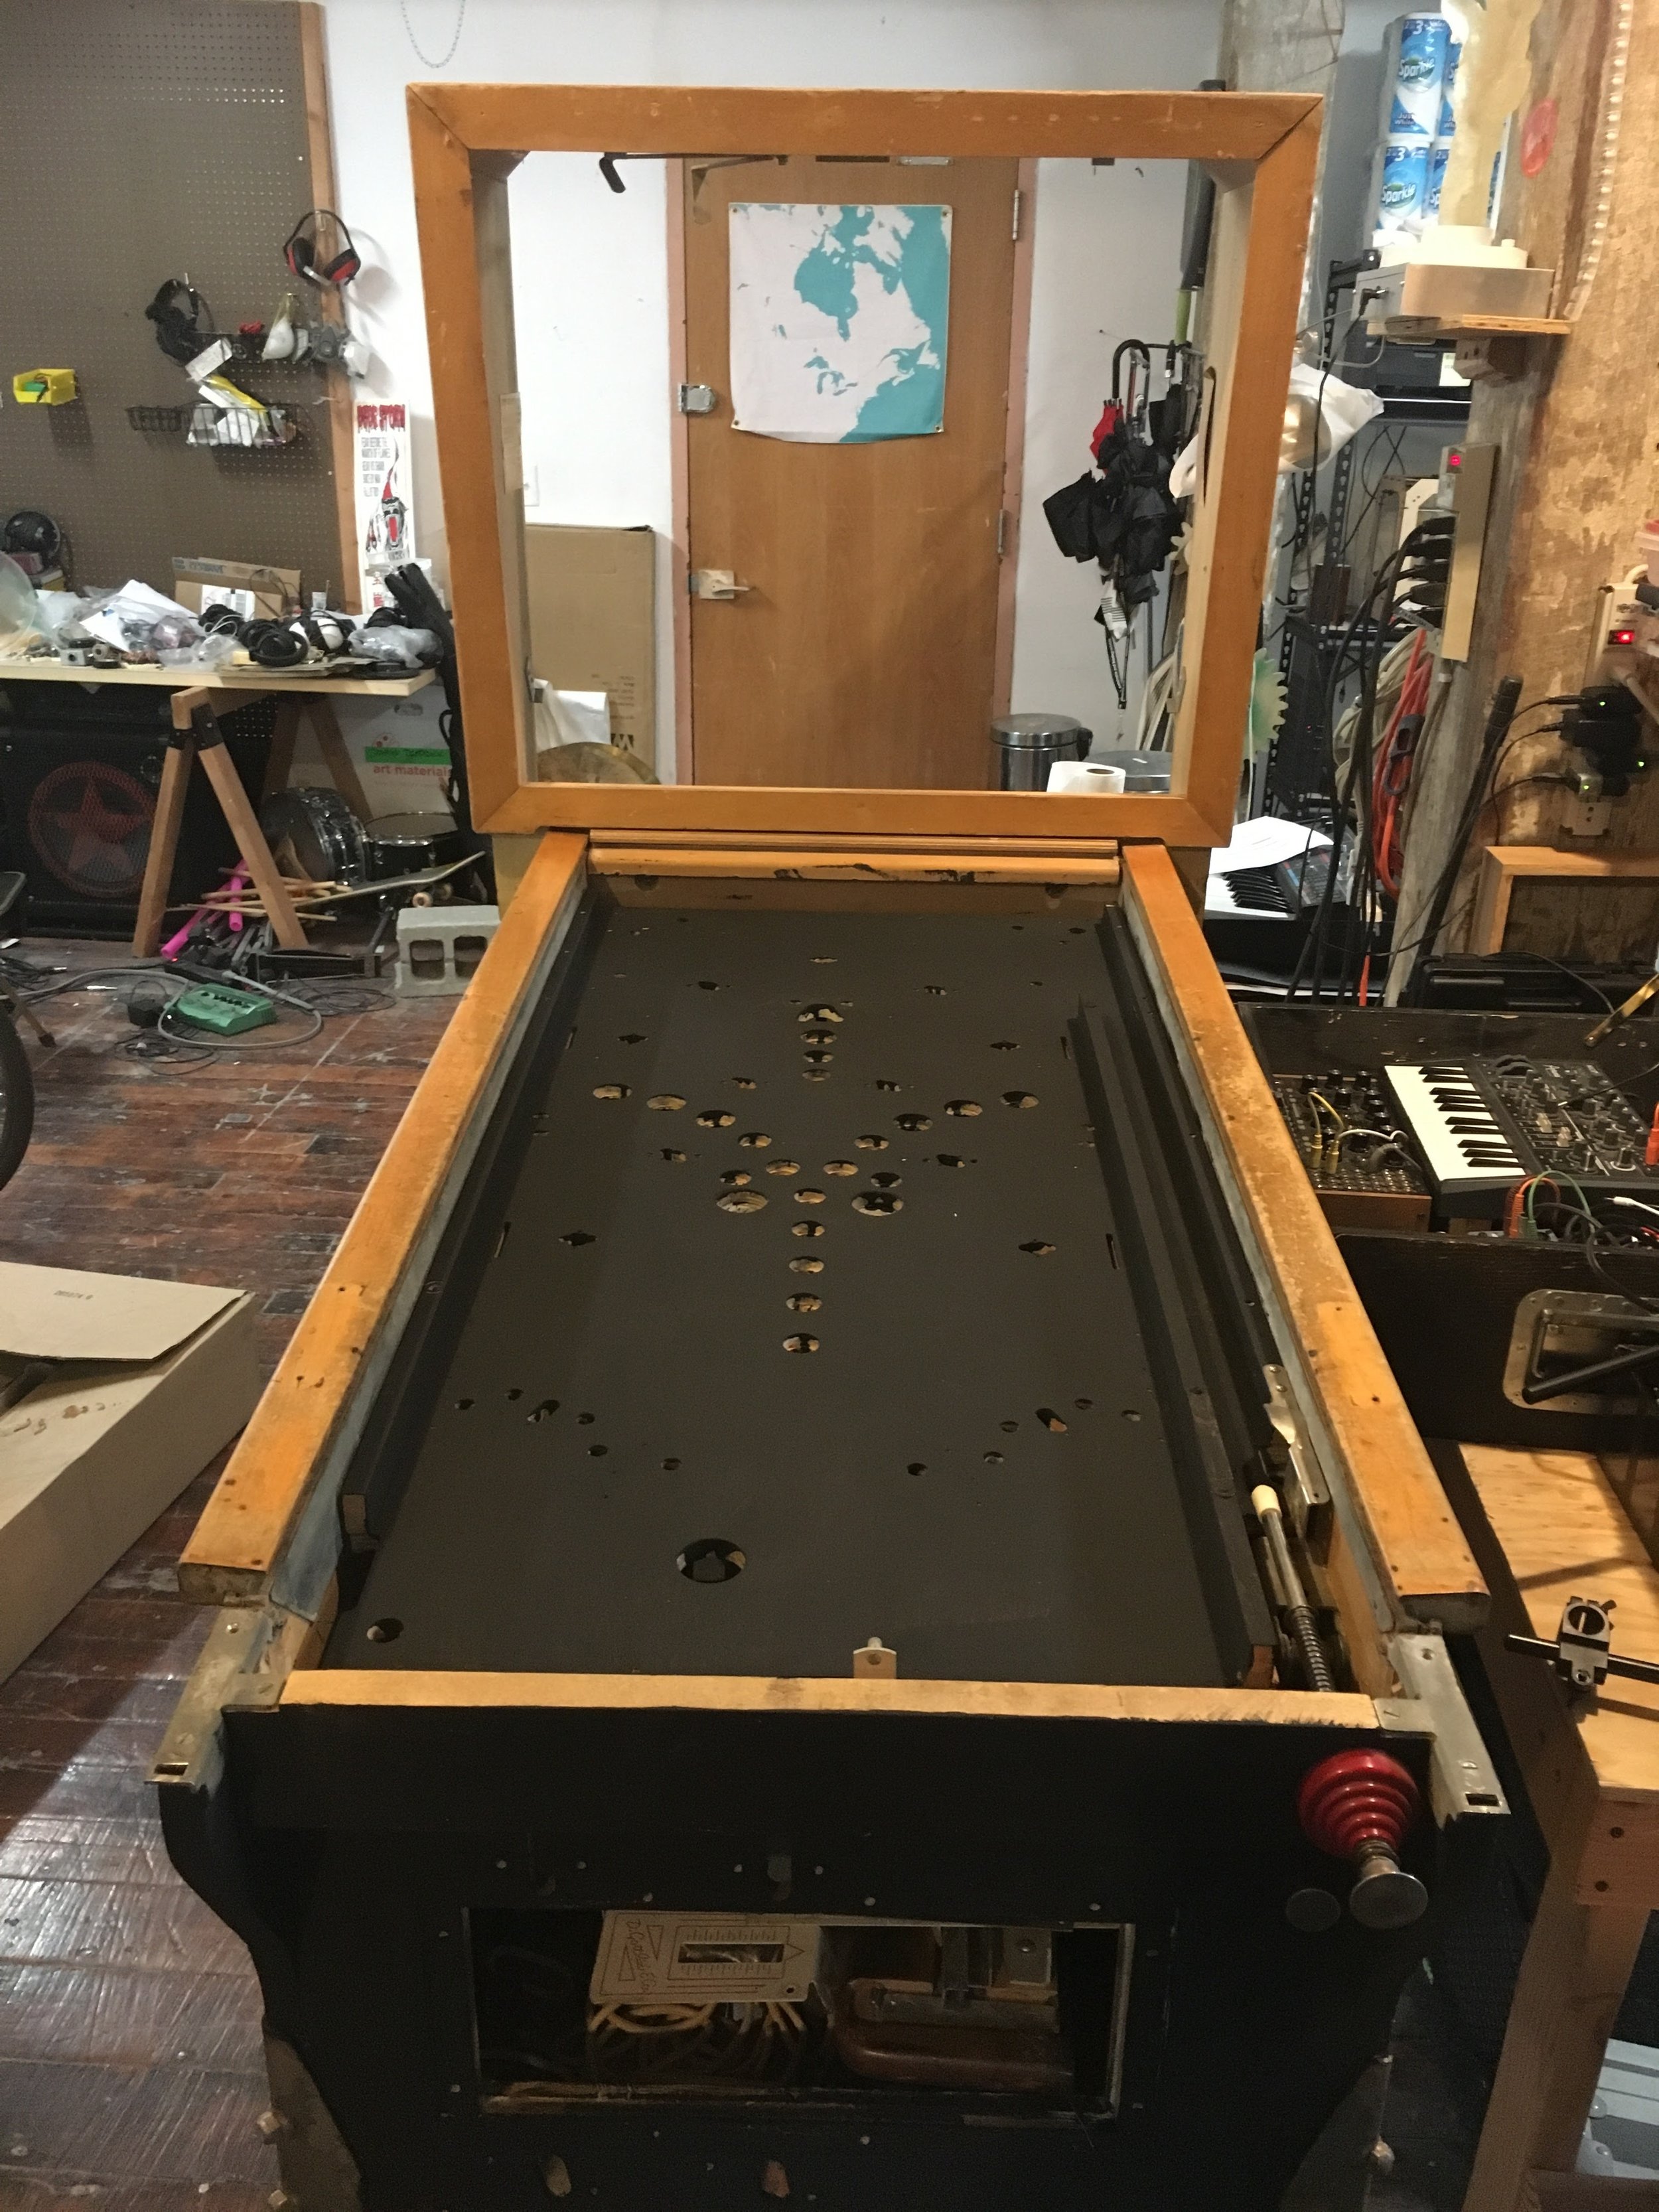
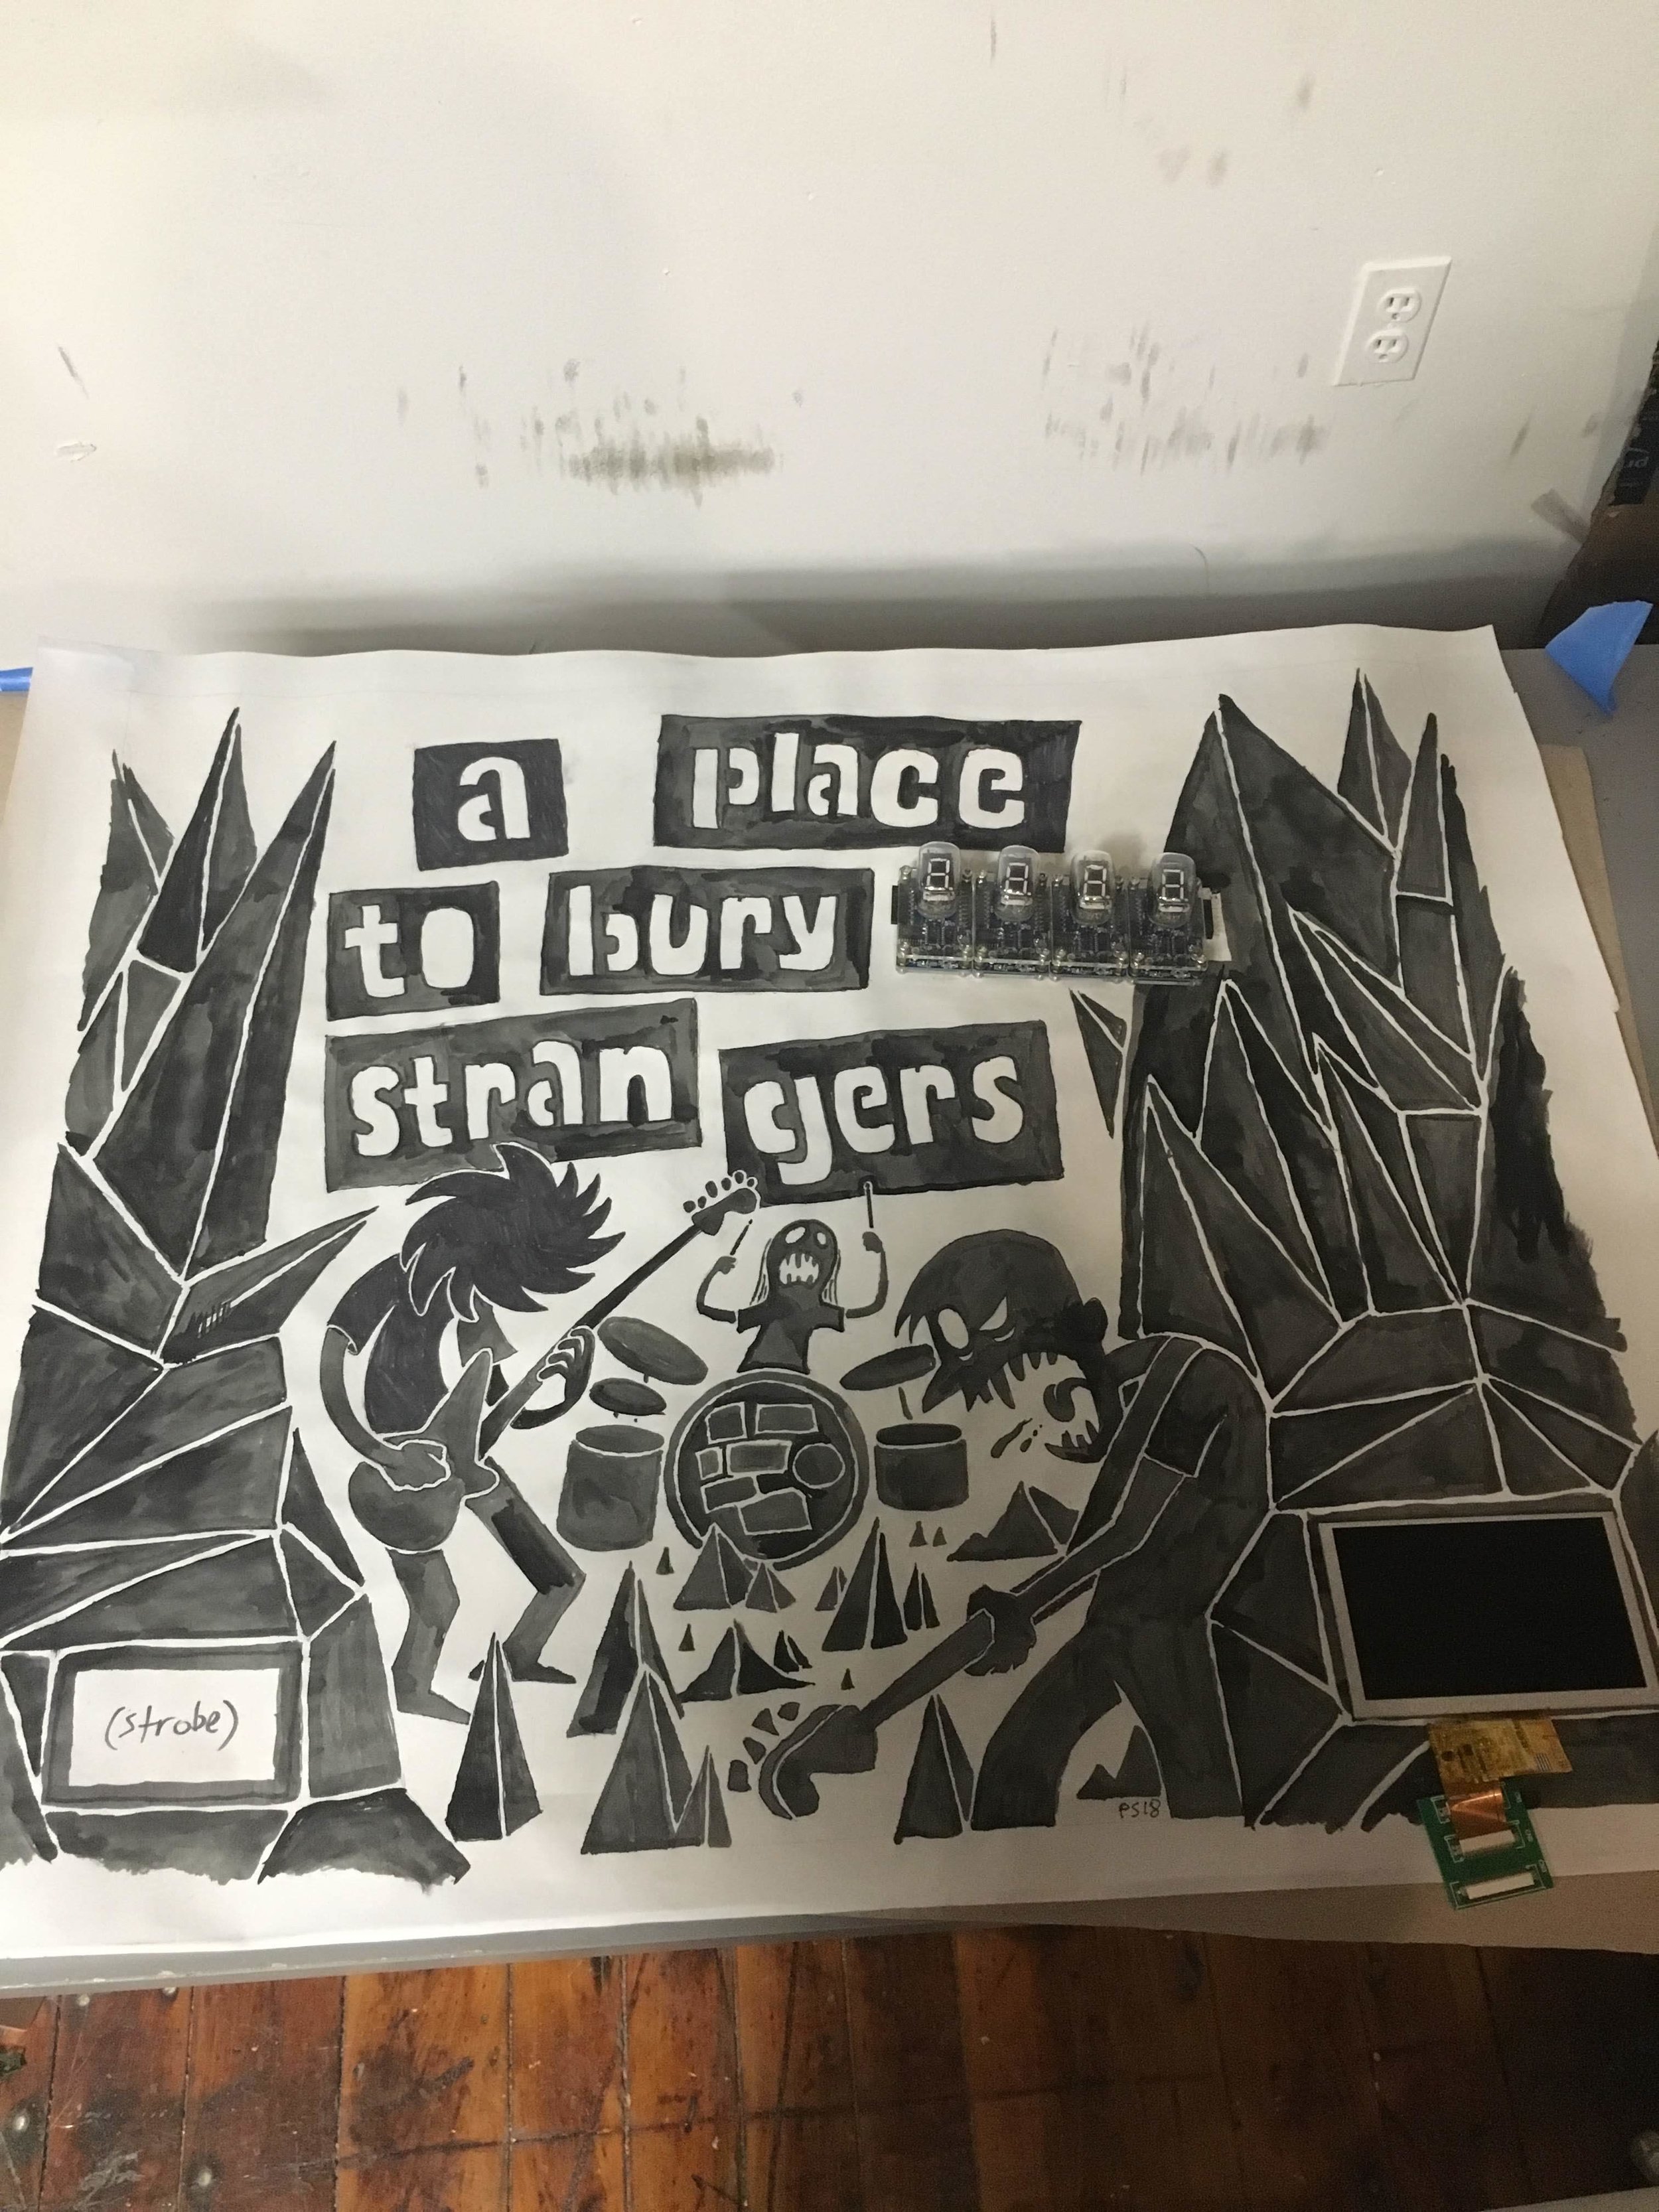
Marquee
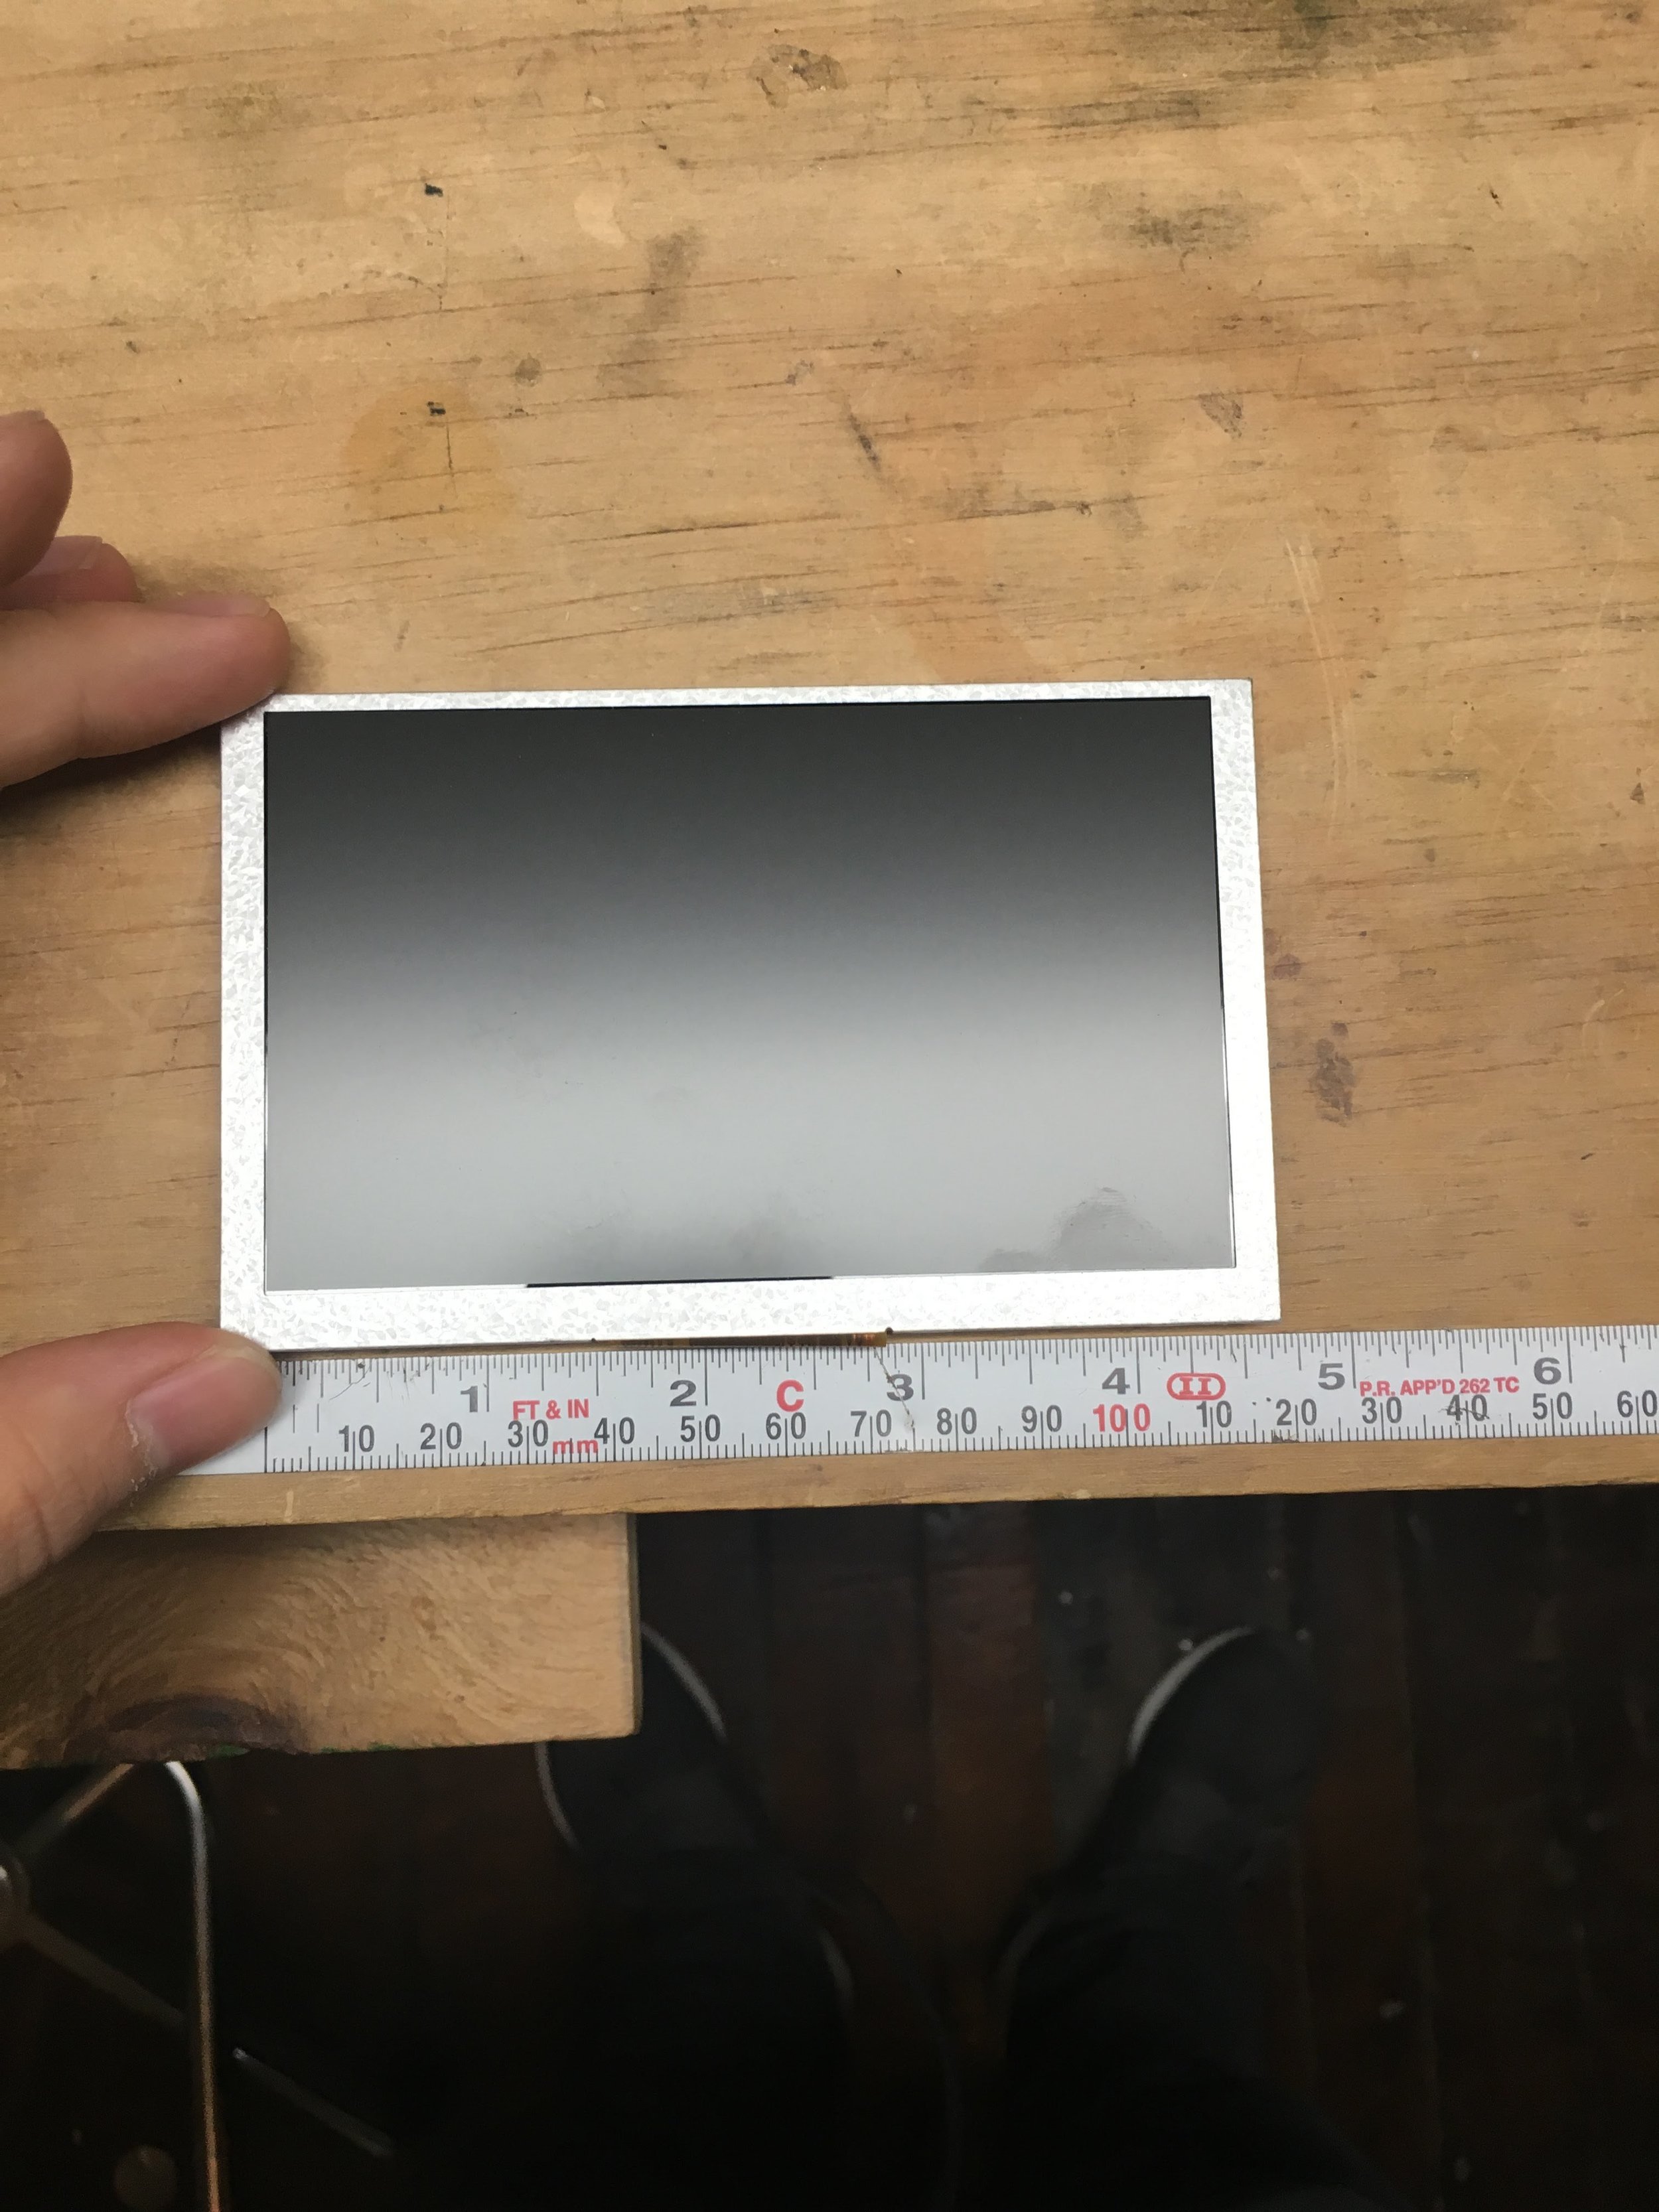
The marquee glass was broken on arrival, so I went to Canal Plastics and got a custom sheet of clear acrylic cut to size. At first, I thought I'd fill the marquee with an LCD screen, but I realized that all of the old pinball machines had beautiful artwork here and it would be a missed opportunity. I decided to keep a small 7" screen for video content, but find an artist to paint the majority of the marquee.
I reached out to Preston Spurlock, one of my favorite artists in New York, to do a stylized version of the band. However, the marquee also had to incorporate the various elements of the machine: the screen, a strobe light, lasers, and a scoreboard.
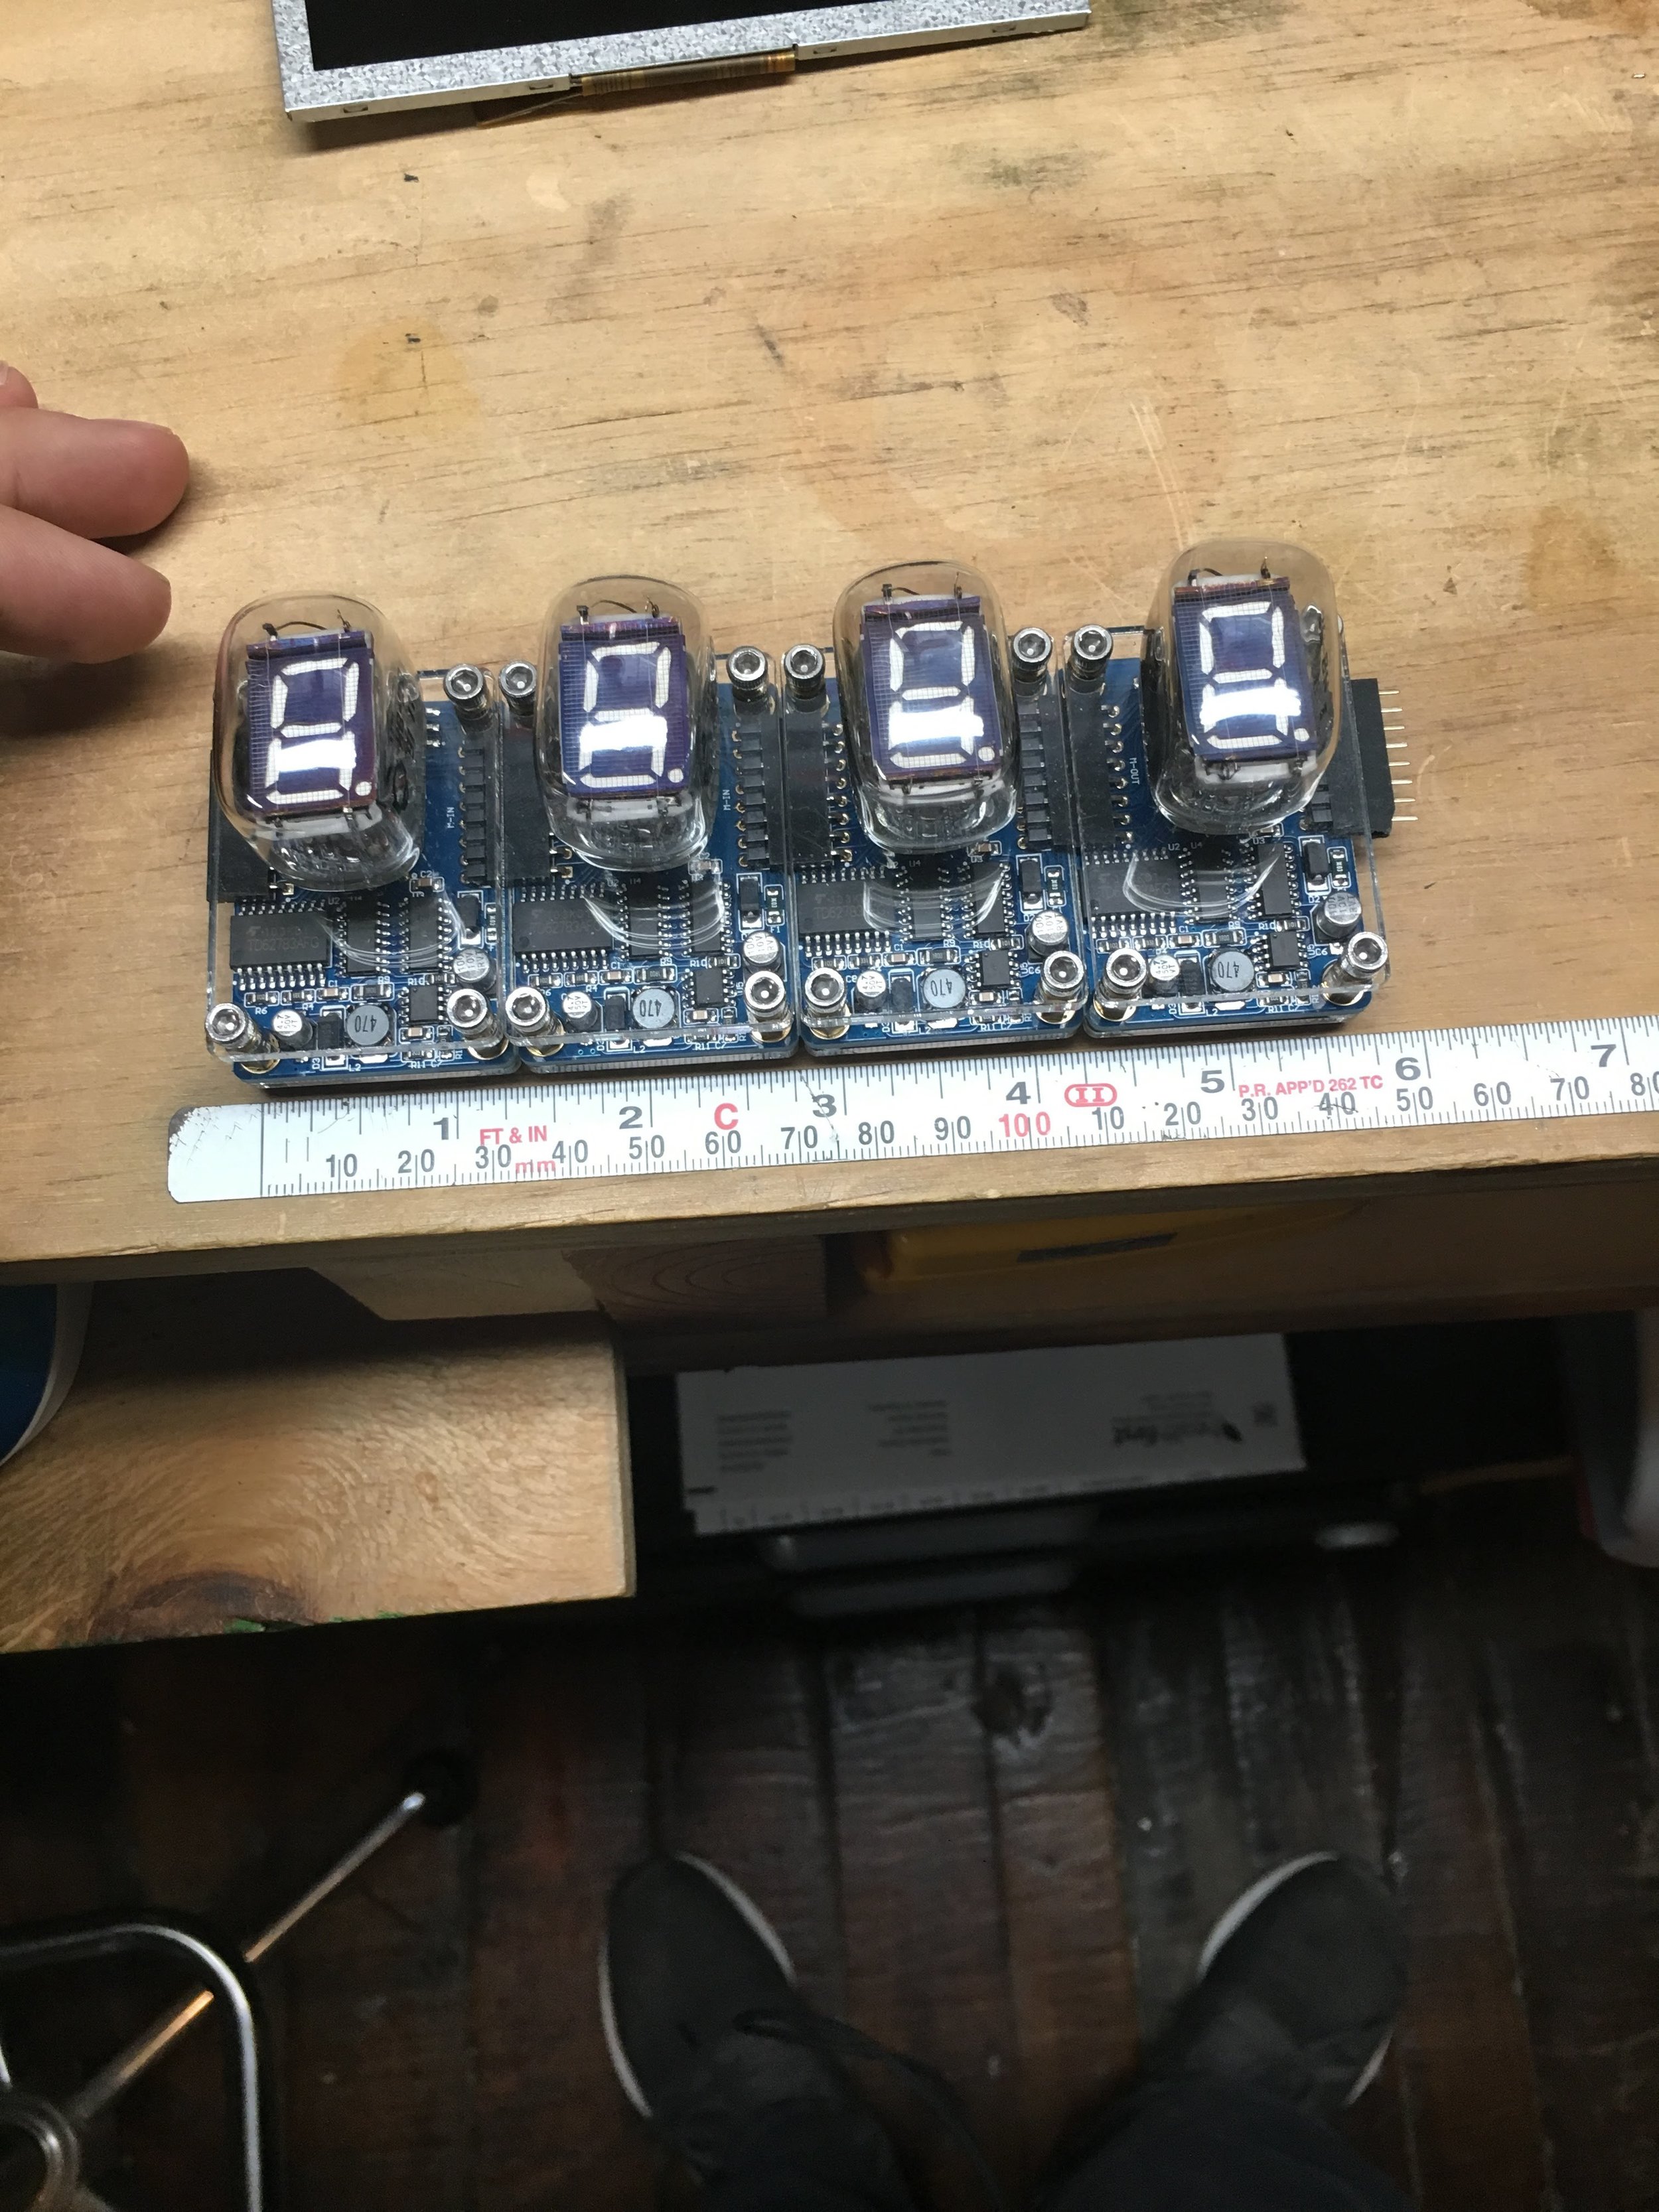
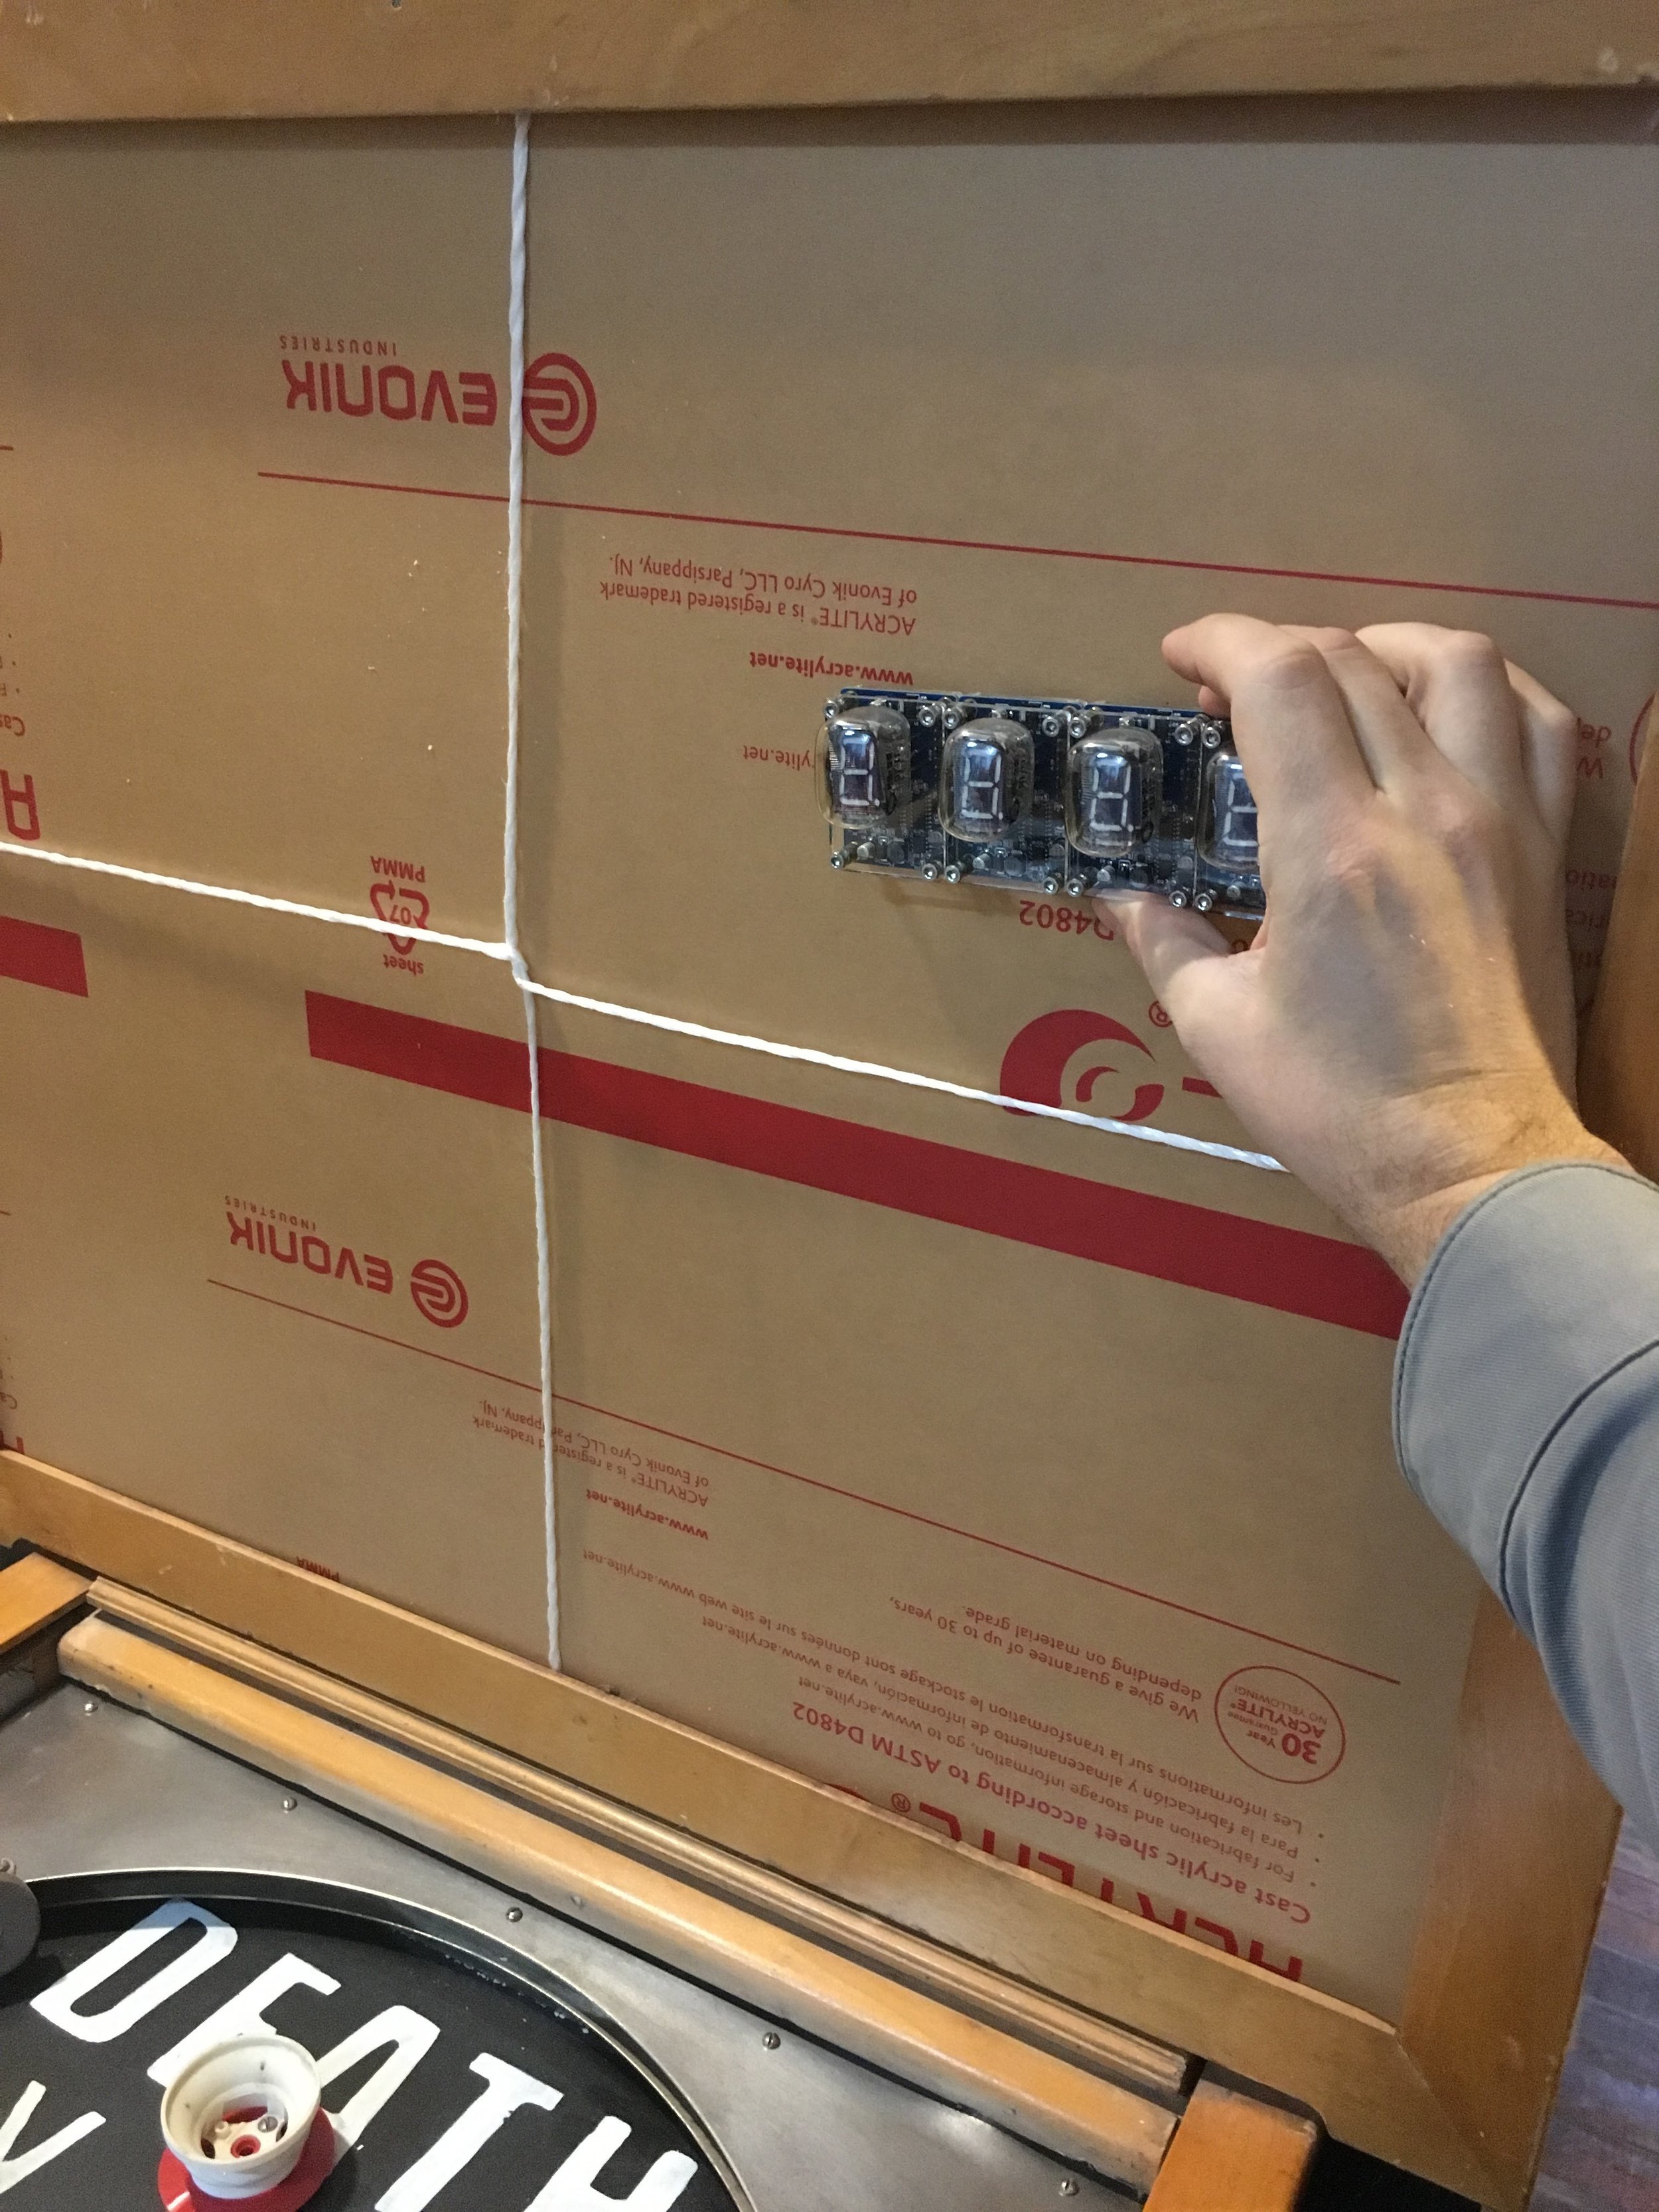
I had four VFD tubes lying around my studio from an old project and decided this would be the perfect project to use them. They look beautiful and these particular tubes had a background color that was controllable.
So I measured everything and gave the dimensions to Preston, and he sketched up the marquee art. We used spray adhesive to attach it to the acrylic, and then an exacto to cut out the spaces for the remaining tech.
The VFD tubes, just because they were so far away, had their own Arduino Uno controlling them. That brought the microcontroller count up to four, if you've been counting. So now we had four independent controllers doing their thing, but we had to design some software to let everything talk to each other.


Software

I knew some kind of computer would be needed to act as the brain of the pinball machine, control the video and sound effects, and pass messages between the microcontrollers. Since I had a Raspberry Pi 3 laying around, we decided to see if it was capable of being that brain.
I recruited Dustin Long and Andy Wallace to help build the software. To start playing around with game design, Andy built a simulator in openFrameWorks that would allow them to develop separate from the machine. It had no connection to the actual hardware, but he drew out a bunch of circles on top of the diagram of the play field and made them respond to mouse movement. This was enough to start thinking about the logic of the game and we tried out making a few very simple scenes. The actual number of inputs and outputs was fairly limited so we had to be creative in how we used them while making sure that the average player could quickly understand what was going on.
Once we started on the actual hardware, Dustin built out the basic structure of the pinball machine’s brain in Python. The actual machine works by having the Python brain send and receive messages via serial connections to the microcontrollers. While the earlier simulator was a fine place to mess with pinball game logic, we needed a way to test the brain as we built it. Dustin and Andy were writing the code for it, and they rarely had access to the studio and the machine. To get around needing access to the actual hardware, Dustin rigged an alternate mode for the brain that sent and received those same messages over TCP. This allowed Andy to strip all of the logic from the openFrameWorks simulator and have it just send and receive messages, acting as a stand in for the 4 microcontrollers. All of the game logic still occurred in the python script, but we could work on the code and test it on the same computer without needing to hook up the actual pinball machine.
This allowed Andy to refine the game logic and make the rules that govern the playfield. Besides just making sure players earned points, this meant deciding how our limited number of lights and sensors would interact with each other—and what would set off big things like the fog or strobe—as well as things like sound effects and lights. In the end, the game logic is fairly simple; the pinball machine we started with was a bit older with far fewer bells and whistles (and ramps) than modern pinball machines, but we also wanted to overwhelm the player with lights and sounds. Overwhelming them with game mechanics too felt like it would be confusing, and not the fun kind of confusing. We settled for a few simple pinball tropes (matching colors along the top bumpers, hitting a target a set number of times) and making sure that the NeoPixel lights went wild whenever the player did anything.

Finishing Touches
With all of the strobe lights and laser lights, we thought glow-in-the-dark pinballs might work better than metallic pinballs. However, the glow-in-the-dark color didn't really show unless it was lit most of the time. I decided to order a strip of blacklight LEDs, powered by one of the spare relays, and mount them to angle bracket just above the playfield. This meant we you could still see the ball in a dark room, but we also had control to turn the blacklights off if necessary.
Also having access to a laser cutter was super convenient. I replaced the lower right and left panels with acrylic panels with a Fender guitar etched into them. I also filled the "gobbler holes" in the center of the playfield - a ball loss on the original machine - with the image of the eye from APTBS's new album "Pinned".
The tops of the bumpers and lamps also needed new imagery, so working with Andy Wallace, we found images from circuit diagrams to cover each bumper. We etched the acrylic with the paper on, spray painted them black, and peeled off the paper when it was dry.
For sound effects, I asked Grooms' frontman and Death By Audio co-owner Travis Johnson to compose an array of one-second sounds that were in the style of the DBA pedals. We programmed those sounds to play whenever the ball hits a switch or a bumper.
Residency
The A Place To Bury Strangers pinball machine is set to debut at Le Poisson Rouge on Sunday July 15th for the En Orbita festival. Afterward, we may take it back to the shop (baby's first night out) to make sure nothing caught fire, and will be looking for a venue to host it for a residency period. If you own a venue, or know someone who owns a venue in New York (we can't let it stray too far), contact us to set something up!